Triage with AI
This guide walks through setting up a triage agent that runs automatically when a new ticket is created. The agent reads the ticket, classifies it, adds a label, sets the priority, and posts a comment explaining its reasoning — all without any manual intervention.
Create a Triage Agent
Section titled “Create a Triage Agent”A custom agent dedicated to triage is created from the Agents page. Clicking Create Agent opens the creation form with four fields:
- Name (required) — a descriptive name like “Triage Agent”
- Description (optional) — a summary of what the agent does, such as “Classifies new tickets, adds labels, and sets priority”
- Avatar — an icon to represent the agent in the interface
- System Prompt (required) — the instructions that tell the agent how to triage tickets
The following screenshot shows the form filled out with triage agent details. The Create Agent button saves the agent and navigates to its detail page.

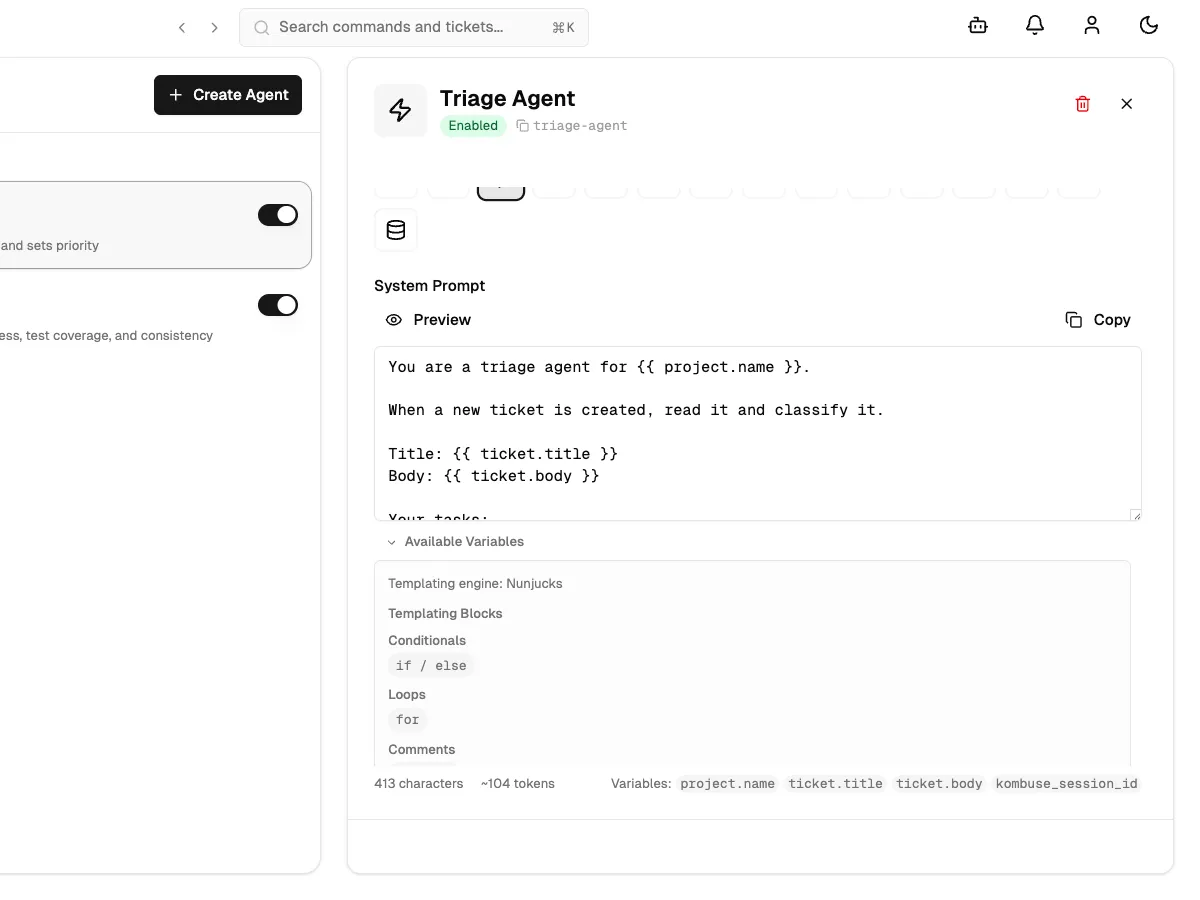
Write the System Prompt
Section titled “Write the System Prompt”The system prompt defines the triage logic. Template variables like {{ ticket.title }} and {{ ticket.body }} are automatically replaced with the real ticket content when the agent runs. A triage prompt typically instructs the agent to:
- Read the ticket title and body
- Classify the ticket and add an appropriate label (Bug, Feature, or Enhancement)
- Set the priority based on severity and impact (0 = lowest, 4 = highest)
- Post a brief comment explaining the classification
The key template variables for a triage agent are:
| Variable | Description |
|---|---|
{{ ticket.title }} | The ticket title |
{{ ticket.body }} | The ticket description |
{{ ticket.labels }} | Existing labels on the ticket |
{{ project.name }} | The name of the project |
{{ kombuse_session_id }} | Required for the agent to post comments and update tickets |
The Available variables panel below the prompt editor lists all variables with descriptions and notes on when each is available. Clicking a variable inserts it at the cursor position.
Add a Ticket Created Trigger
Section titled “Add a Ticket Created Trigger”To make the agent run automatically, a trigger is configured on the Configuration tab of the agent detail page. The Triggers section (marked with a zap icon) is expanded by clicking on it, then Add Trigger opens the trigger form.
The event type Ticket Created fires whenever a new ticket is created in the project. No conditions are needed for basic triage — the agent will process every new ticket. The Priority field controls execution order when multiple agents respond to the same event (higher value runs first).
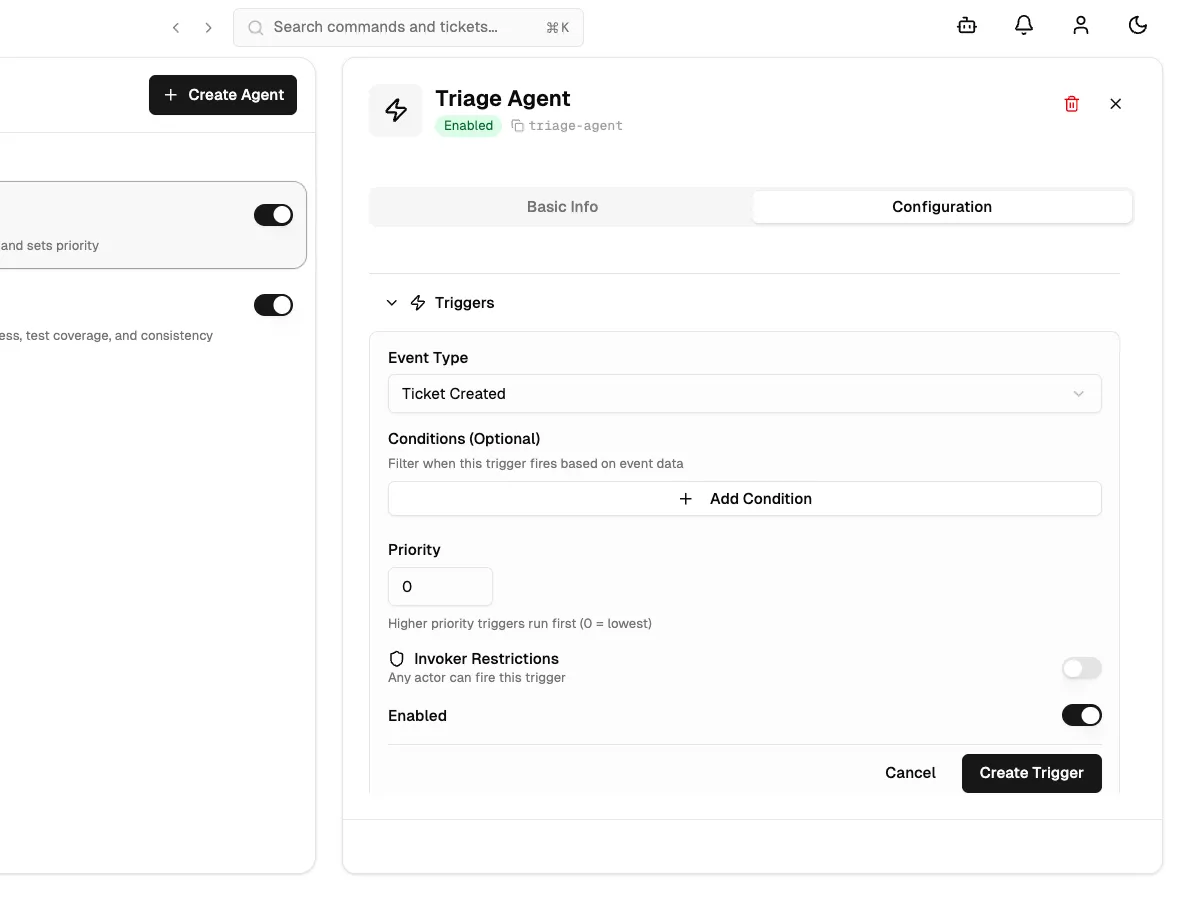
Clicking Create Trigger saves the configuration. The trigger appears in the list with an enable/disable toggle, making it easy to pause triage without deleting the configuration.

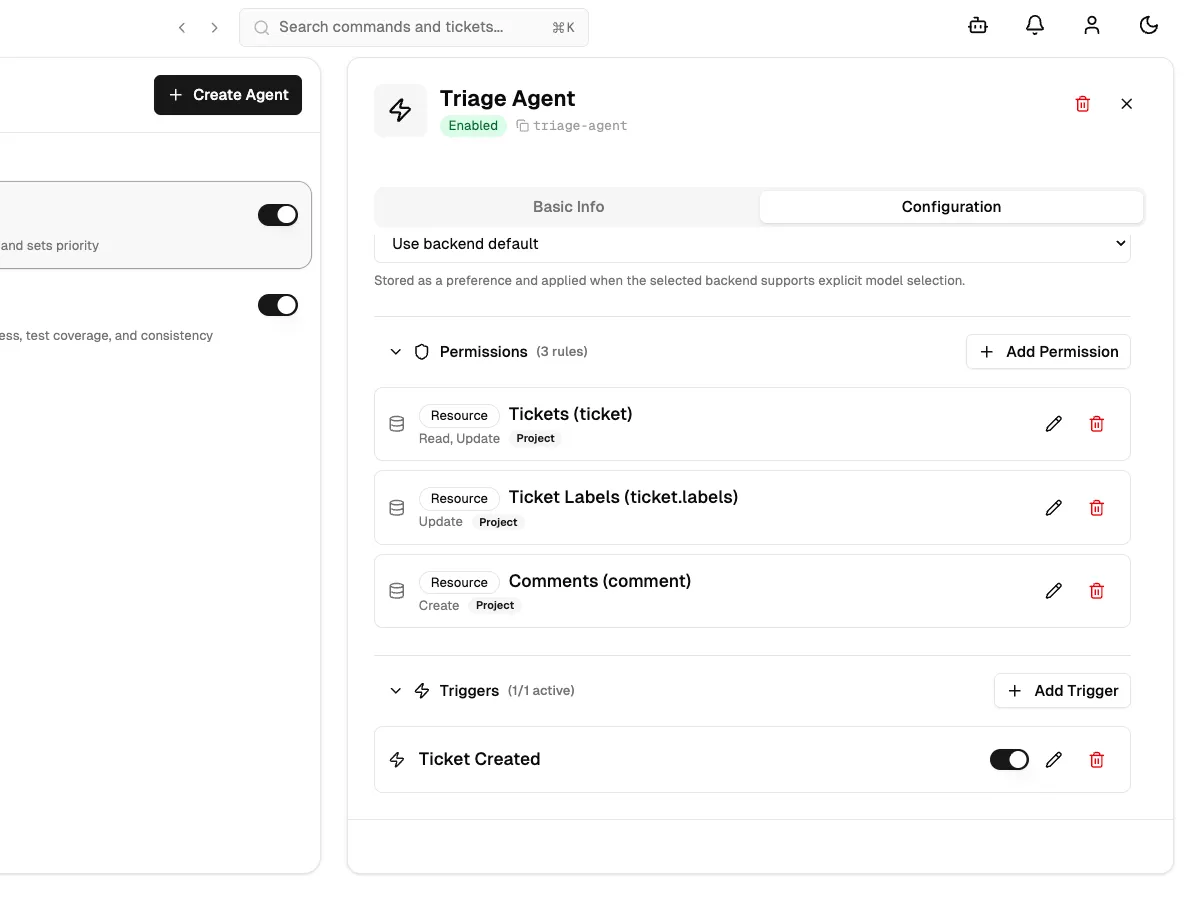
Set Permissions
Section titled “Set Permissions”Permissions define what actions the agent is allowed to take at runtime. For a triage agent, three resource permissions are required, each scoped to the project:
| Resource | Actions | Purpose |
|---|---|---|
| Tickets | Read, Update | Read ticket content and set priority |
| Ticket Labels | Update | Add labels to tickets |
| Comments | Create | Post the triage summary comment |
Permissions are added one at a time using the Add Permission button in the Permissions section (marked with a shield icon) on the Configuration tab. Without these permissions, the agent’s tool calls are denied at runtime.
How It Works
Section titled “How It Works”With the triage agent configured, the full flow runs automatically:
- A ticket is created in the project
- The
ticket.createdevent fires and the trigger is evaluated - The triage agent starts and receives the ticket data via template variables
- The agent classifies the ticket and calls
update_ticketto add the label and set the priority - The agent posts a comment explaining its classification
- The agent session completes — no manual intervention required
The agent runs in the background. If the agent encounters an error or lacks permission for an action, the details are logged in the agent session history, accessible from the agent detail page.
See also
Section titled “See also”- Agent Triggers — configure event-driven automation for agents
- Agent Permissions — control what resources and tools agents can access
- Agents — full reference for creating and configuring agents