Comments & Mentions
Comments are the primary way to collaborate on tickets. They allow discussing work, mentioning agents to invoke them, cross-referencing other tickets, and attaching images — all from the comment input at the bottom of any ticket.
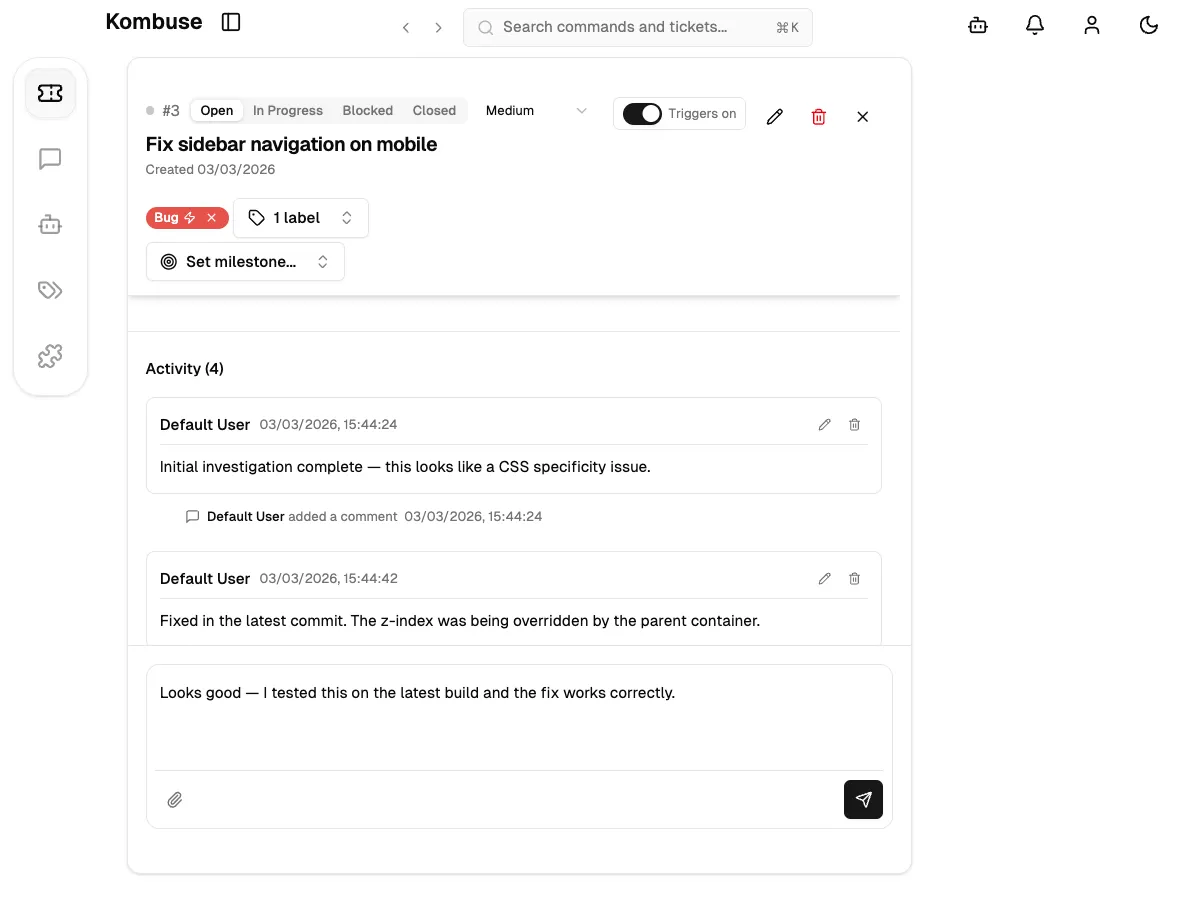
The Activity Timeline
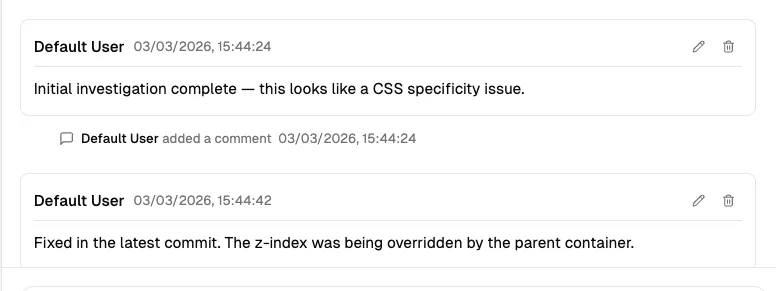
Section titled “The Activity Timeline”When the user opens a ticket, the Activity section appears below the description. It shows a combined timeline of comments and system events (like status changes and label updates), with a heading Activity (N) showing the total count.
Comments appear as cards with the author’s name, timestamp, and Markdown-rendered body. System events appear as smaller inline entries between comments.
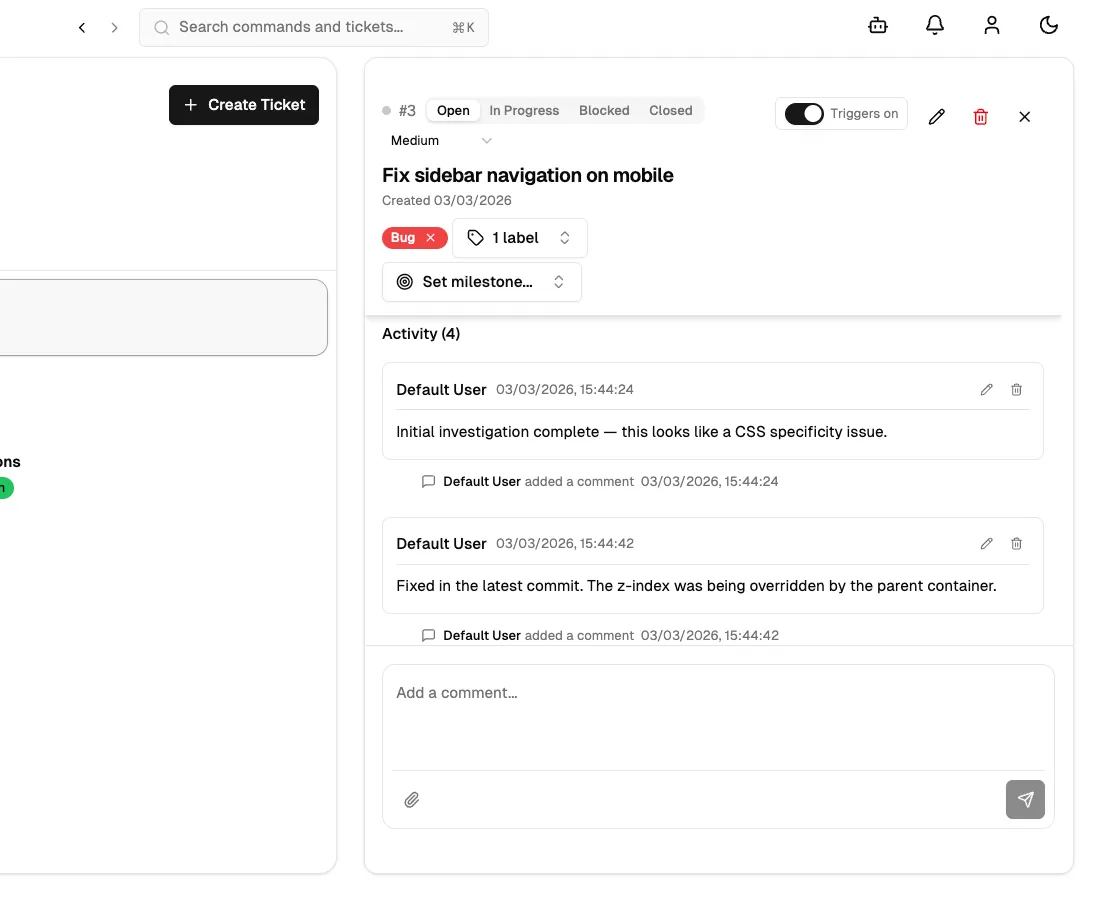
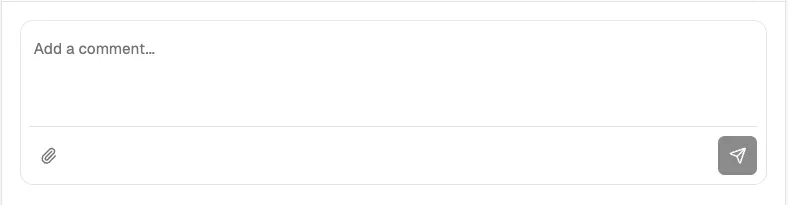
Adding a Comment
Section titled “Adding a Comment”The comment input sits at the bottom of the ticket detail view with the placeholder “Add a comment…”. A message is typed and submitted by pressing Enter, or Shift+Enter inserts a new line. The send button (arrow icon) on the right side of the toolbar also submits the comment.
Comments support full Markdown formatting — headings, bold, italic, code blocks, lists, and links all render in the posted comment.
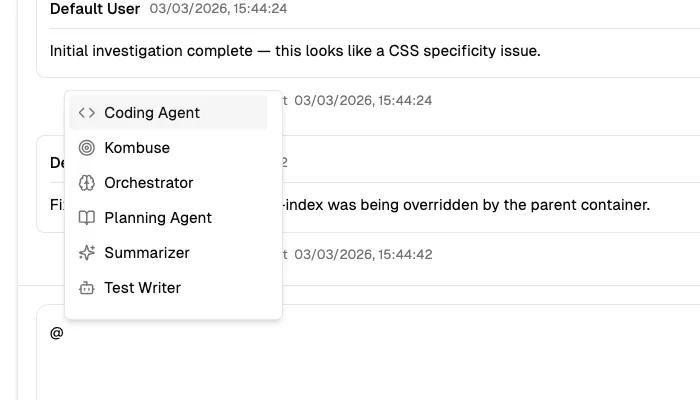
Mentioning Agents
Section titled “Mentioning Agents”By typing @ in the comment input, the mention autocomplete opens. The dropdown shows available agents with their avatar icon and display name. The arrow keys navigate the list, Enter or Tab selects an entry, and Escape dismisses the dropdown. The @ trigger only activates at the start of the input or after a space — it does not trigger mid-word.
When a comment containing an @mention is sent and agent triggers are enabled for the ticket, the mentioned agent is automatically invoked to respond. If triggers are disabled, a warning appears in the dropdown footer: “Triggers off — agents won’t be invoked.”
In the posted comment, @mentions render as highlighted text in the primary accent color.
Referencing Tickets
Section titled “Referencing Tickets”Typing # in the comment input opens a search for other tickets. The autocomplete dropdown shows matching tickets with their number (e.g. #1), title, and a colored status badge showing the current state (open, in progress, blocked, or closed). Additional text after # filters by ticket title.
Arrow keys navigate the list, and Enter or Tab selects an entry. In the posted comment, ticket references render as interactive chips — a small badge displaying the ticket number, a truncated title, and a colored status dot (green for open, yellow for in progress, red for blocked, gray for closed). Hovering over a chip shows a preview card with more details, and clicking it navigates directly to that ticket.
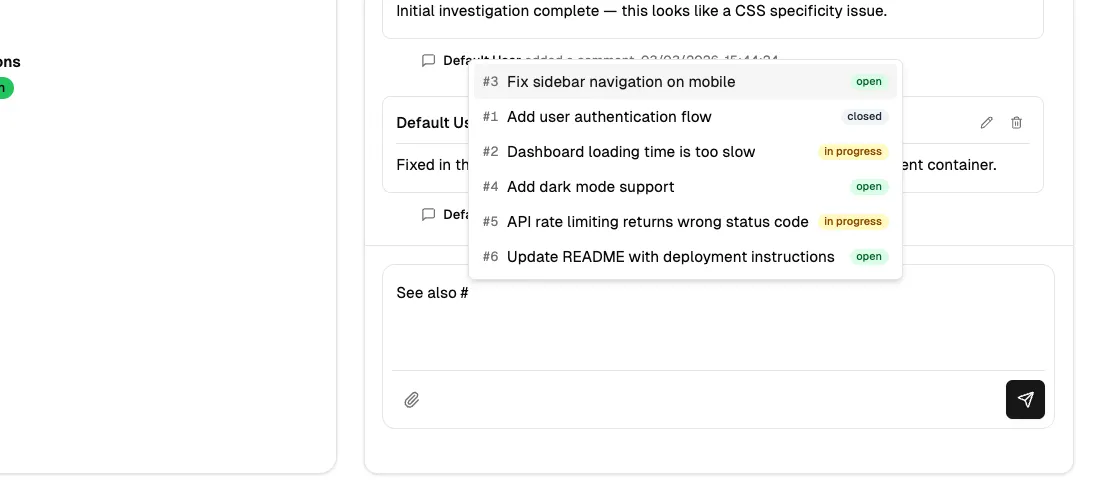
Image Attachments
Section titled “Image Attachments”Images can be attached to comments in three ways:
- The paperclip button in the toolbar opens a file picker.
- An image can be pasted directly from the clipboard into the comment input.
- Image files can be dragged and dropped onto the input area.
Only image files are supported. Attached images appear as previews above the toolbar before sending, allowing review or removal. In posted comments, images display as thumbnails below the text — clicking any thumbnail opens it in a fullscreen lightbox viewer.
Editing and Deleting Comments
Section titled “Editing and Deleting Comments”Each comment shows action buttons on the right side of its header — a pencil icon to edit and a trash icon to delete.
Clicking the pencil icon enters edit mode: the comment body becomes an editable text area with the same Markdown, @mention, and attachment support as the comment input. The checkmark saves the changes, and the X cancels. Edited comments display an “(edited)” label next to the timestamp.
The trash icon deletes a comment permanently.
For comments posted by an AI agent session, two additional buttons appear: a play button to resume the agent’s session and a rotate button to rerun it from the beginning.
See also
Section titled “See also”- Tickets — create, organize, and track work with tickets
- API Reference — full REST API and WebSocket documentation