First Ticket
The primary way to develop with Kombuse agents is through the integrated ticket system. Tickets can be full specs, loose notes, feature brainstorming sessions, or simple TODOs — agents will expand and clarify them throughout the pipeline.
Create Your First Ticket
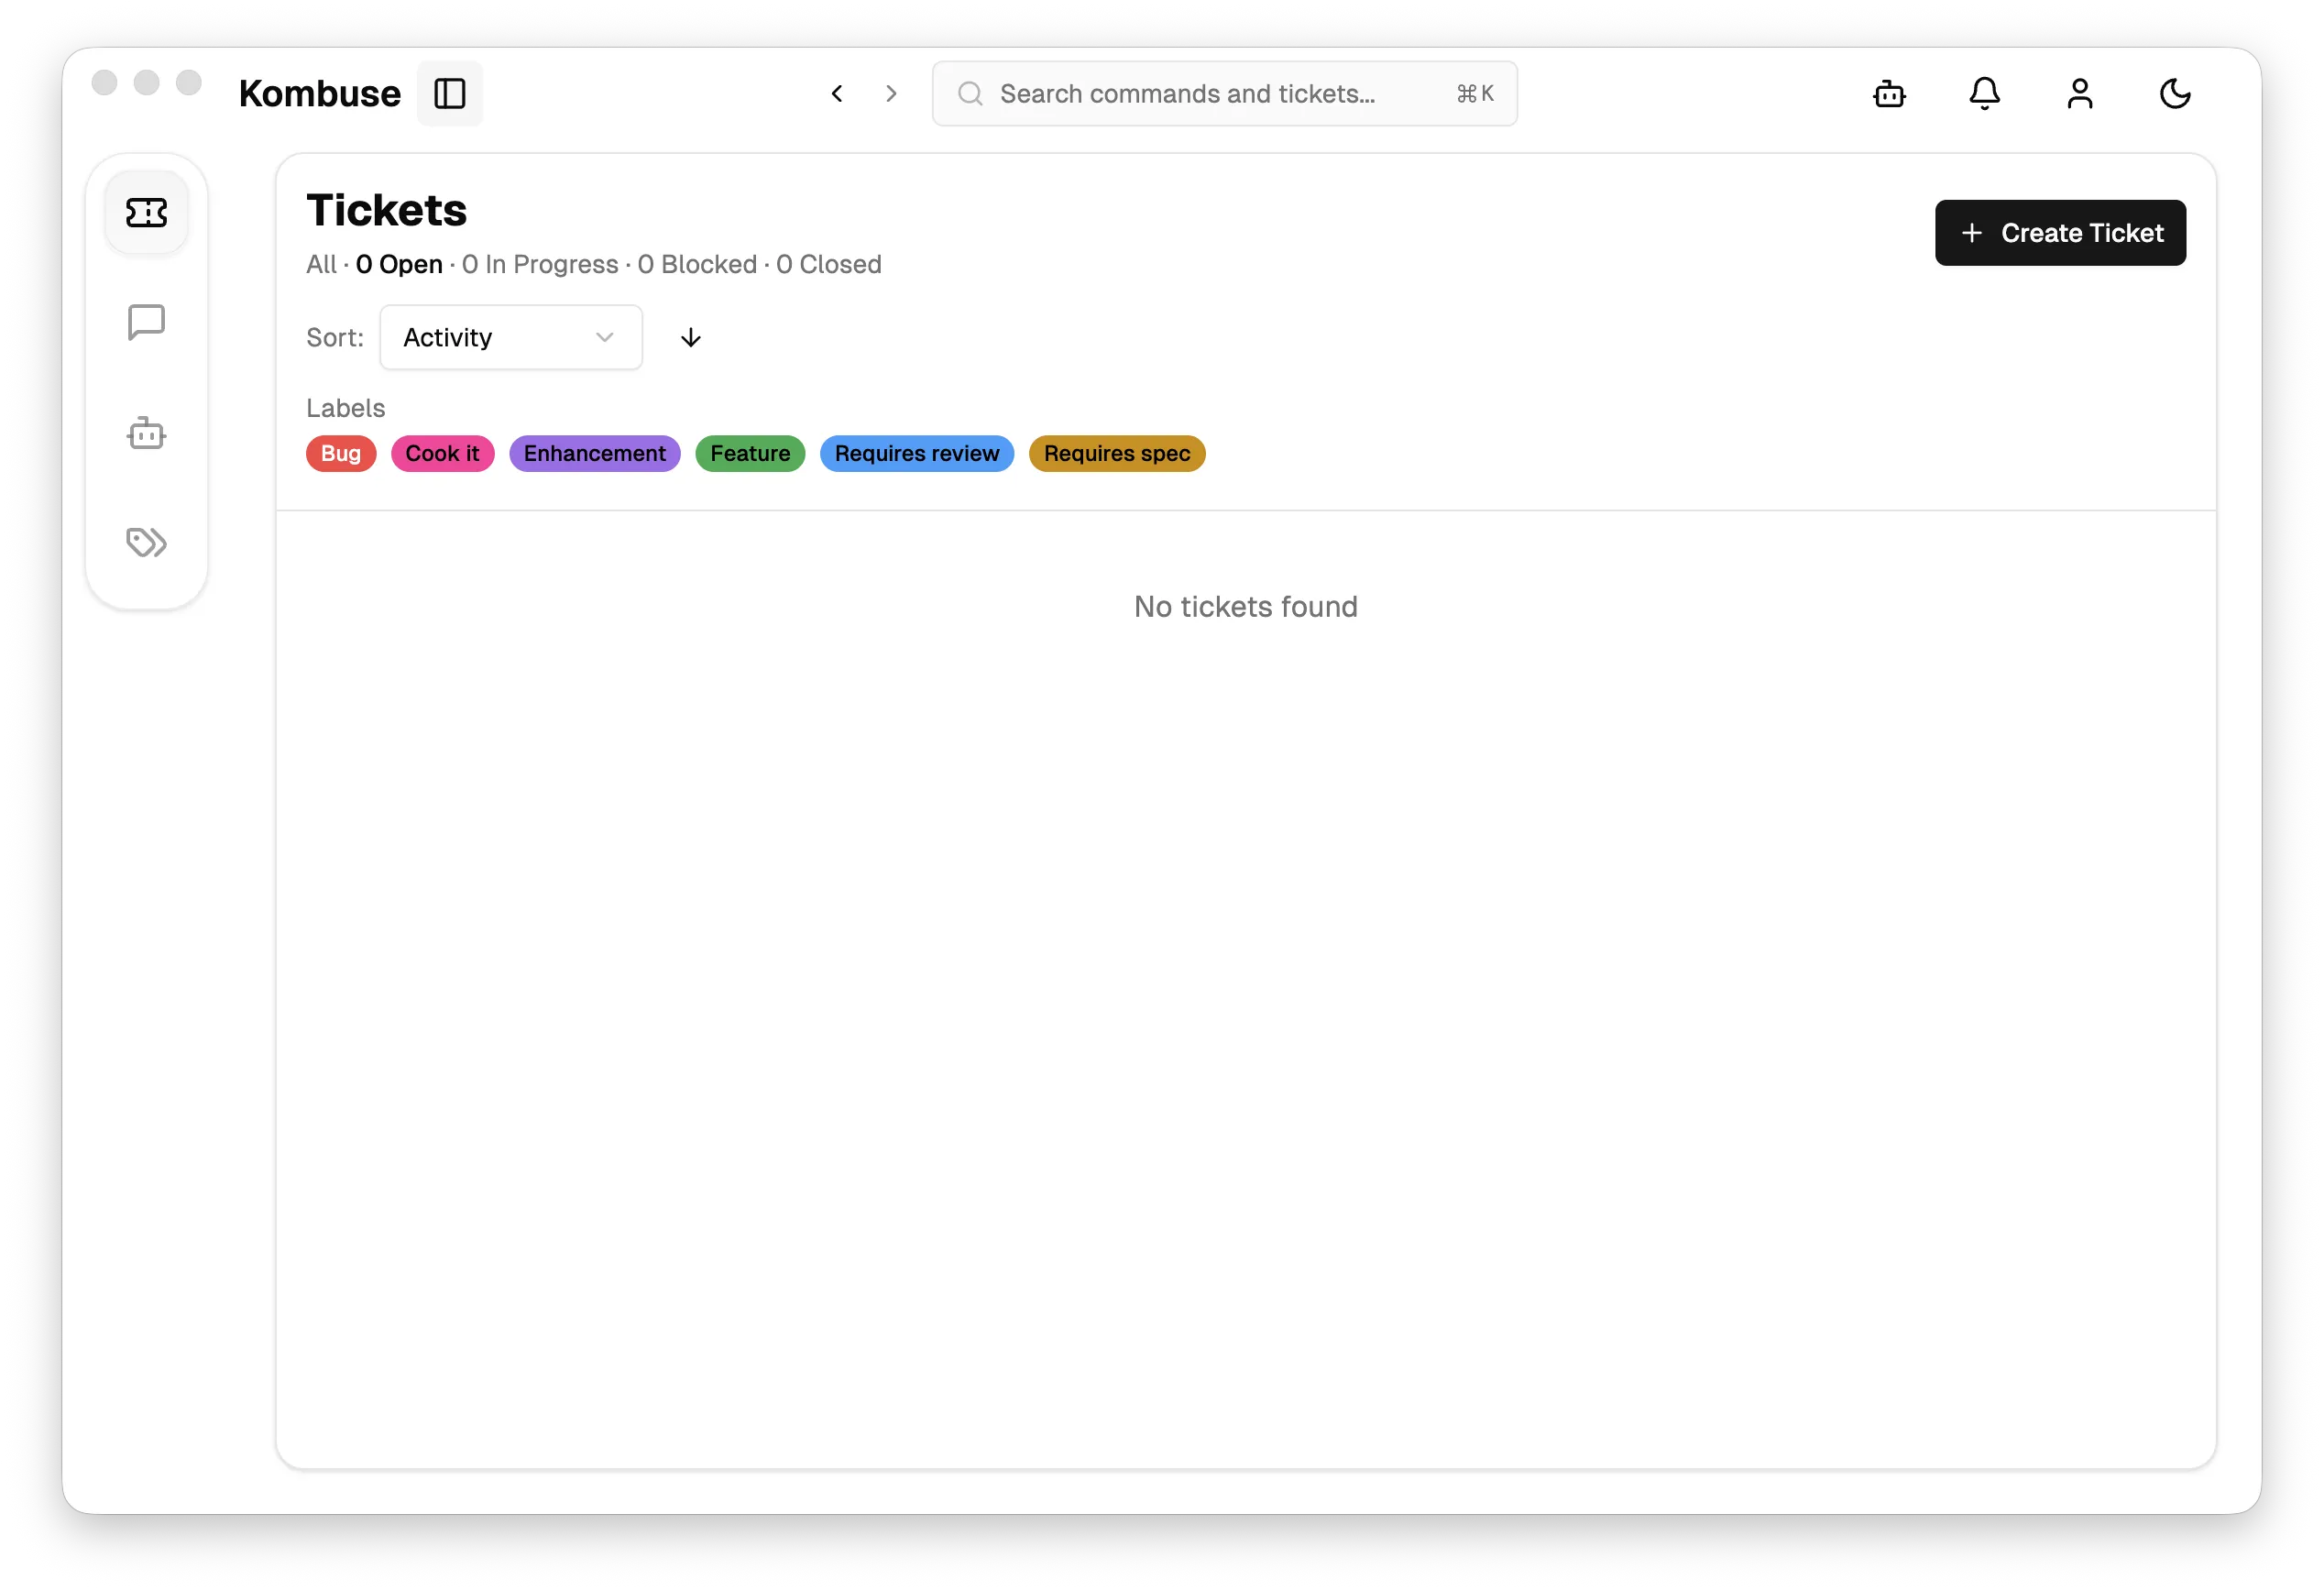
Section titled “Create Your First Ticket”After installing the dev plugin, the Tickets page shows labels like Bug, Cook it, Enhancement, Feature, Requires review, and Requires spec at the top.
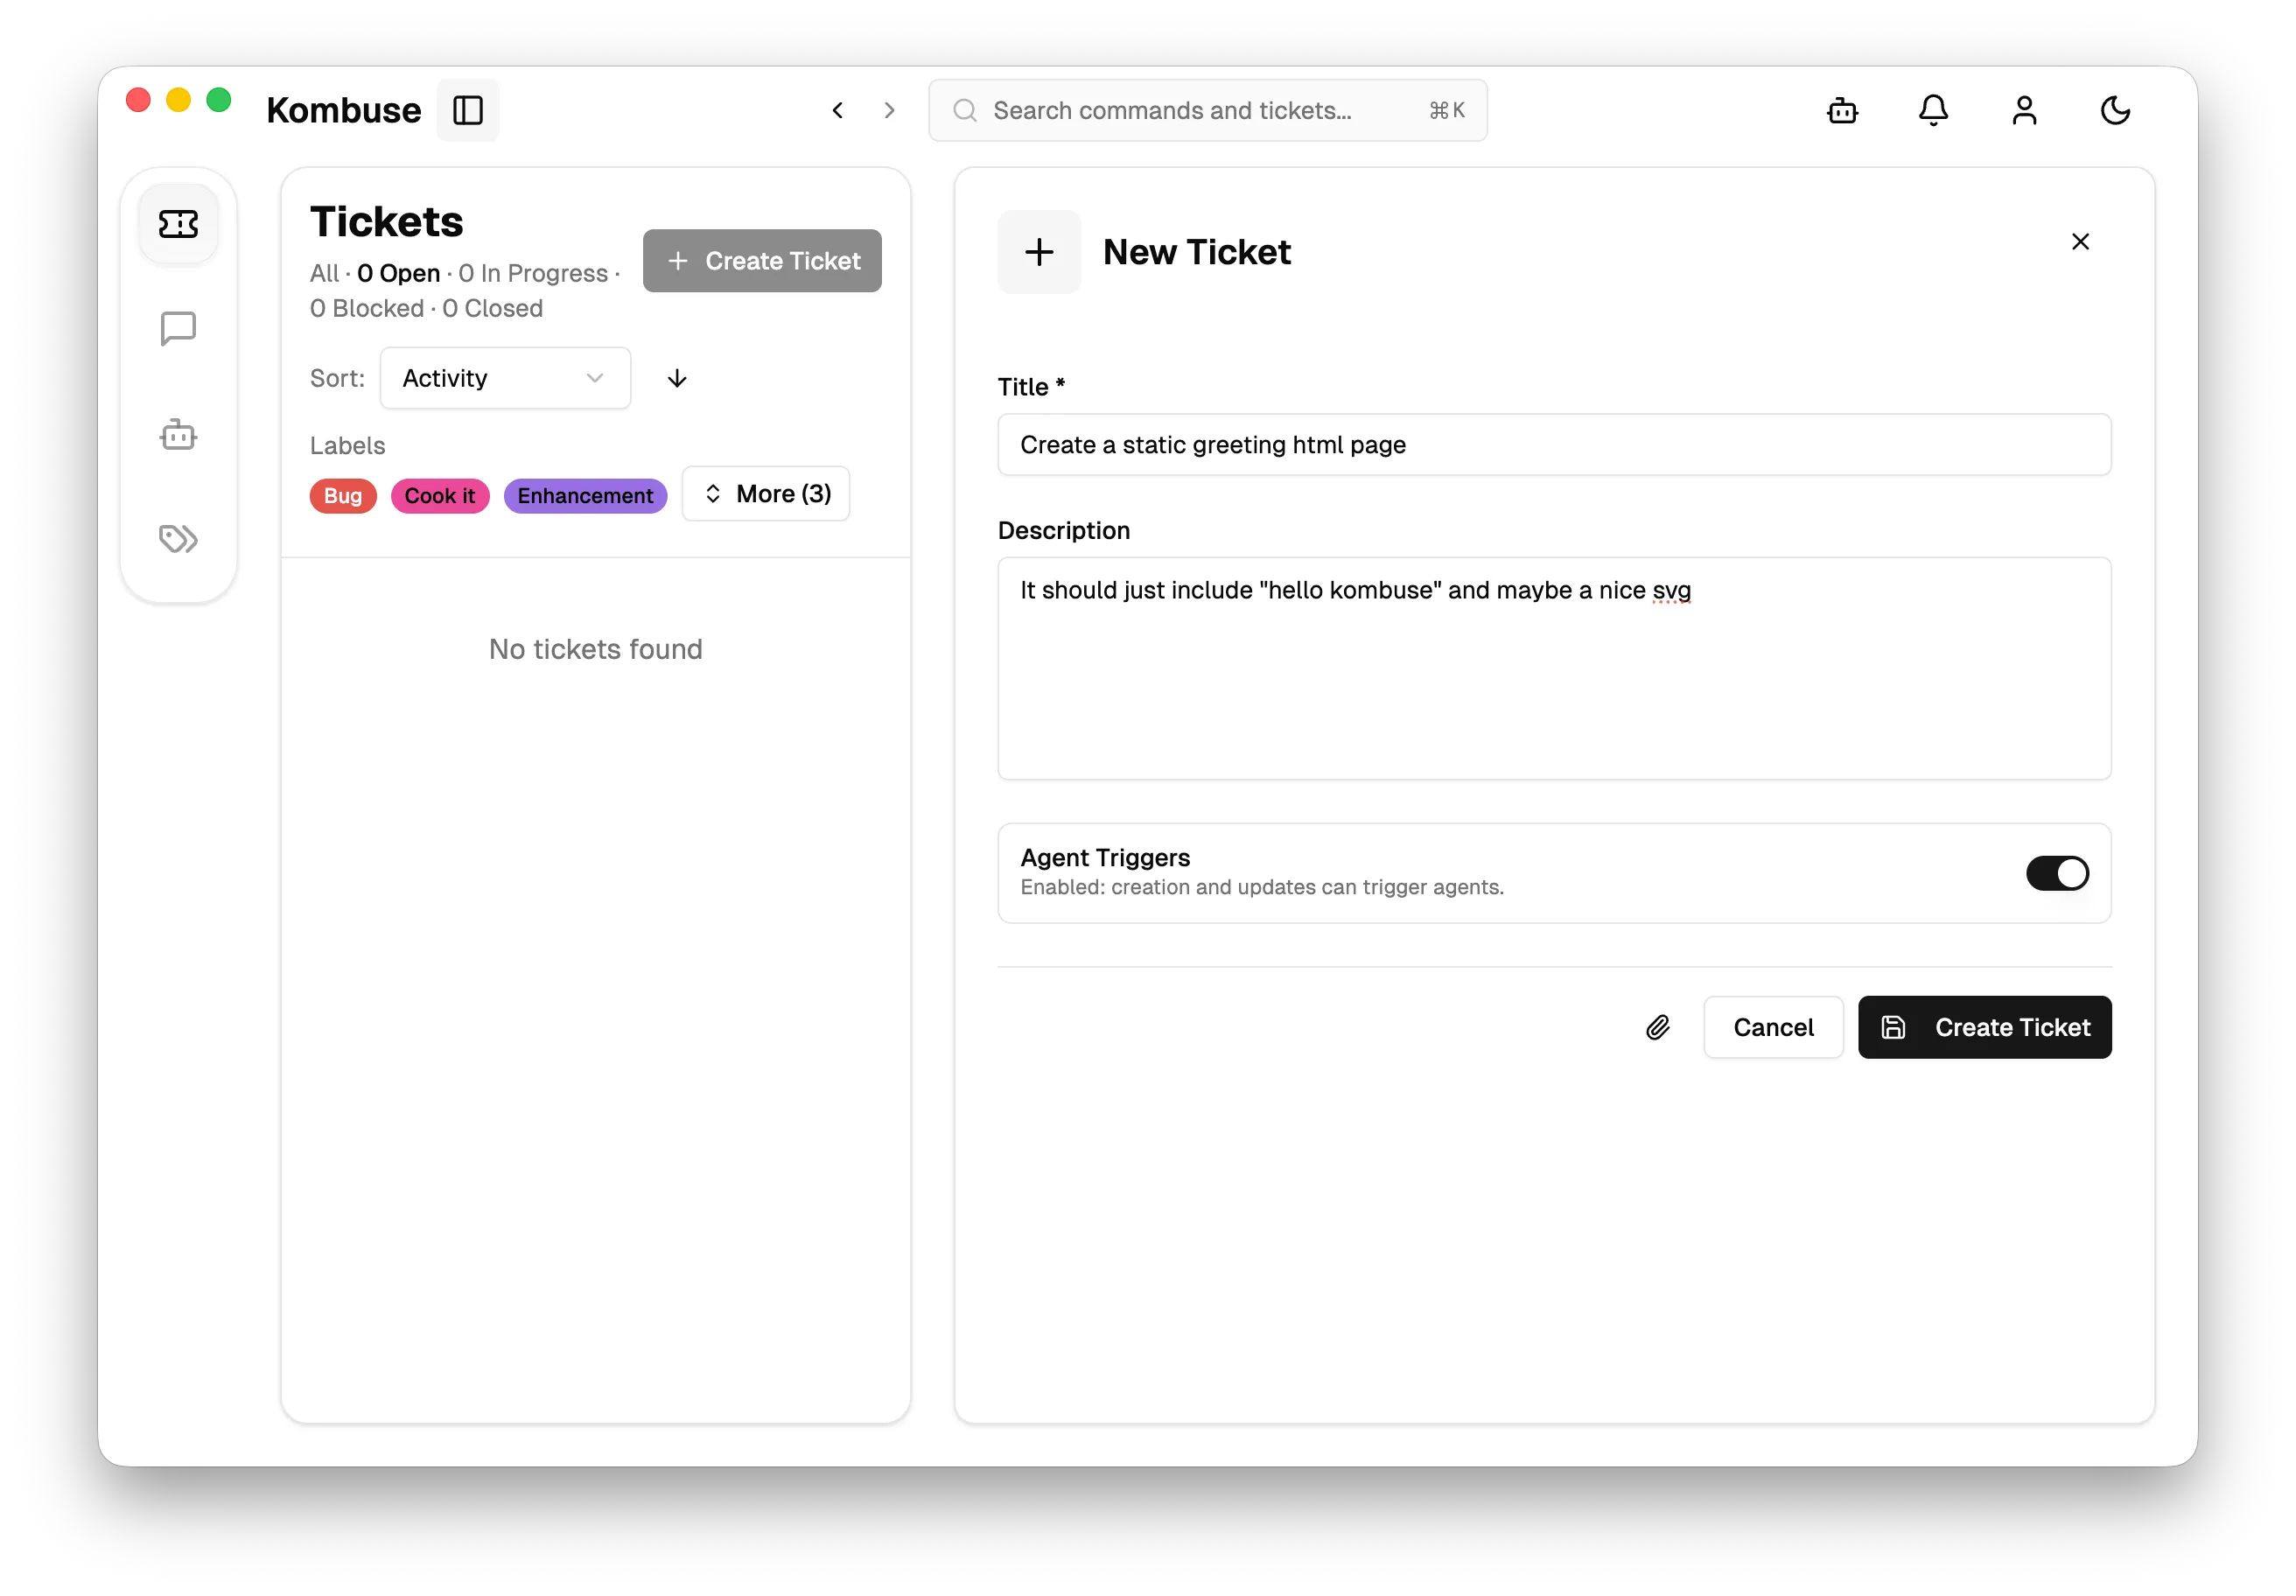
Click + Create Ticket and enter a title and a brief description. For this walkthrough, the title is “Create a static greeting html page” and the description is “It should just include hello kombuse and maybe a nice svg”. The description doesn’t need to be a complete spec — agents will flesh it out. Make sure the Agent Triggers toggle is ON, so creating the ticket automatically starts the pipeline.
Triage
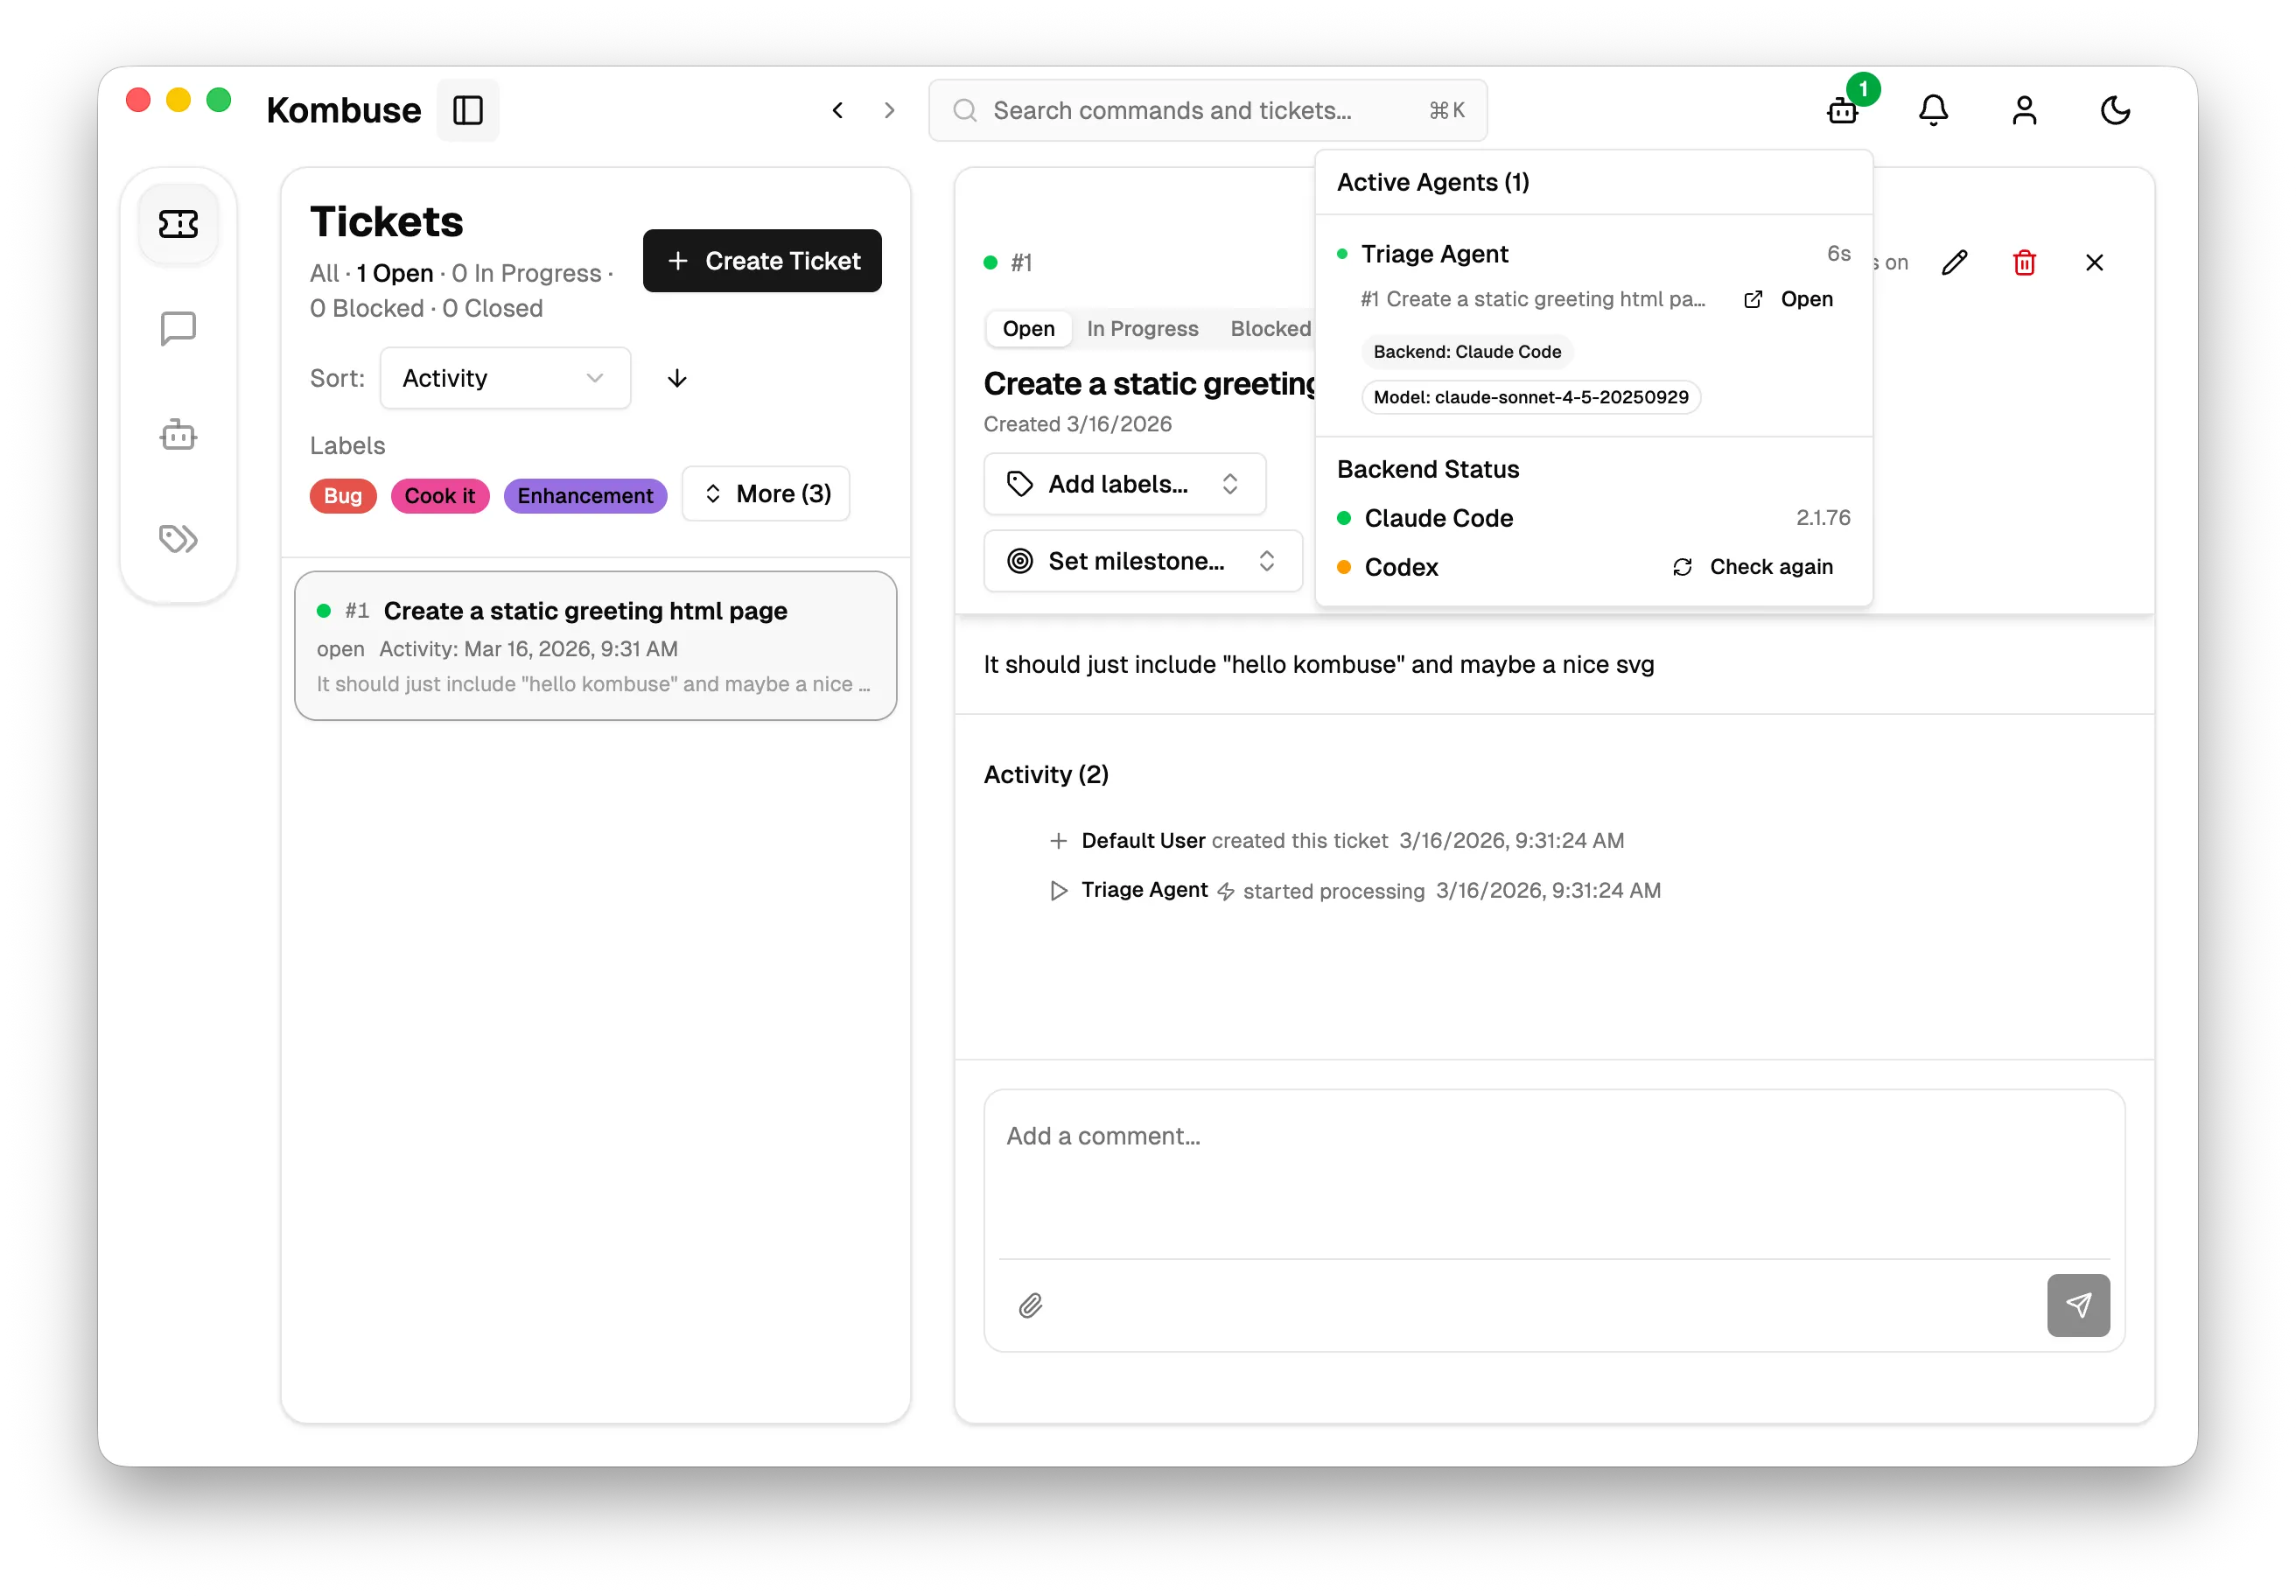
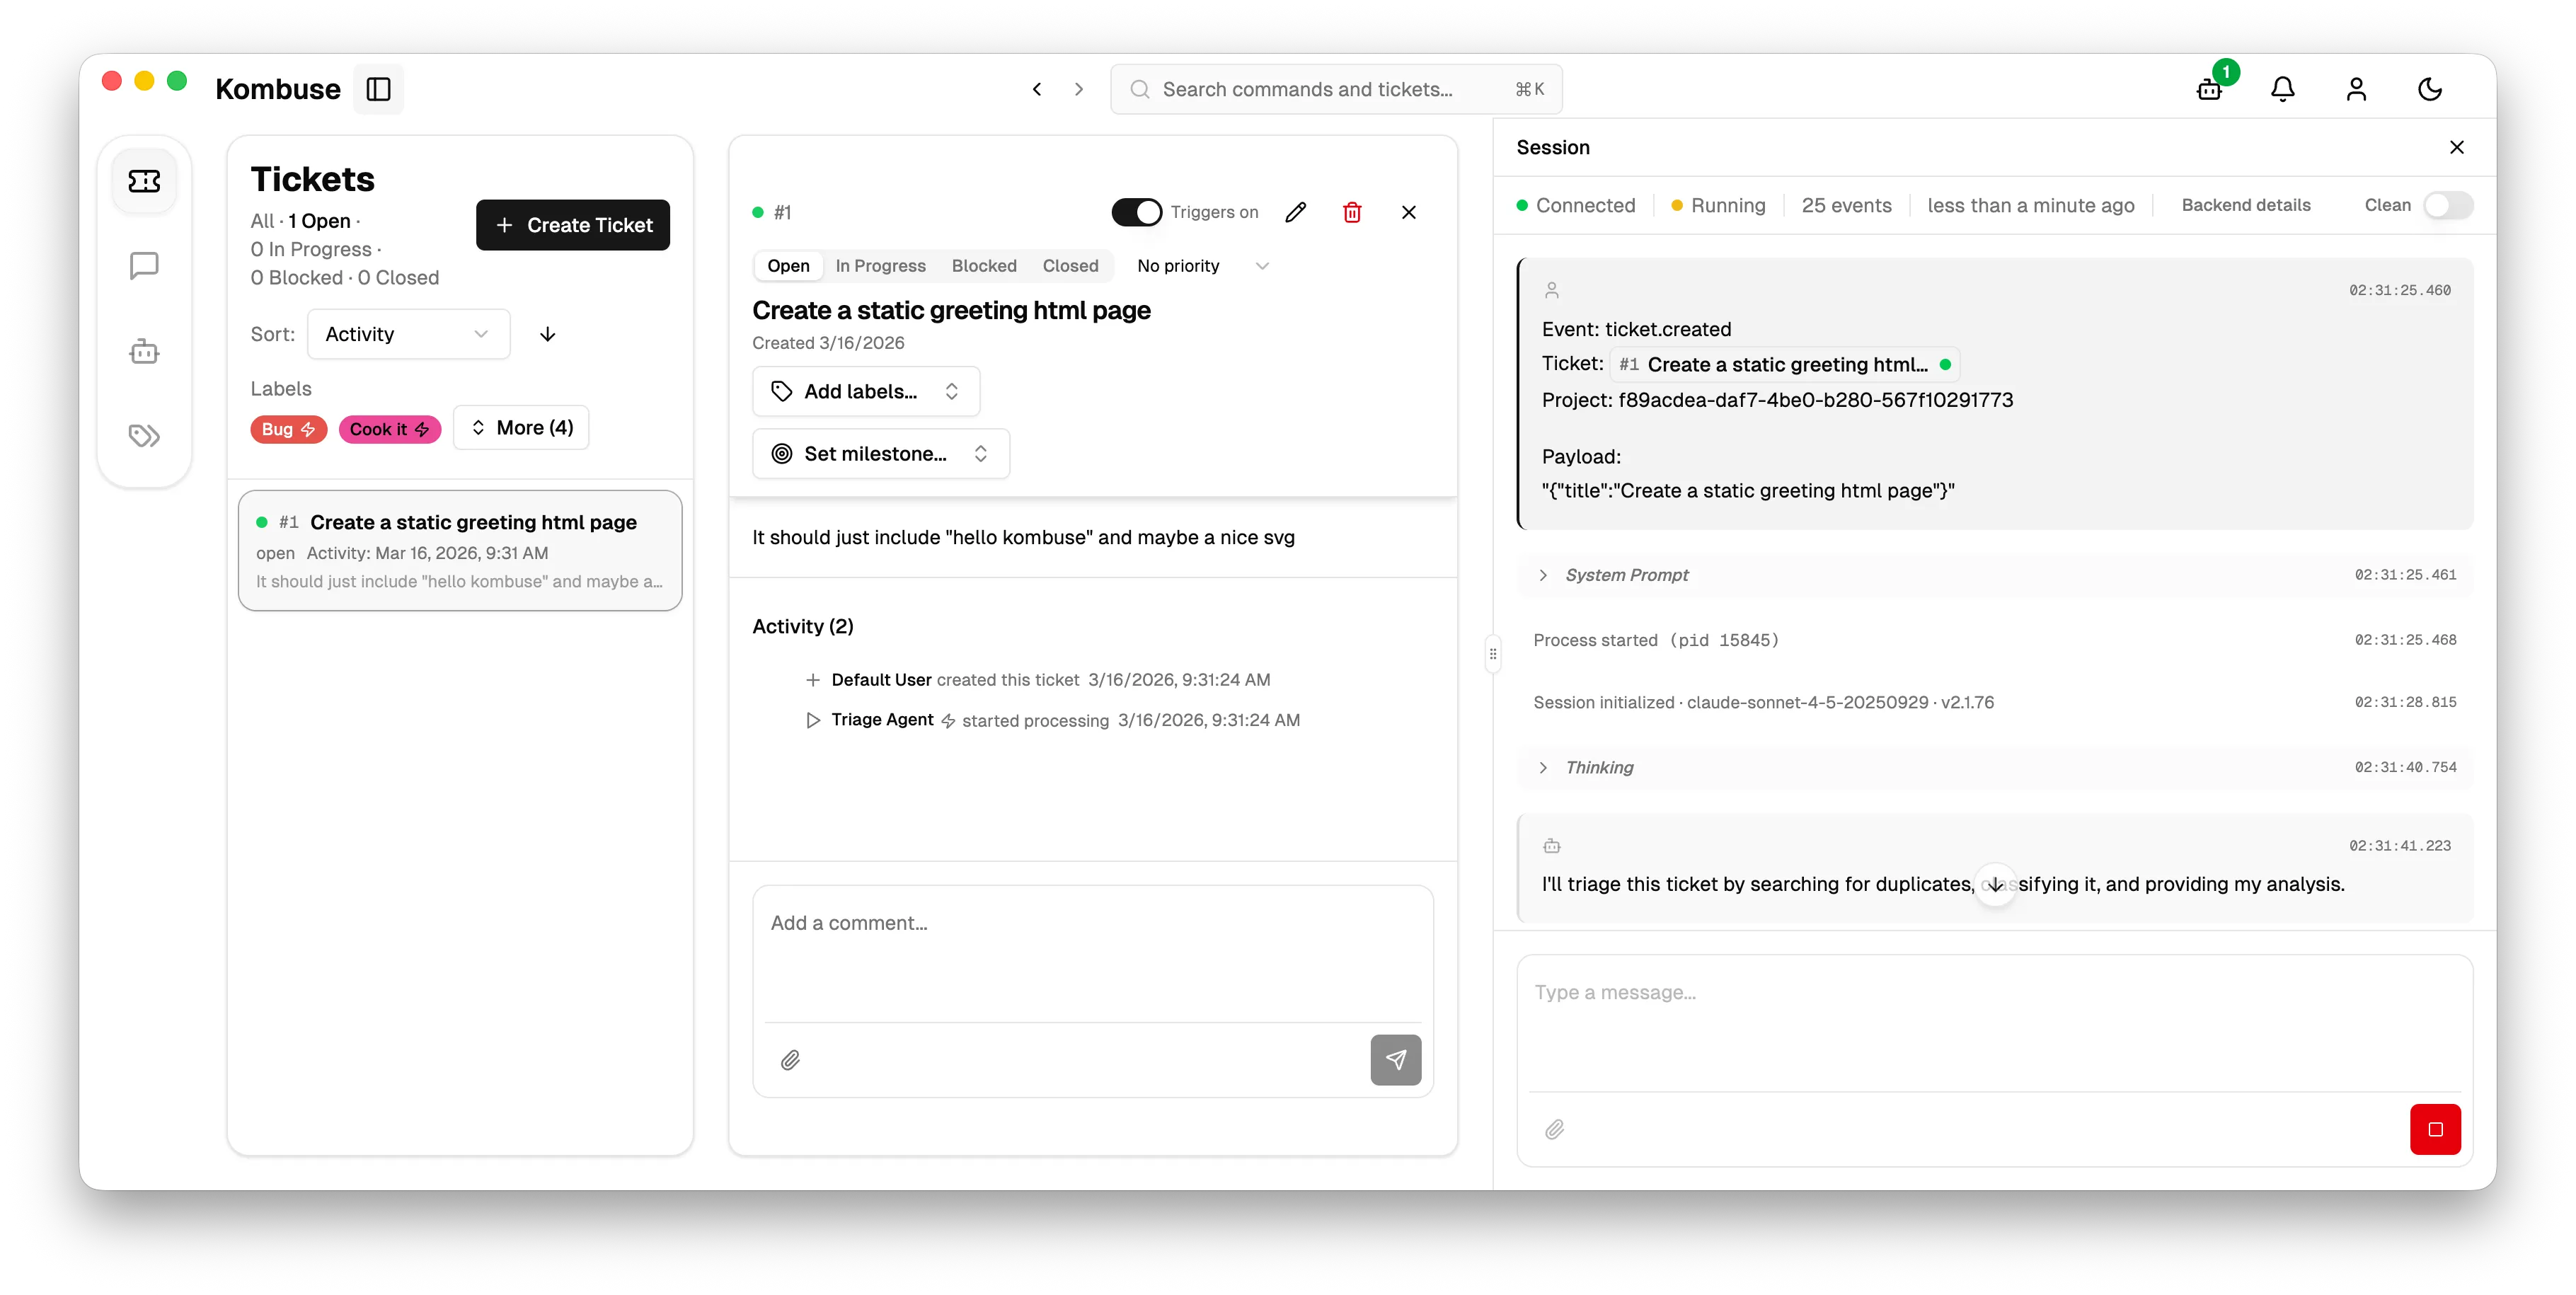
Section titled “Triage”With triggers enabled, creating the ticket immediately starts the Triage Agent — the first stage of the dev pipeline. A green dot appears next to the ticket in the list, and an agent indicator in the top bar shows a green badge with 1 indicating one active agent.
Clicking the indicator opens the Active Agents popup, which lists the Triage Agent, the ticket it is working on, the backend (Claude Code), and an Open button. Pressing Open navigates to the ticket and opens the agent session viewer.
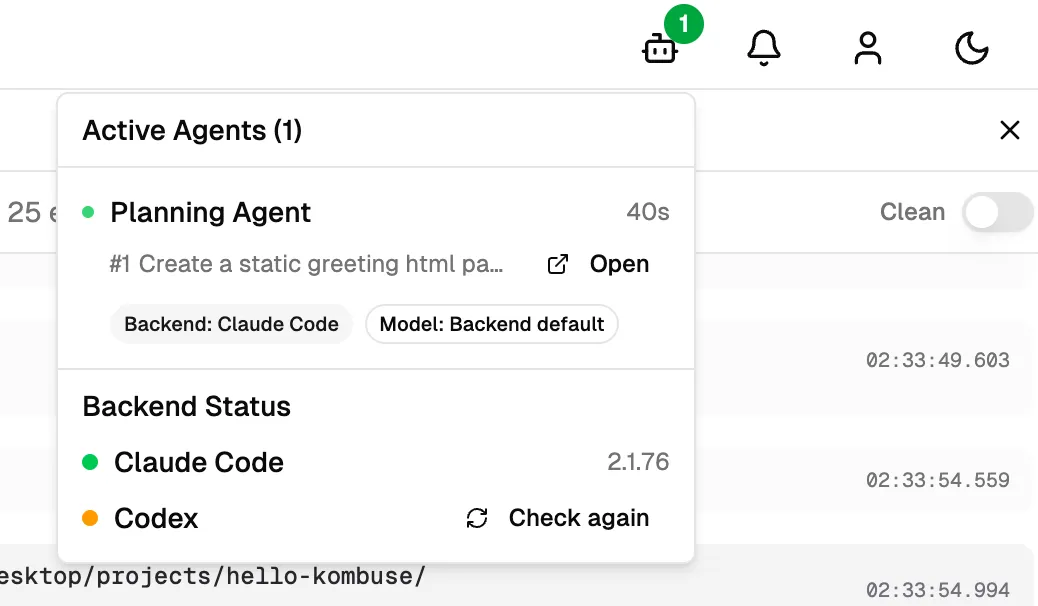
Here is the same indicator later in the pipeline, showing the Planning Agent at work — the popup always reflects which agents are currently active across the project.
The session viewer (right panel) shows the agent’s system prompt, invocation event, thinking process, and tool usage in real time — similar to what you’d see in Claude Code or Codex CLI. It can also be reached by clicking “started processing” or similar agent events in the ticket timeline. The session supports chat input but typically runs non-interactively.
Triage Results
Section titled “Triage Results”The ticket list panel can be hidden using the toggle icon at the top left, allowing a focused view of the ticket and agent session side by side.
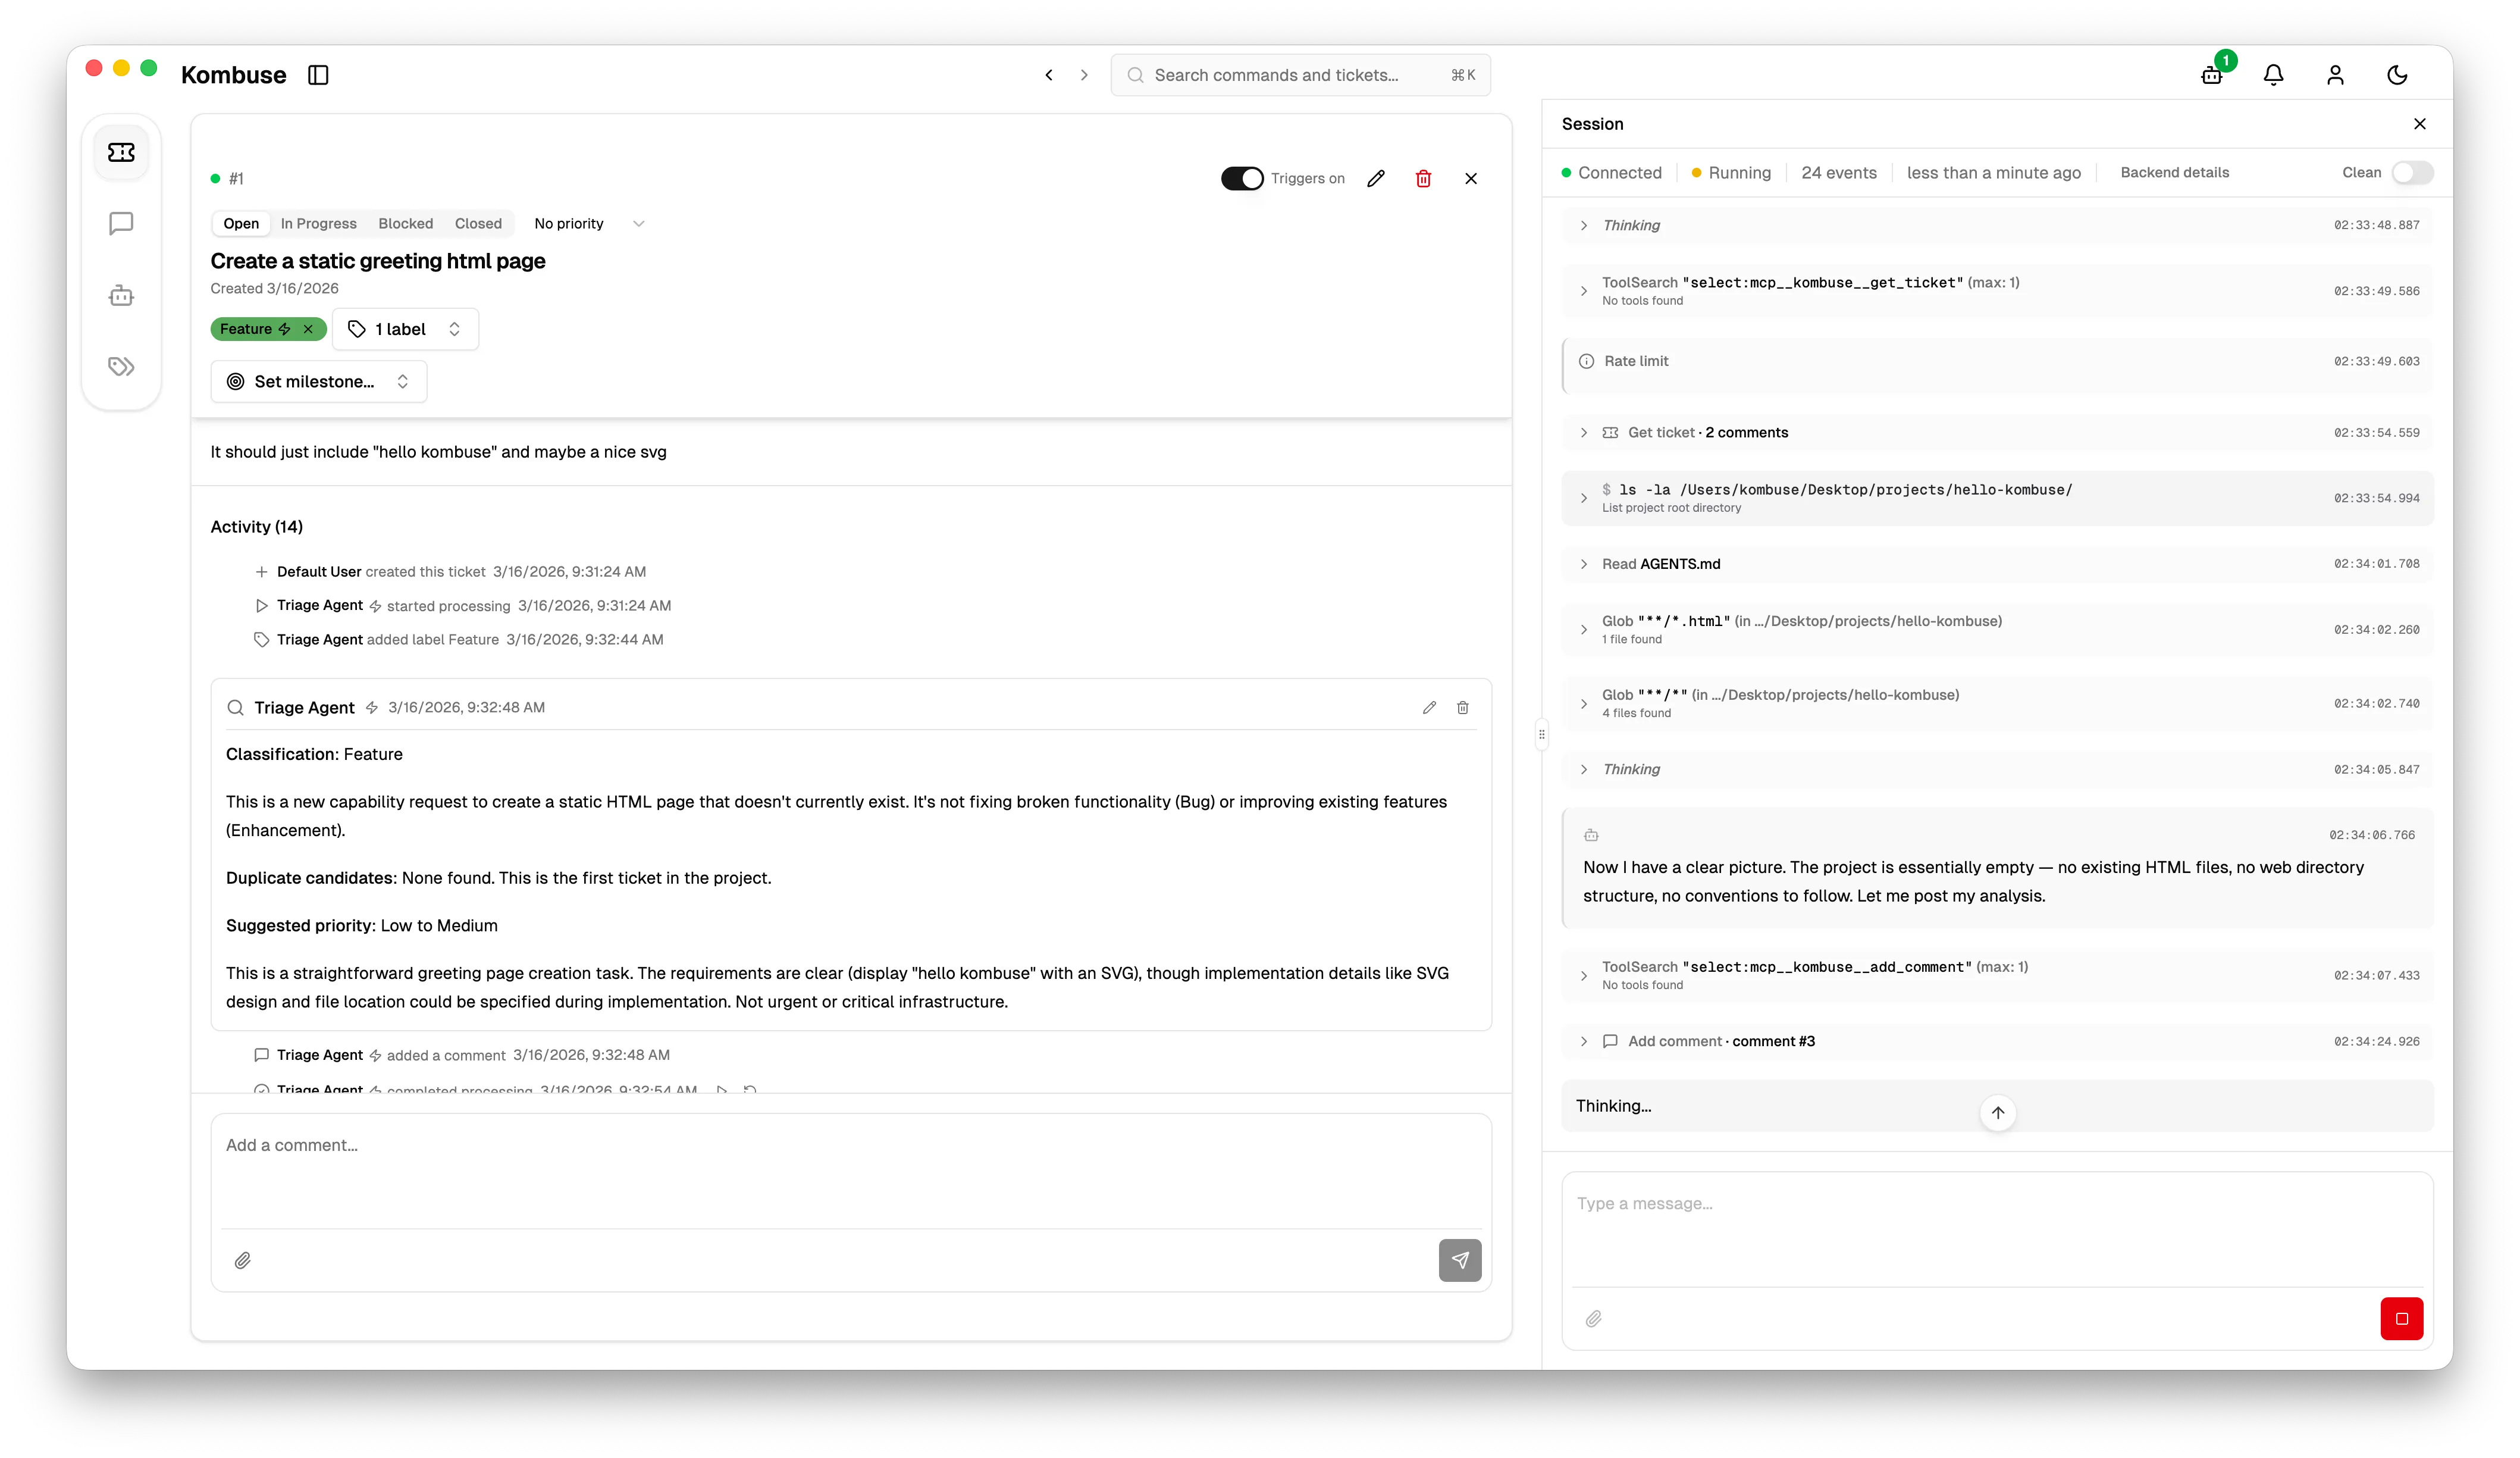
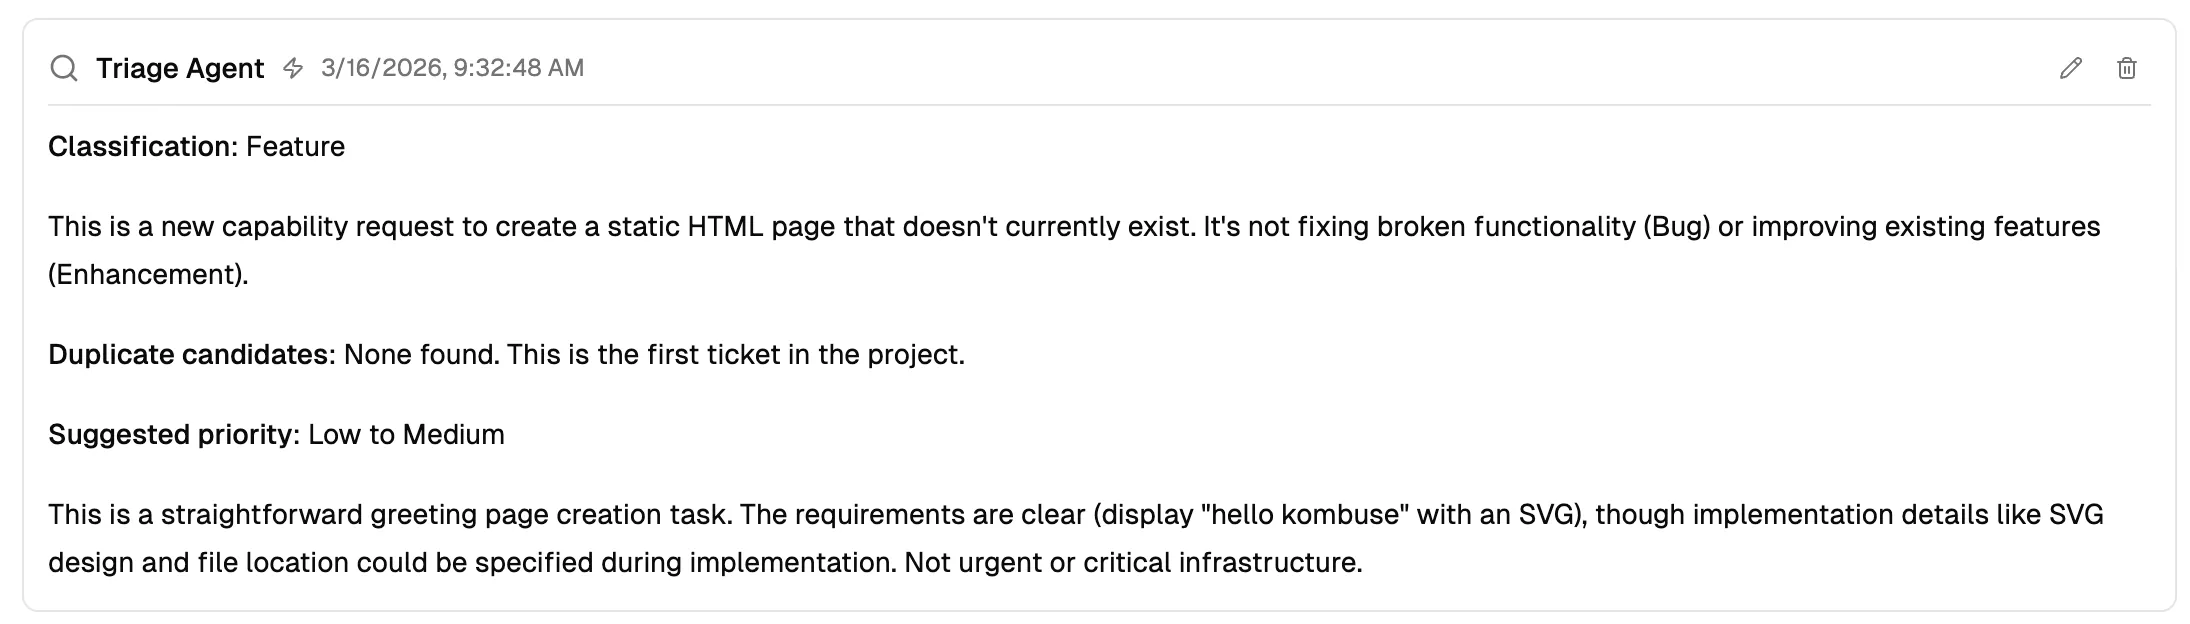
The Triage Agent finishes and posts a comment with its analysis: a classification (Feature), duplicate candidates (none found — this is the first ticket in the project), and a suggested priority (Low to Medium). It also assigns the appropriate label to the ticket. When relevant, the Triage Agent surfaces high-potential duplicate candidates for further discussion and flags regressions.
Ticket Analysis and Planning
Section titled “Ticket Analysis and Planning”After triage completes, the Orchestrator listens to agent completion events and — if there are no blockers — activates the next pipeline stages. The Ticket Analyzer investigates the codebase and project resources to gather context: finding relevant files, identifying potential issues, and refining the user’s request into something more actionable. All dev pipeline agents post comments on the ticket as they finish or when they encounter issues requiring attention.
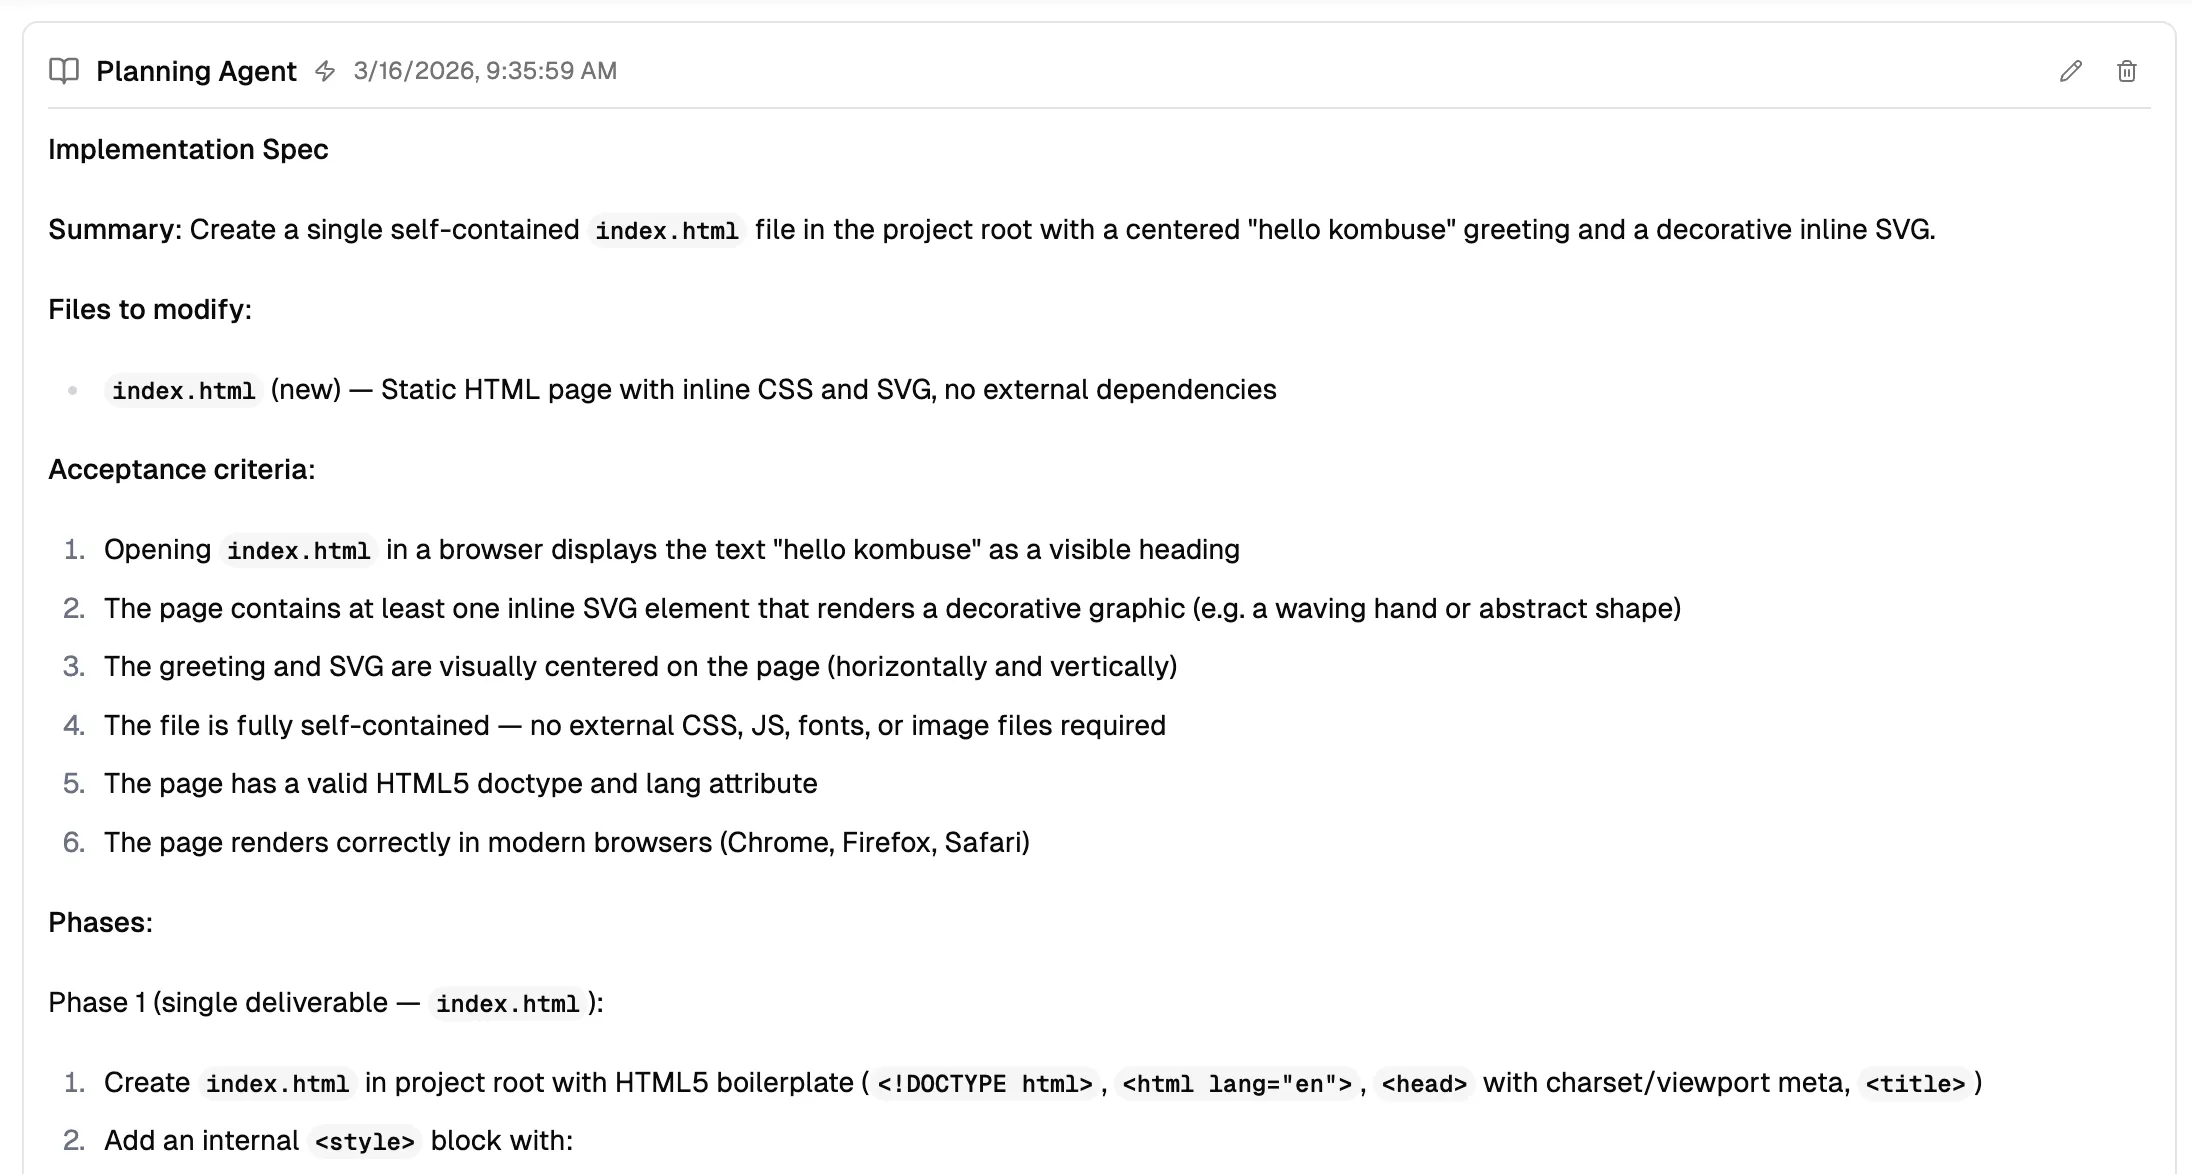
Next, the Planning Agent produces an Implementation Spec containing: a one-line Summary, exact Files to modify with descriptions, testable Acceptance criteria, and ordered Phases with deliverables. The Planning Agent does not modify any files — it only creates a plan for the Coding Agent to follow.
Human in the Loop
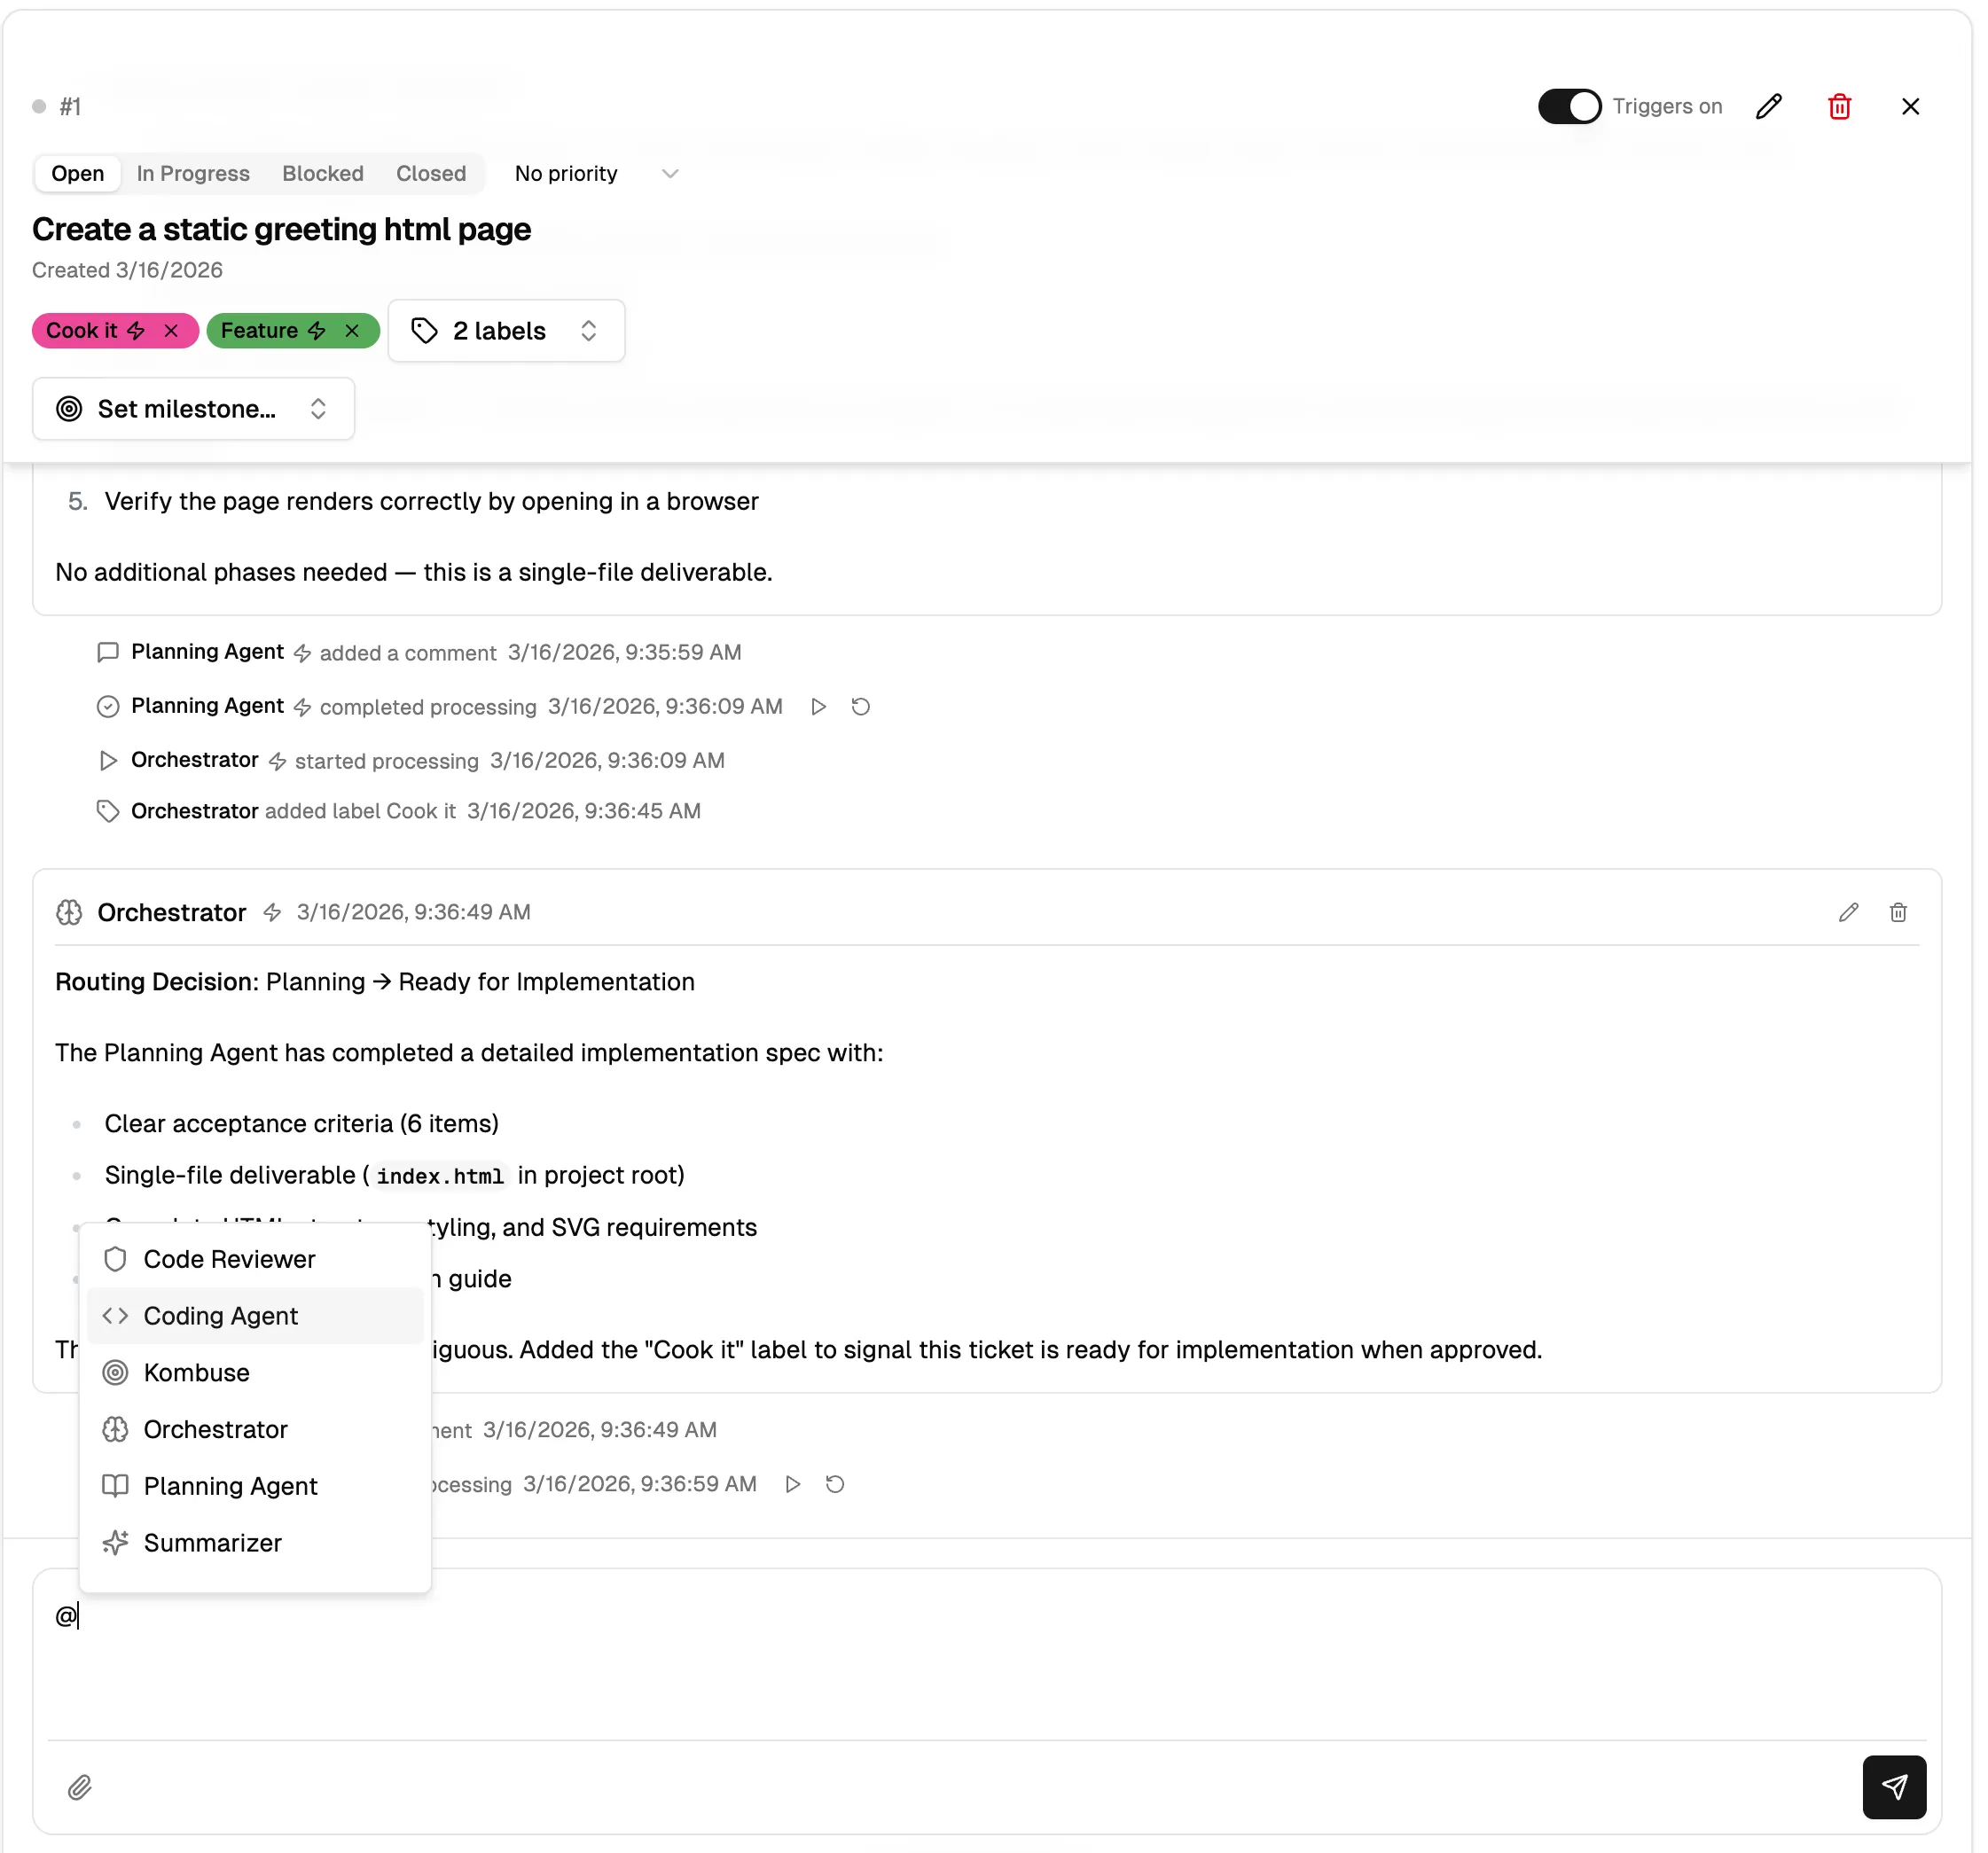
Section titled “Human in the Loop”After the planning stage, the Orchestrator assigns the Cook it label — this is the human-in-the-loop checkpoint. The pipeline halts here intentionally: the Coding Agent does not start automatically. This gives time to review the spec, discuss changes, or request another round of planning.
When ready, the Coding Agent is manually invoked by typing @Coding Agent in a ticket comment. The @ syntax opens an agent picker dropdown listing all available agents. Submitting the comment triggers the Coding Agent to start processing.

Implementation
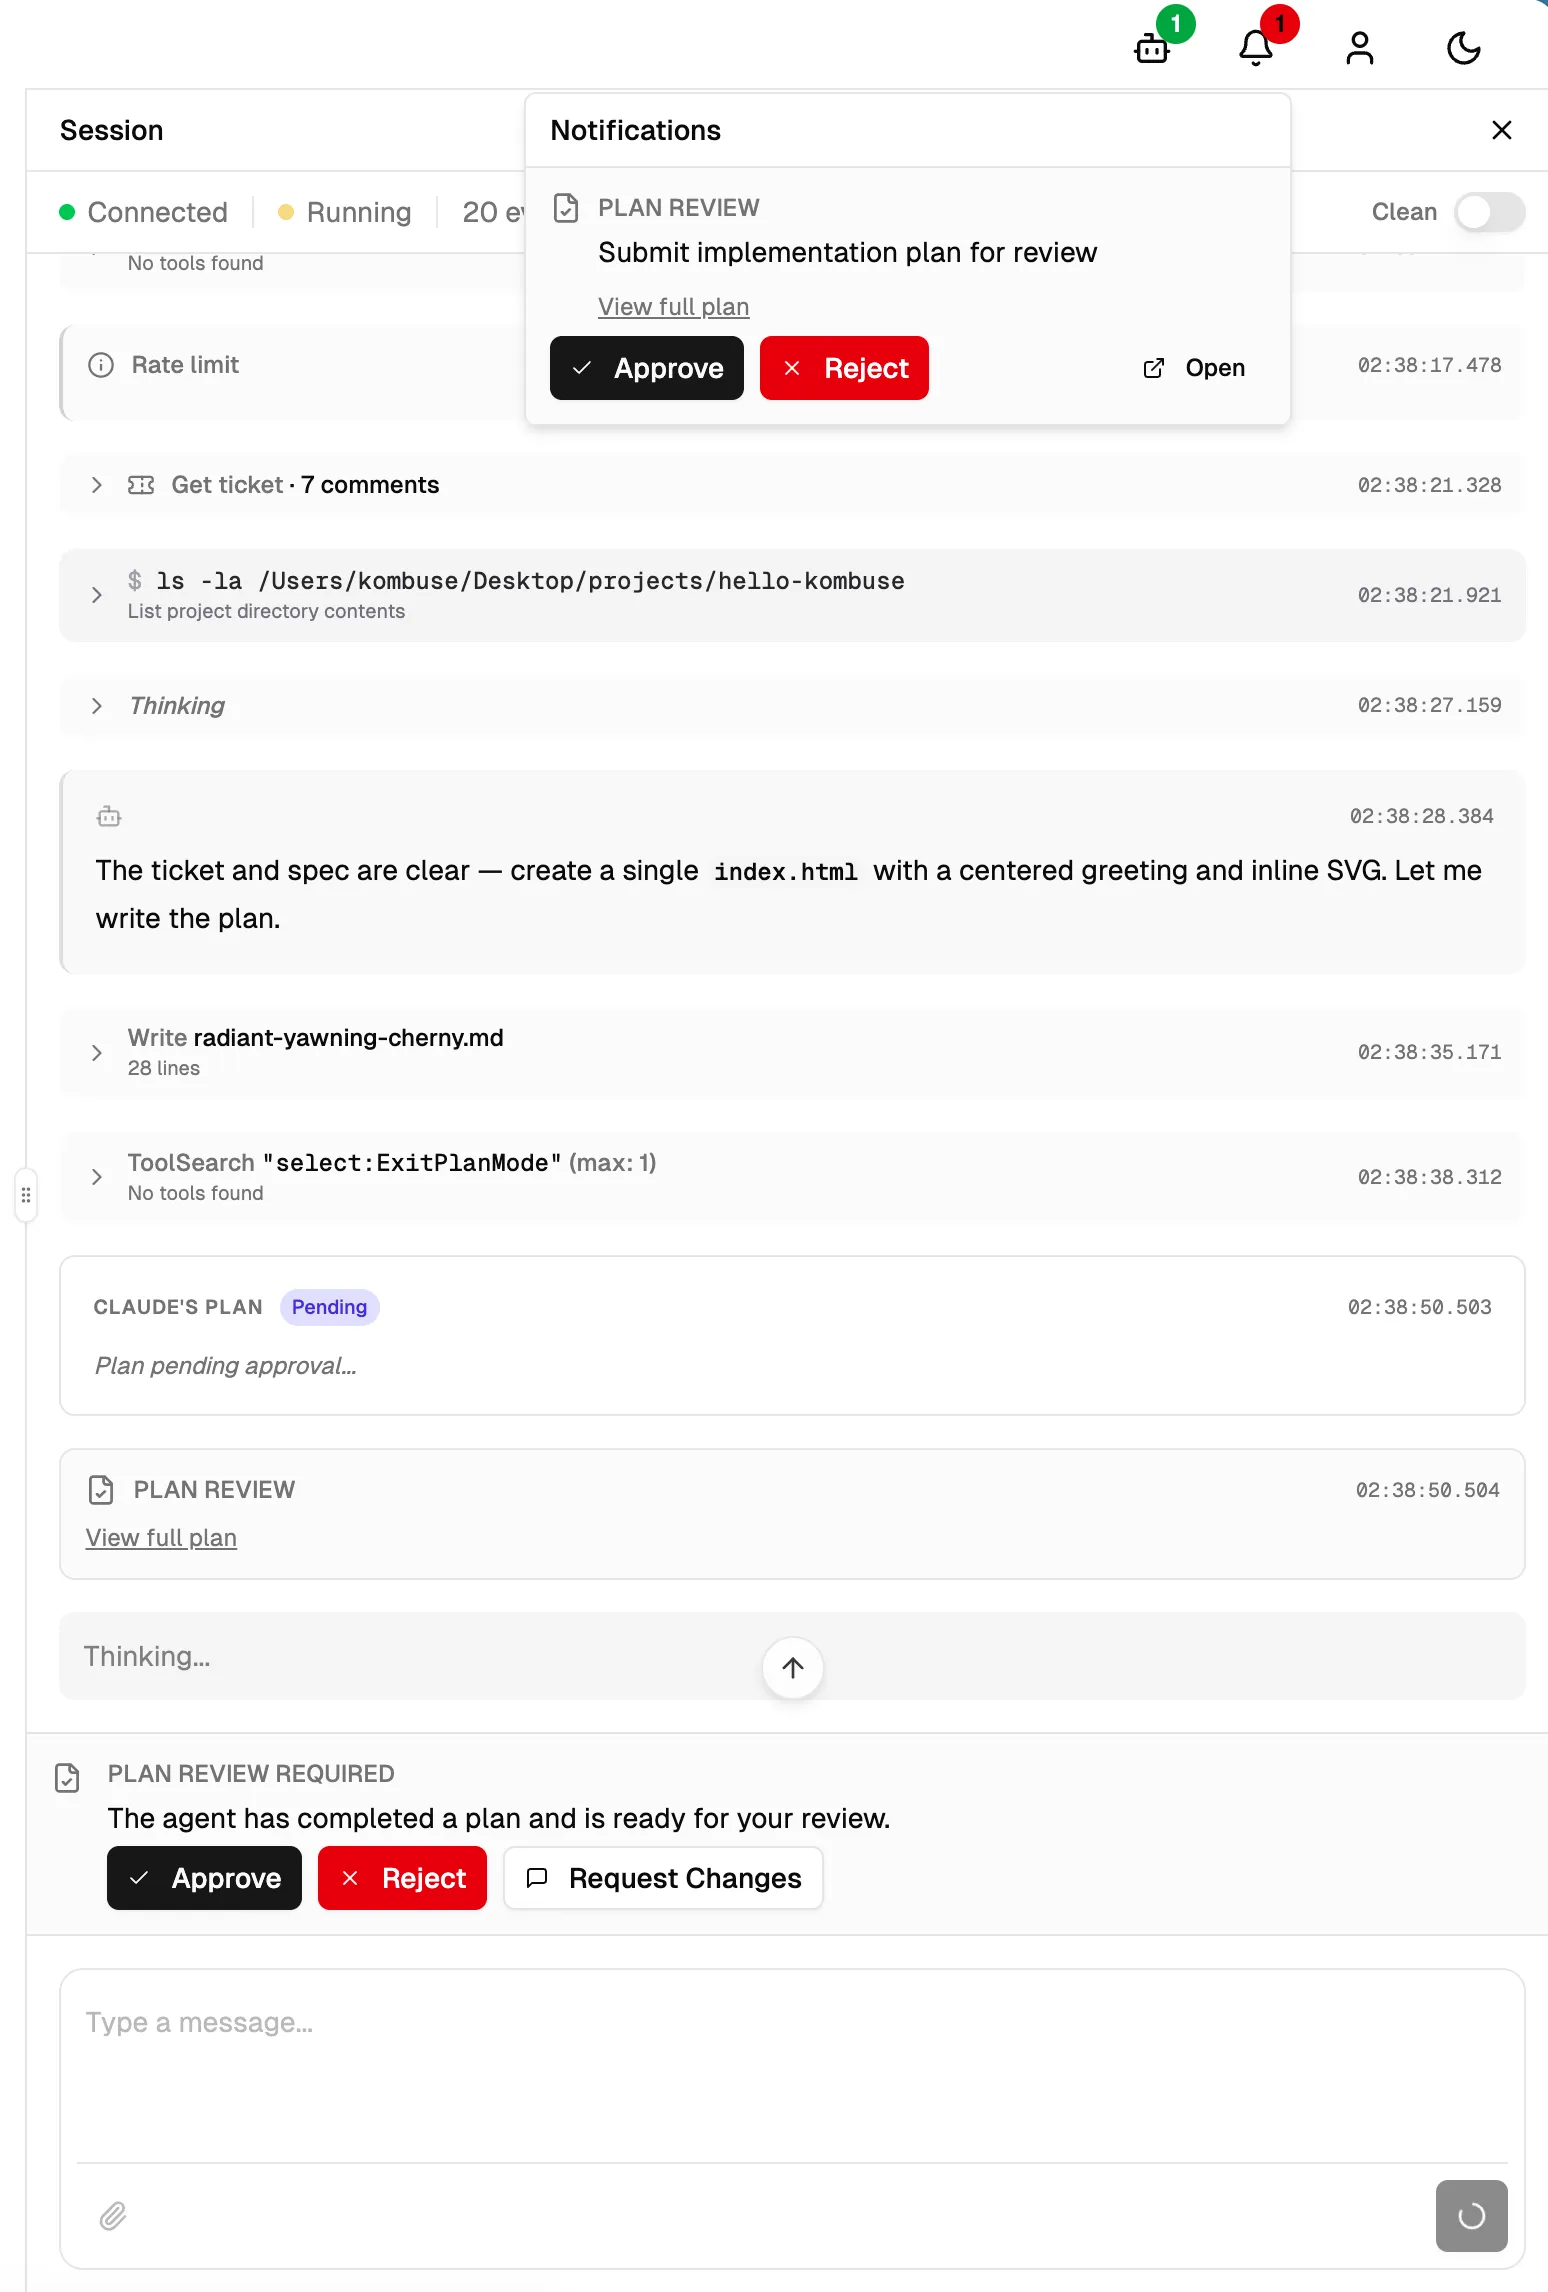
Section titled “Implementation”When the Coding Agent uses the Claude Code backend, it automatically runs in plan mode. It reads the Planning Agent’s spec, then stops to present its implementation plan for approval — another human-in-the-loop checkpoint. A notification appears at the top of the session with PLAN REVIEW and buttons to Approve, Reject, or view the full plan.
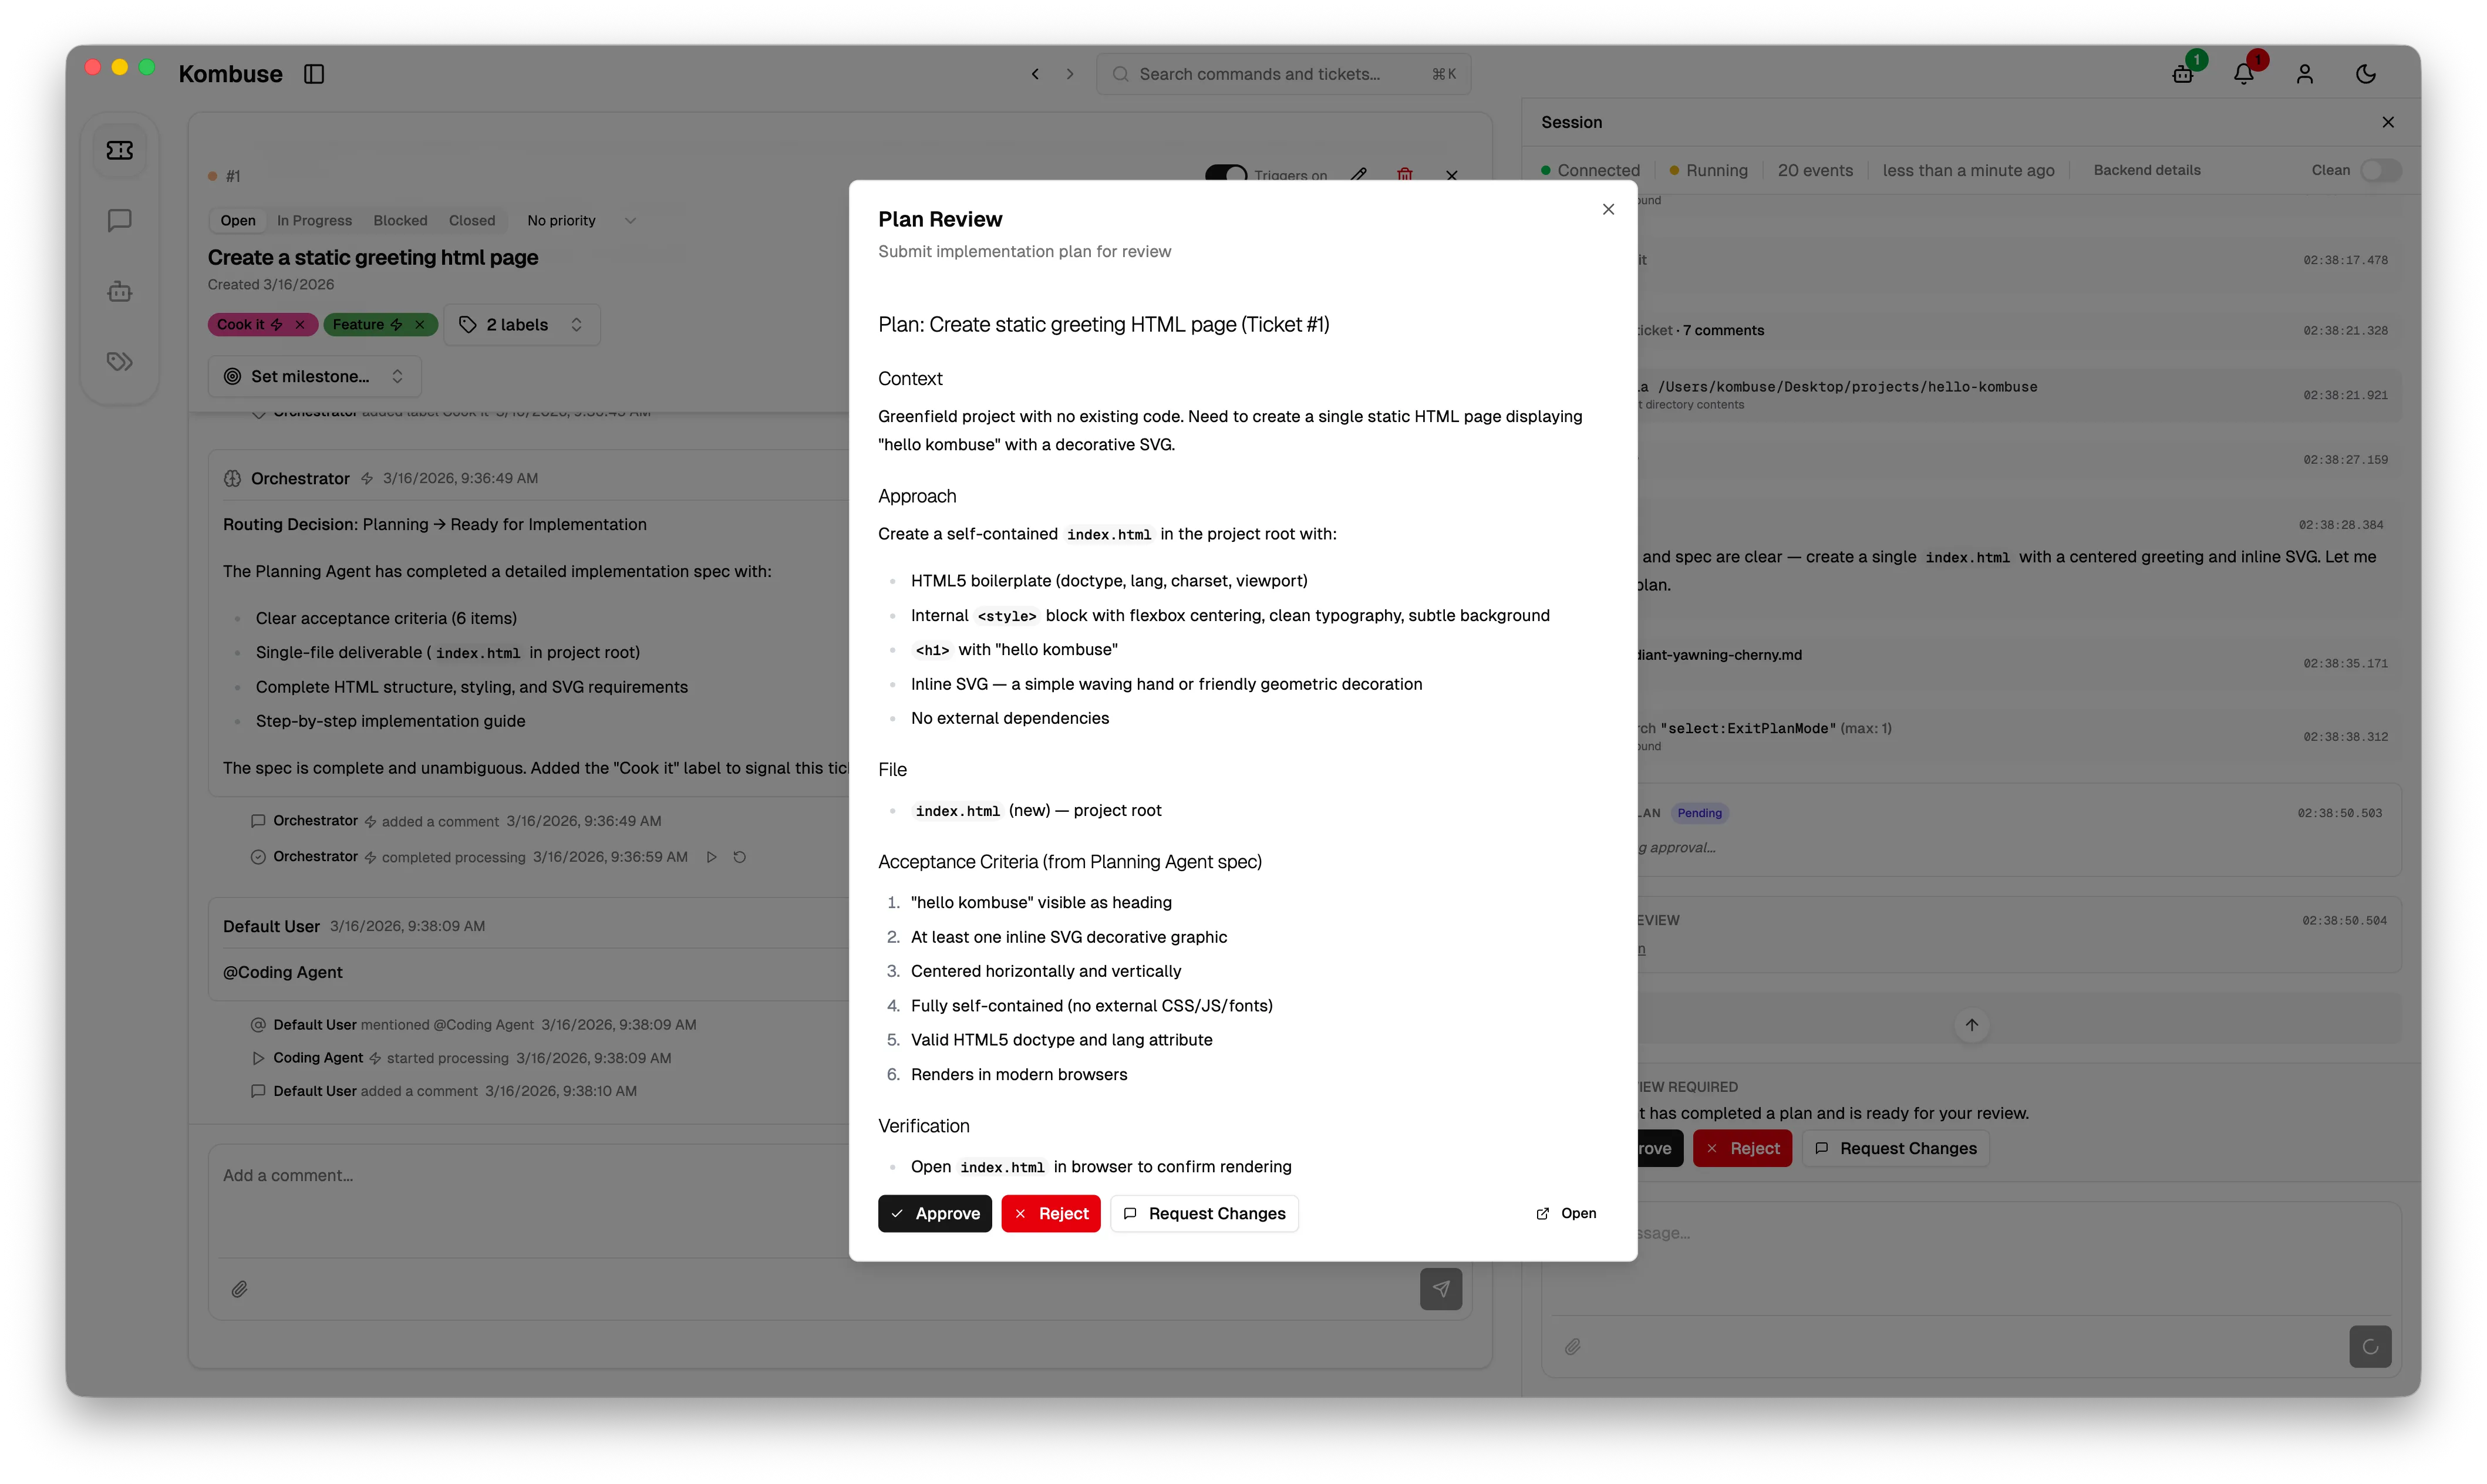
Clicking View full plan or Open shows the Plan Review modal, which includes: the plan title, Context (project state), Approach (what will be created), Files to create or modify, Acceptance Criteria from the Planning Agent’s spec, and a Verification step. The plan can be Approved to proceed, Rejected to abort, or sent back with a Request Changes message directly to the Coding Agent.
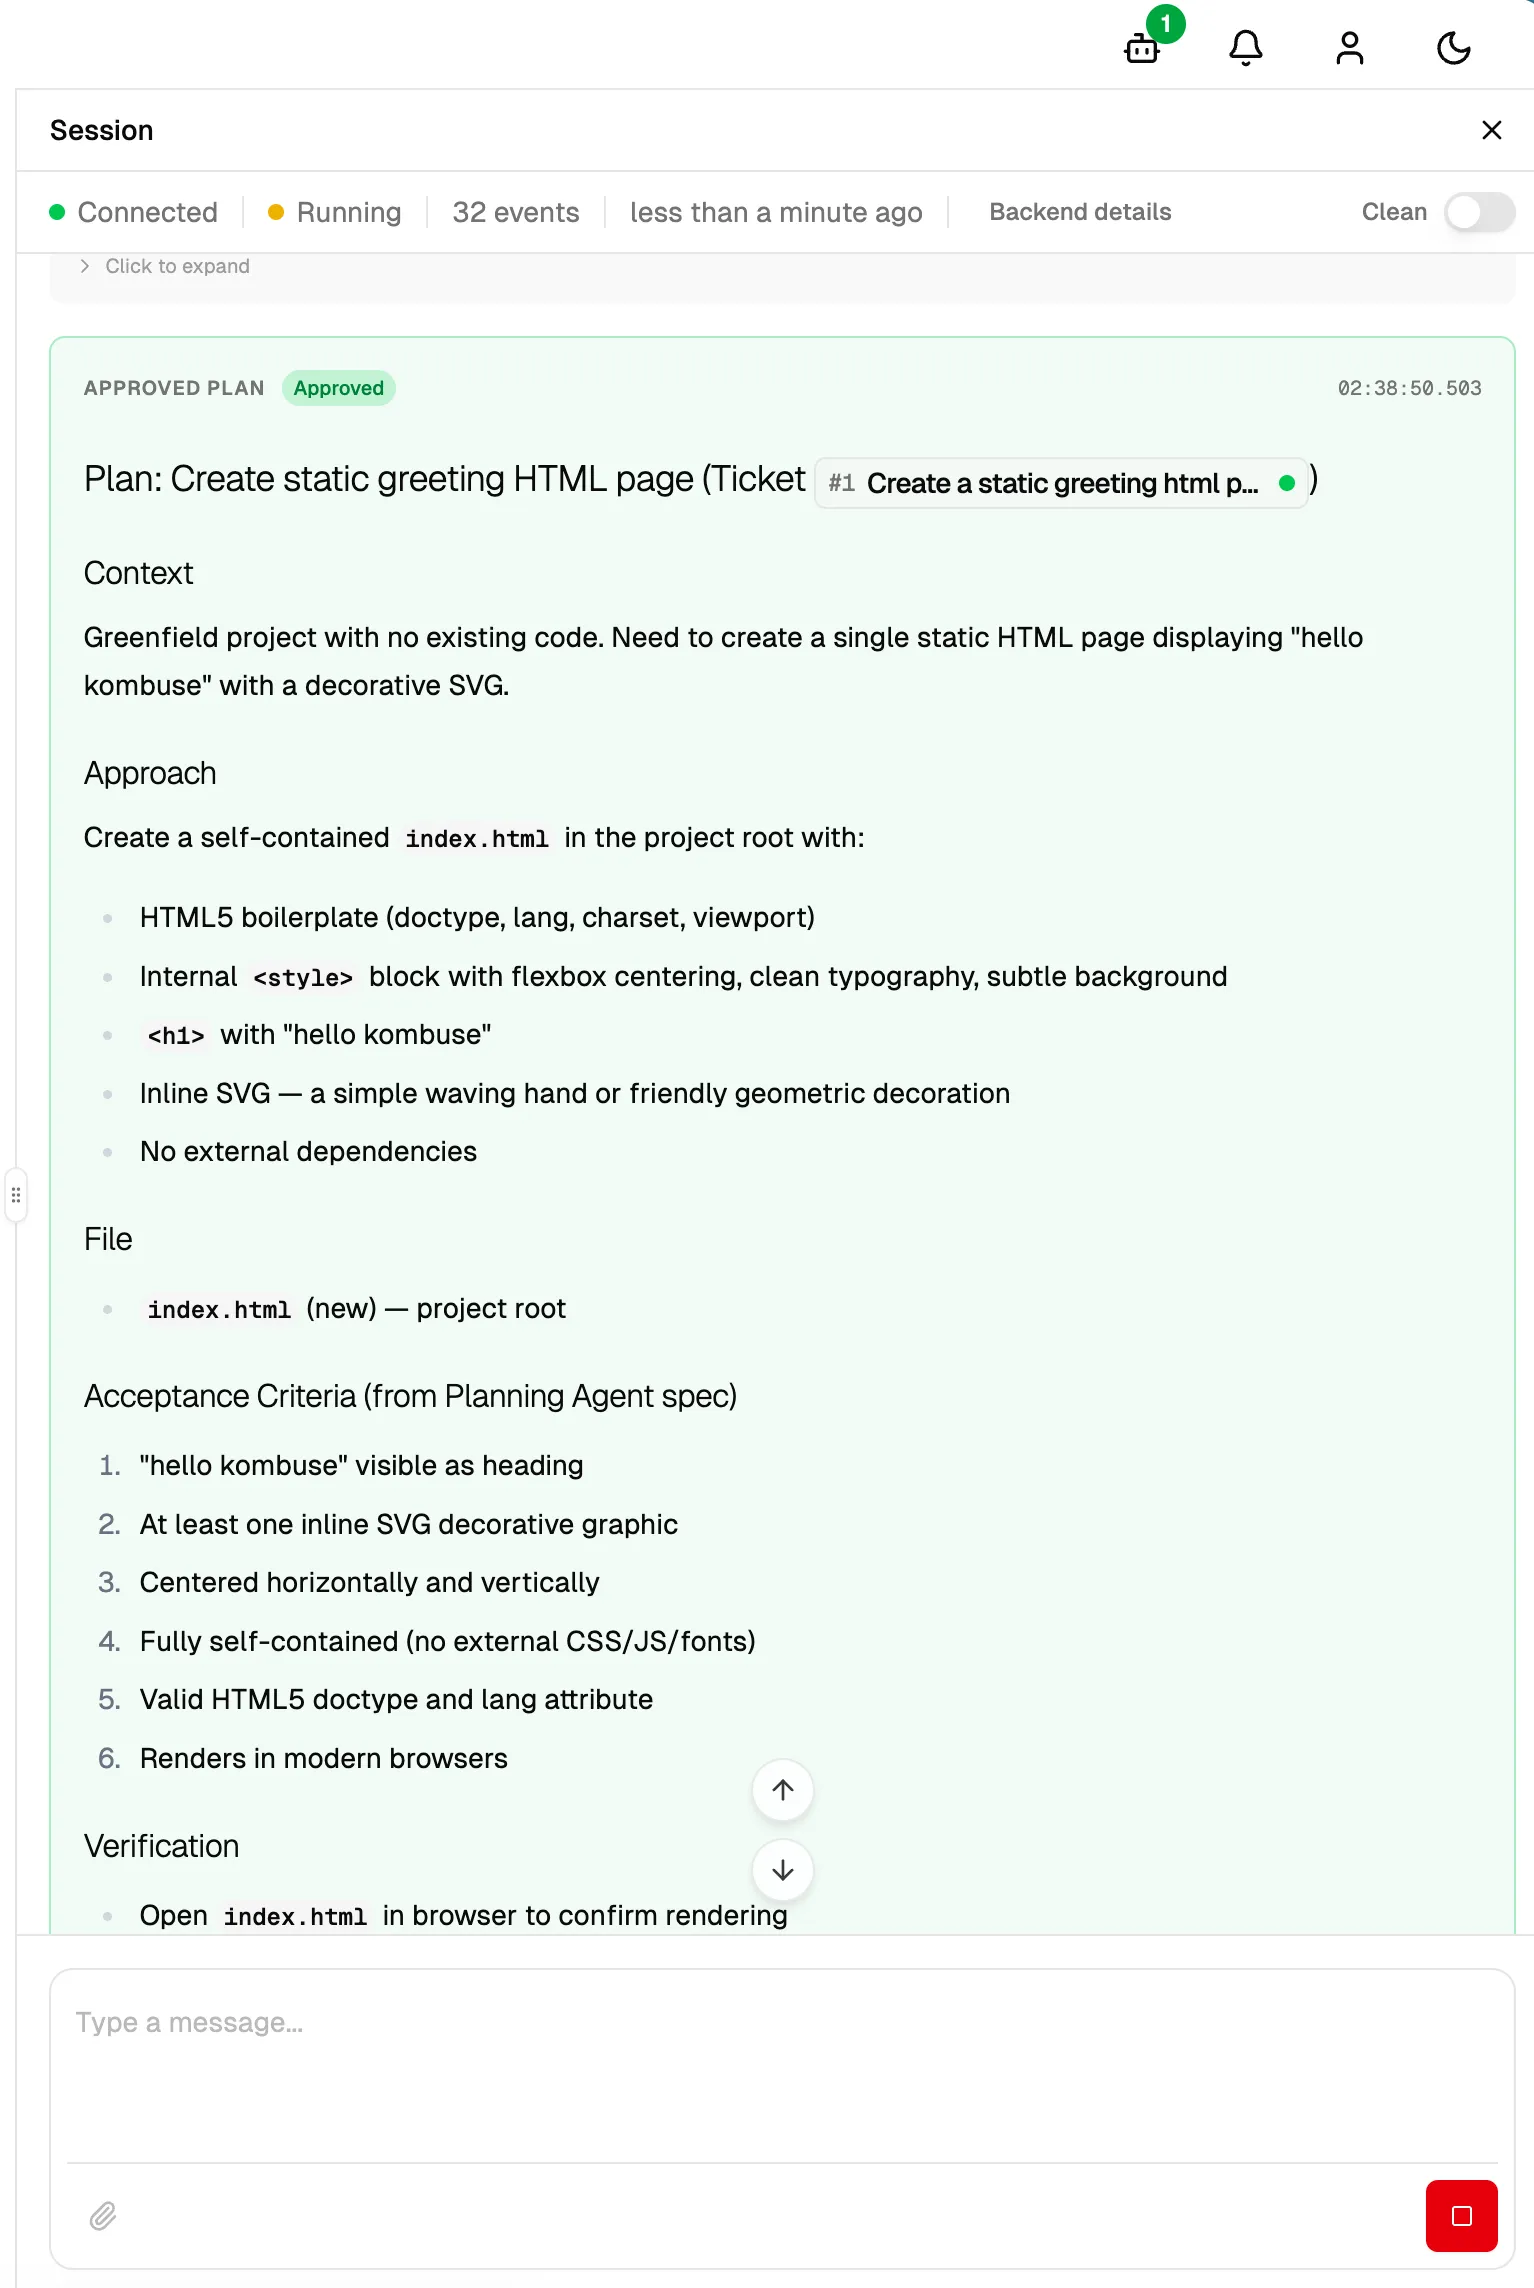
After approval, the session displays the accepted plan and the agent proceeds with implementation.
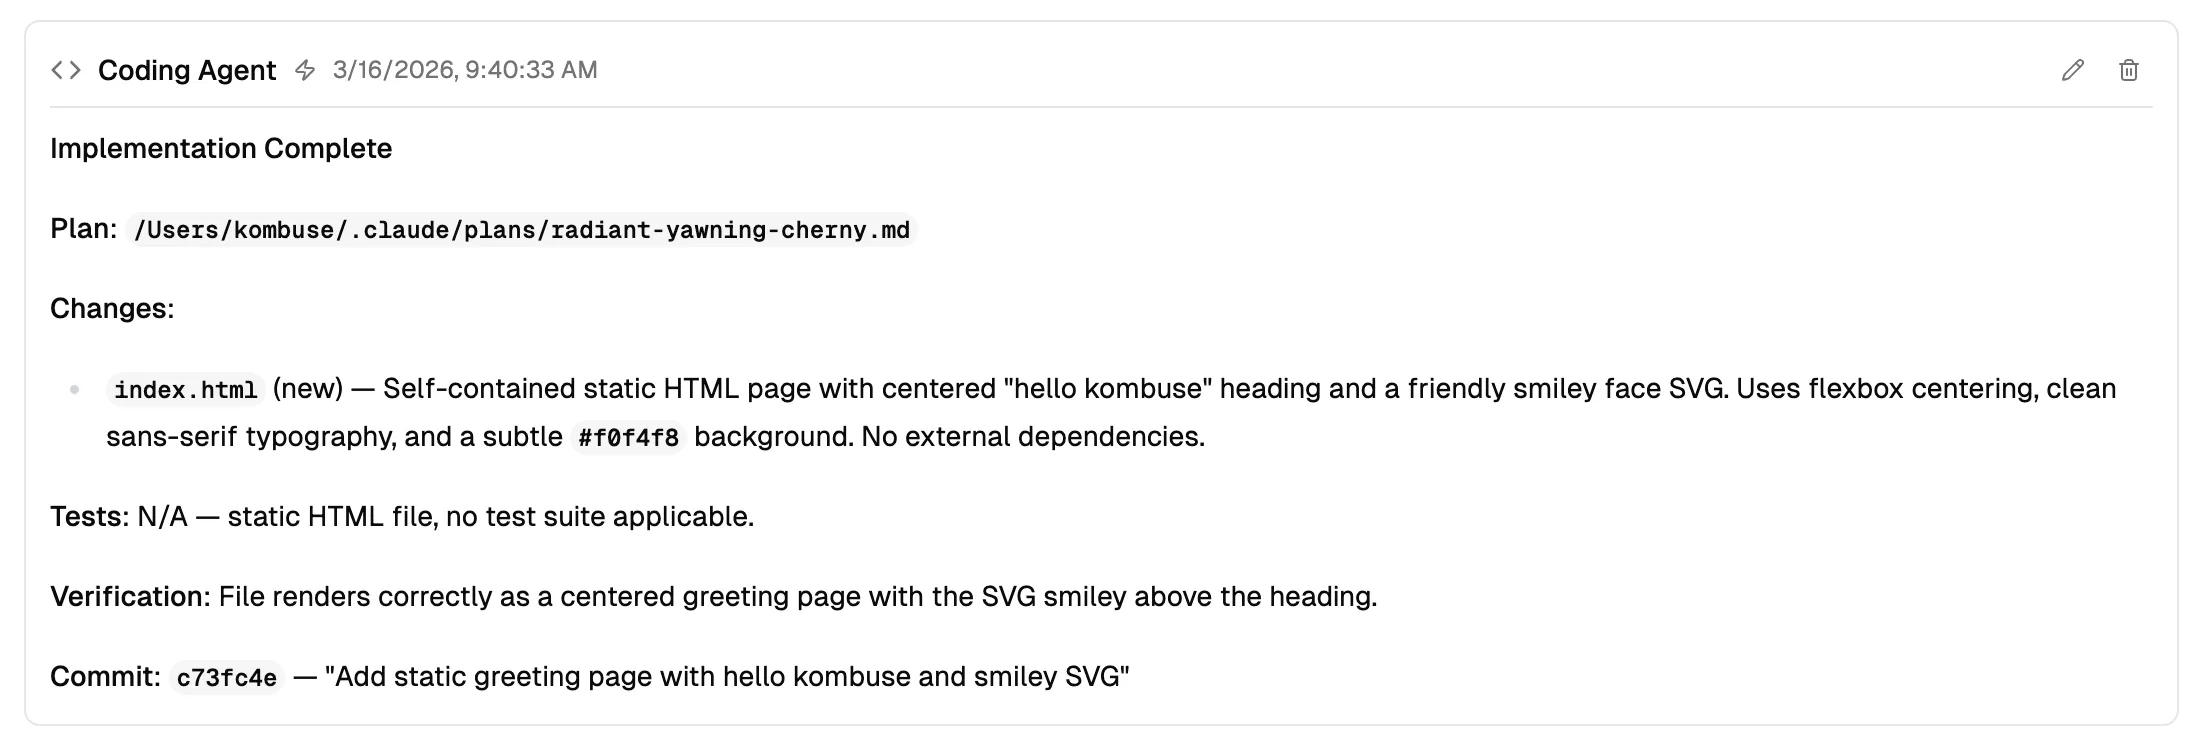
Once implementation is complete, the Coding Agent posts a comment with: the plan file path, a list of Changes made (files created or modified with descriptions), Tests, Verification steps, and the Commit hash and message. The Coding Agent can commit directly or be configured to open a PR instead (see the Version Control page).
Code Review
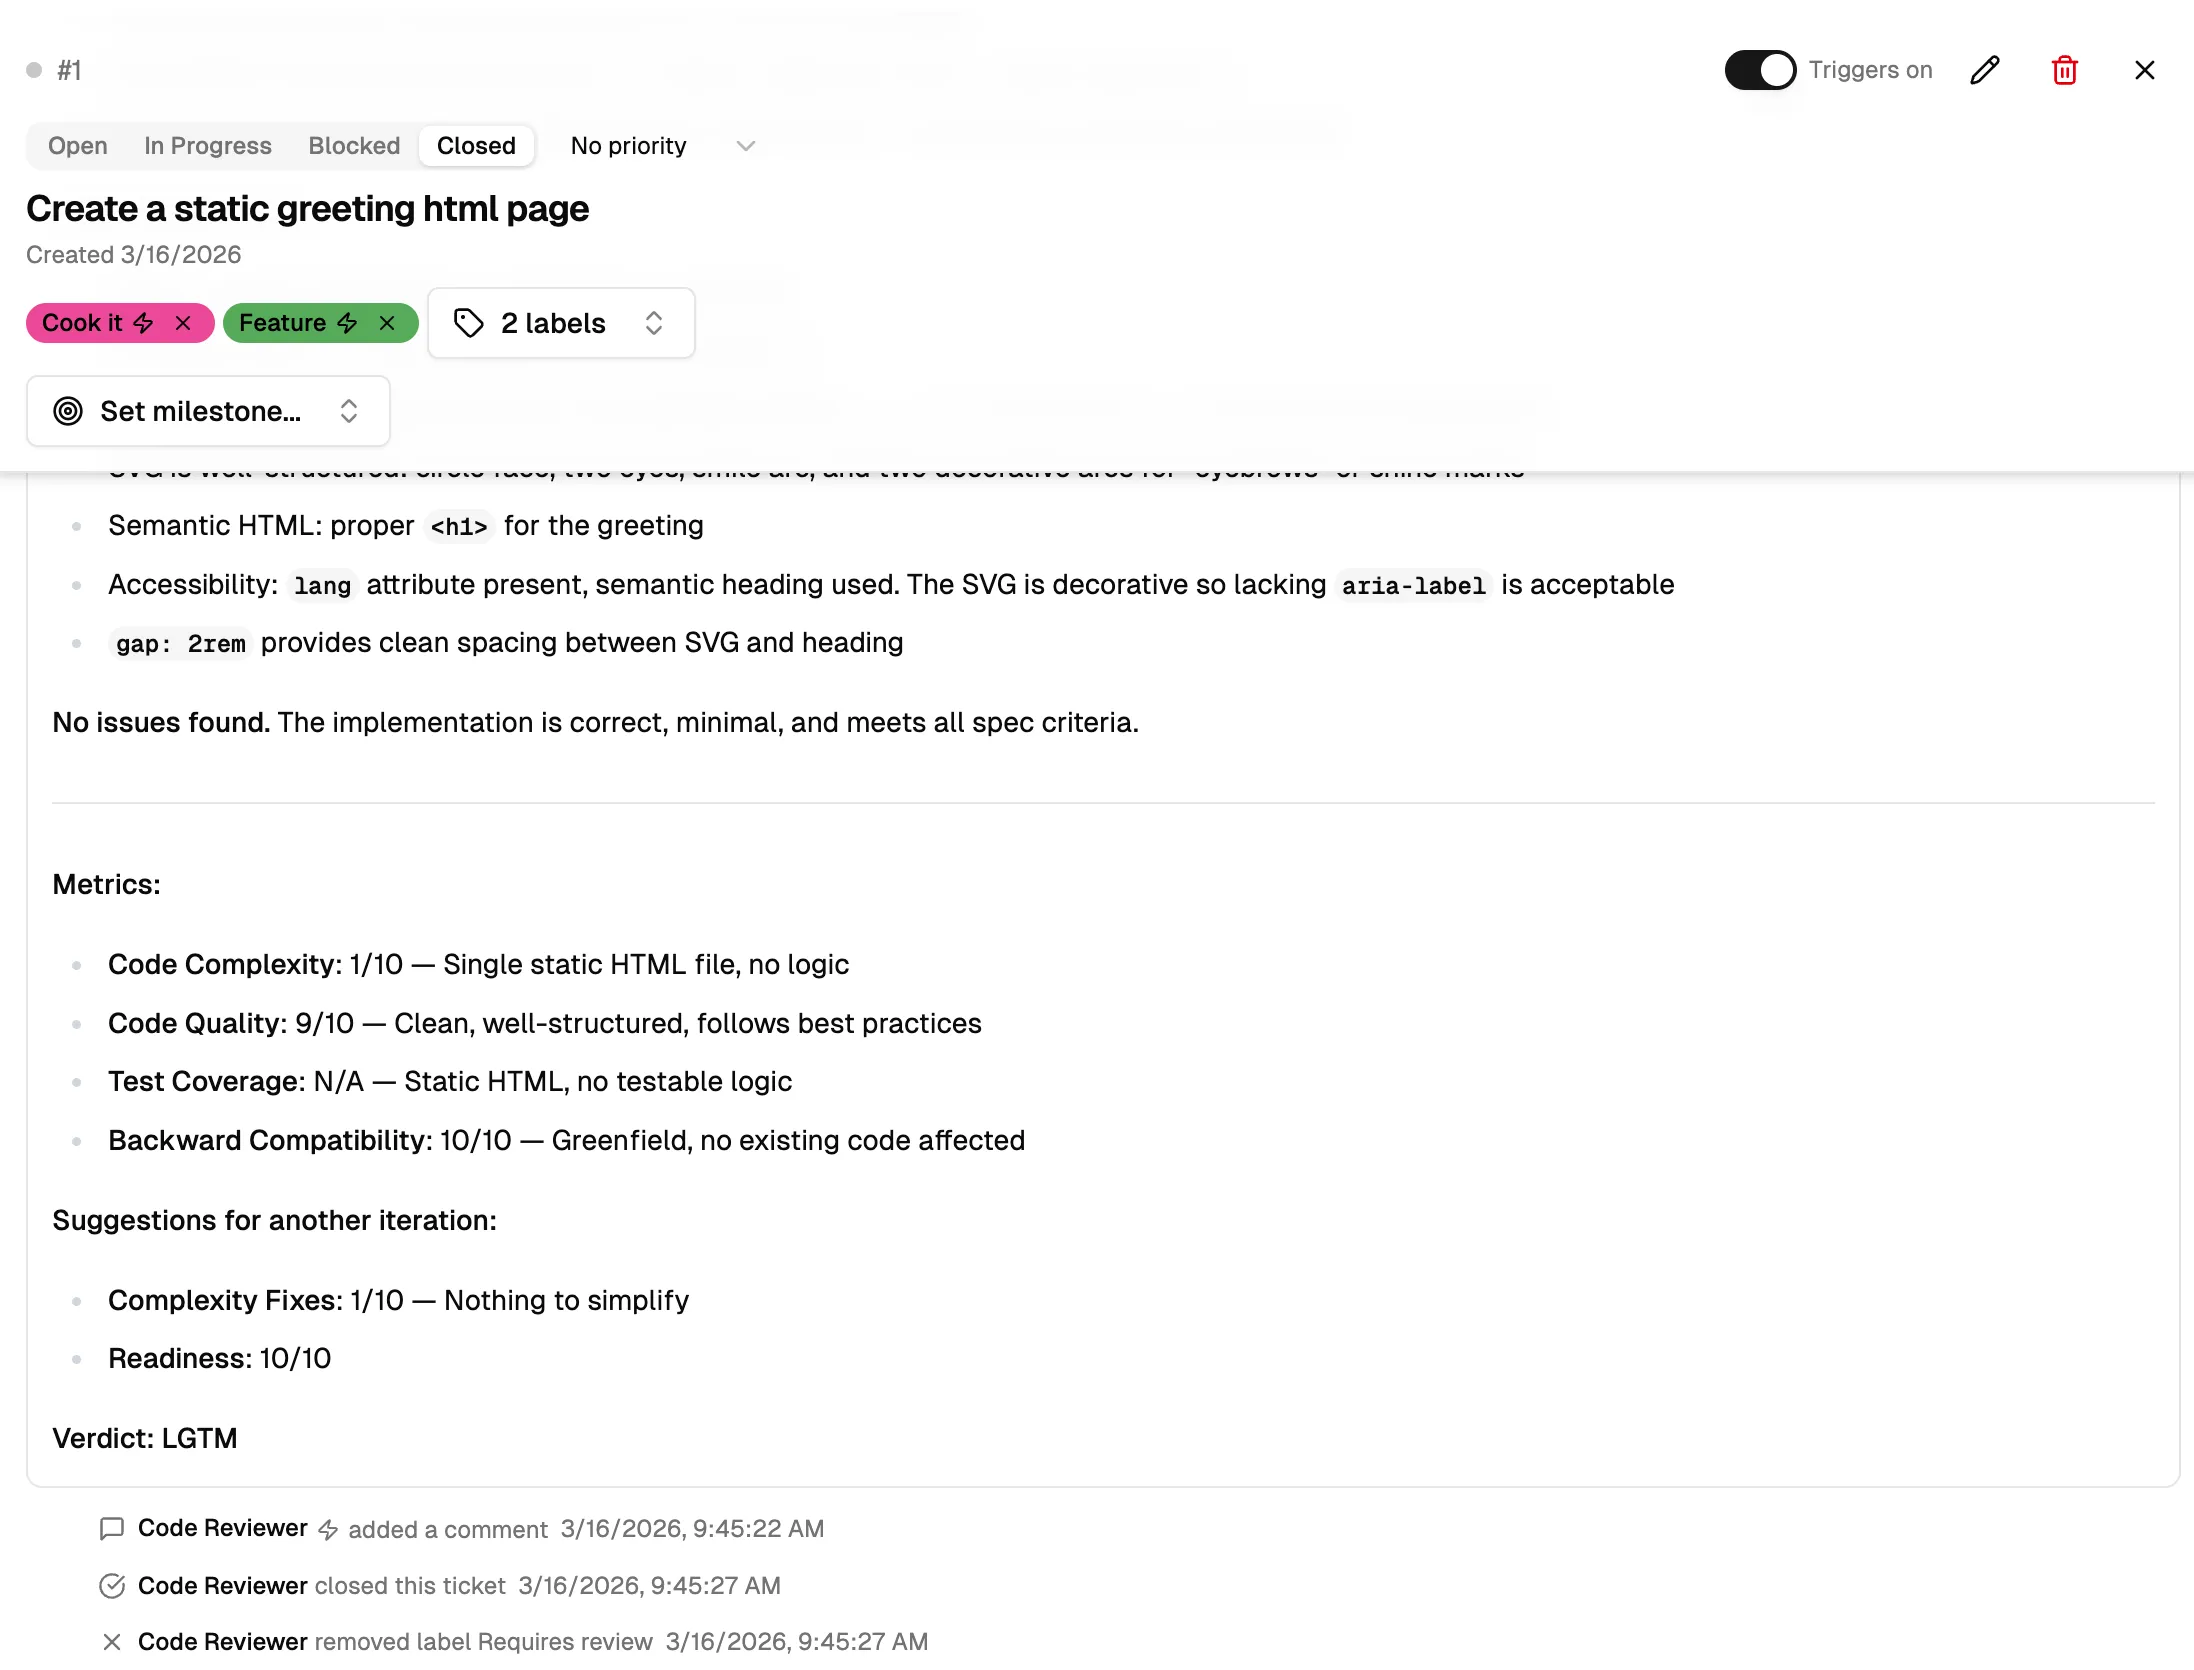
Section titled “Code Review”The Code Reviewer is the final stage of the pipeline. It checks the implementation against the acceptance criteria set out by the Planning Agent. Its comment includes: an Acceptance Criteria Check (each criterion marked Pass or Fail), Code Quality Notes (observations about code structure, patterns, and accessibility), quality Metrics on a 1–10 scale (Code Complexity, Code Quality, Test Coverage, Backward Compatibility, Complexity Fixes, Readiness), and a final Verdict (LGTM or remaining issues).
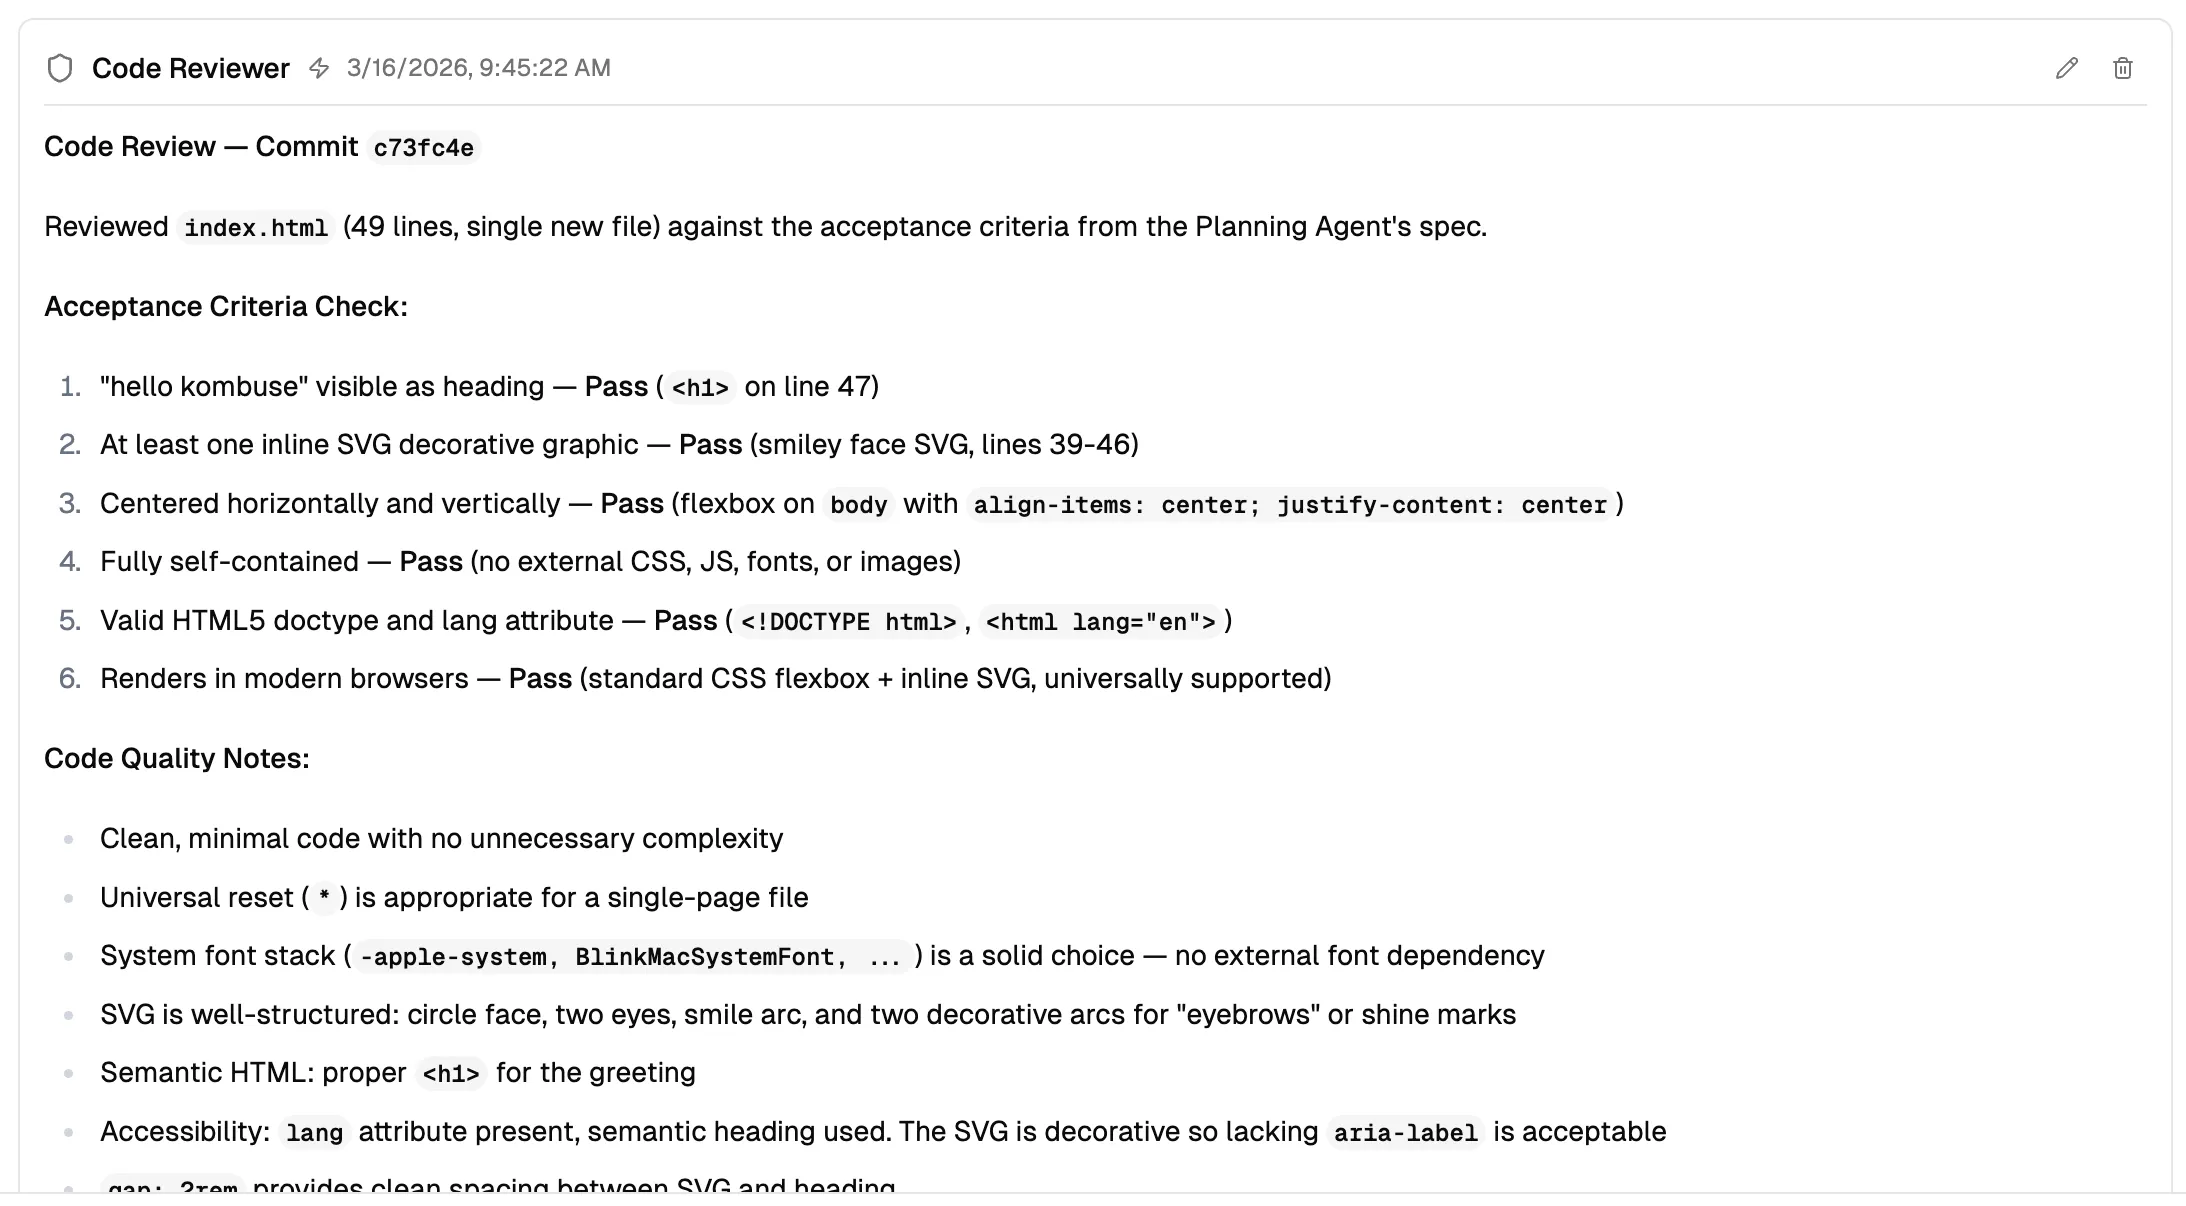
The metrics provide an at-a-glance indicator of implementation quality, making it easy to spot work that gets the job done but could be improved. If the reviewer flags concerns — missing tests, edge cases, style issues — another round of coding work may be triggered.
The Result
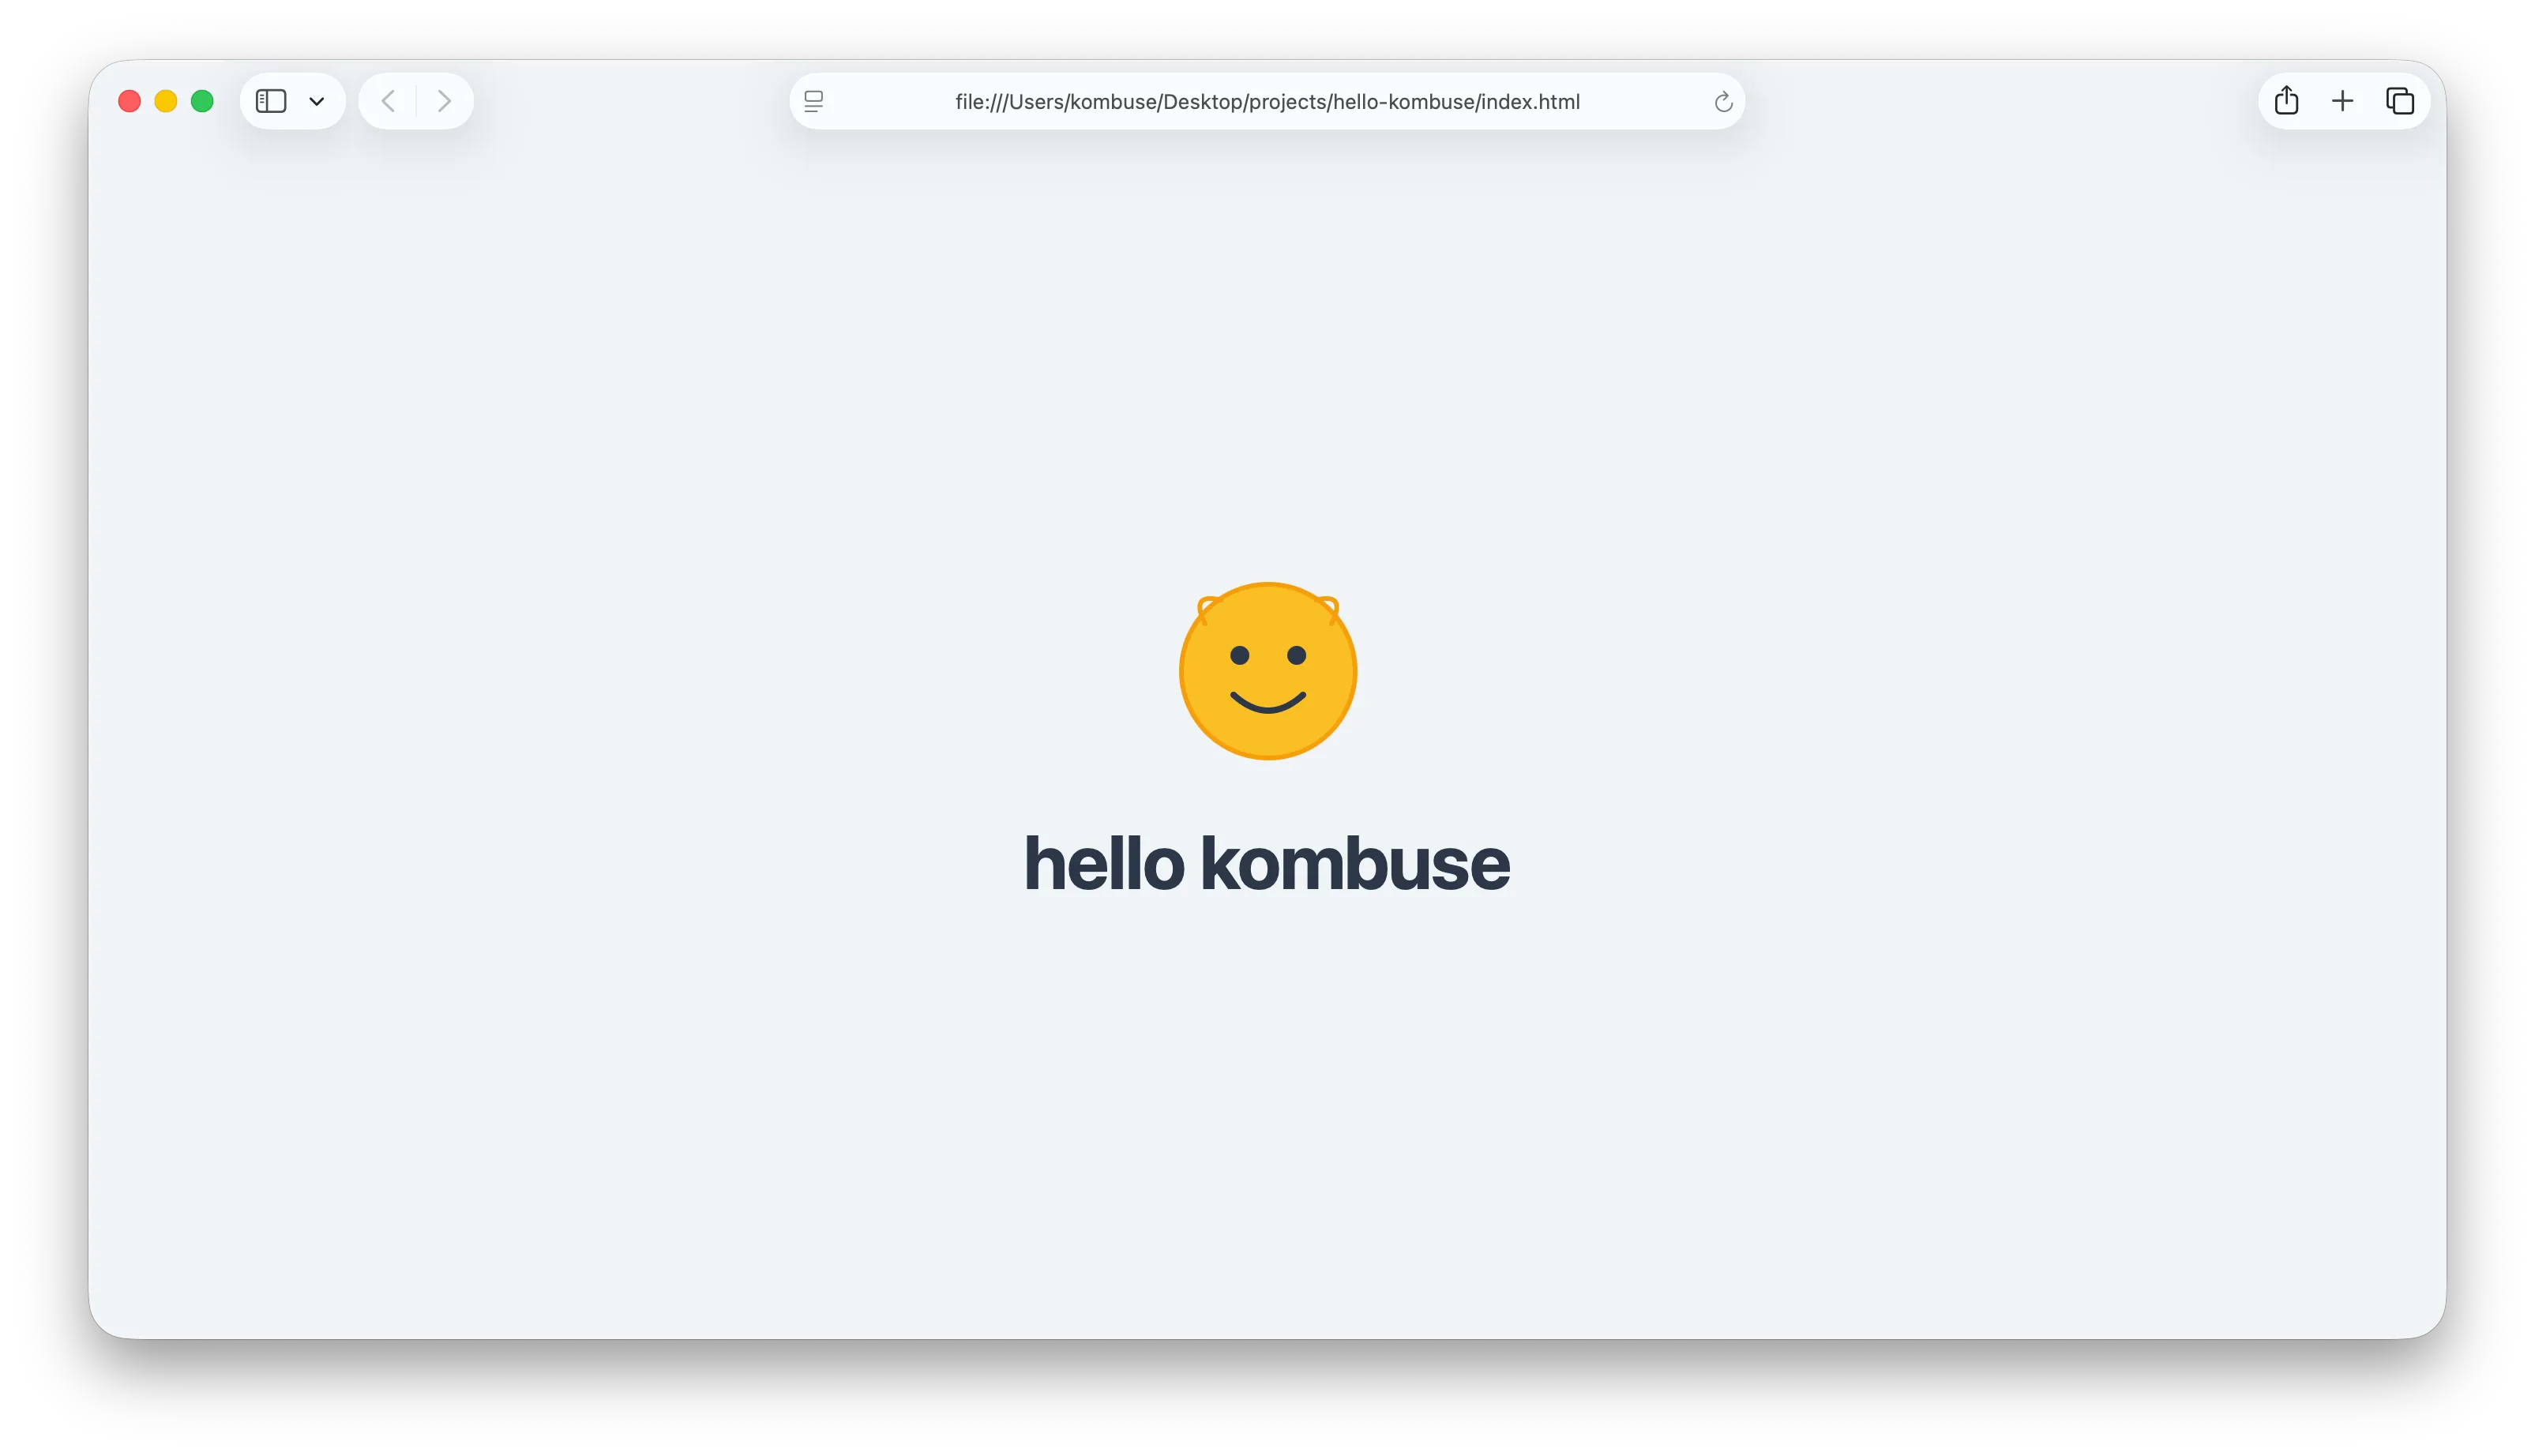
Section titled “The Result”The pipeline is complete. Opening the generated index.html in a browser shows the result — a centered “hello kombuse” heading with a friendly smiley face SVG. From a two-sentence ticket description, the agents triaged, planned, implemented, and reviewed a working page.
Congratulations — the Hello Kombuse tutorial is complete. The full agent-driven development workflow ran from ticket creation to a working implementation with just a few clicks.