Using Kombuse from MCP-Enabled Tools
Kombuse implements an MCP (Model Context Protocol) server that exposes project data — tickets, comments, agents, and the database — as tools that any compatible AI client can use. Claude Code, Codex, Cursor, Claude Desktop, and other MCP-enabled tools can all connect. This guide covers how the connection works, common workflows, and the full list of available tools.
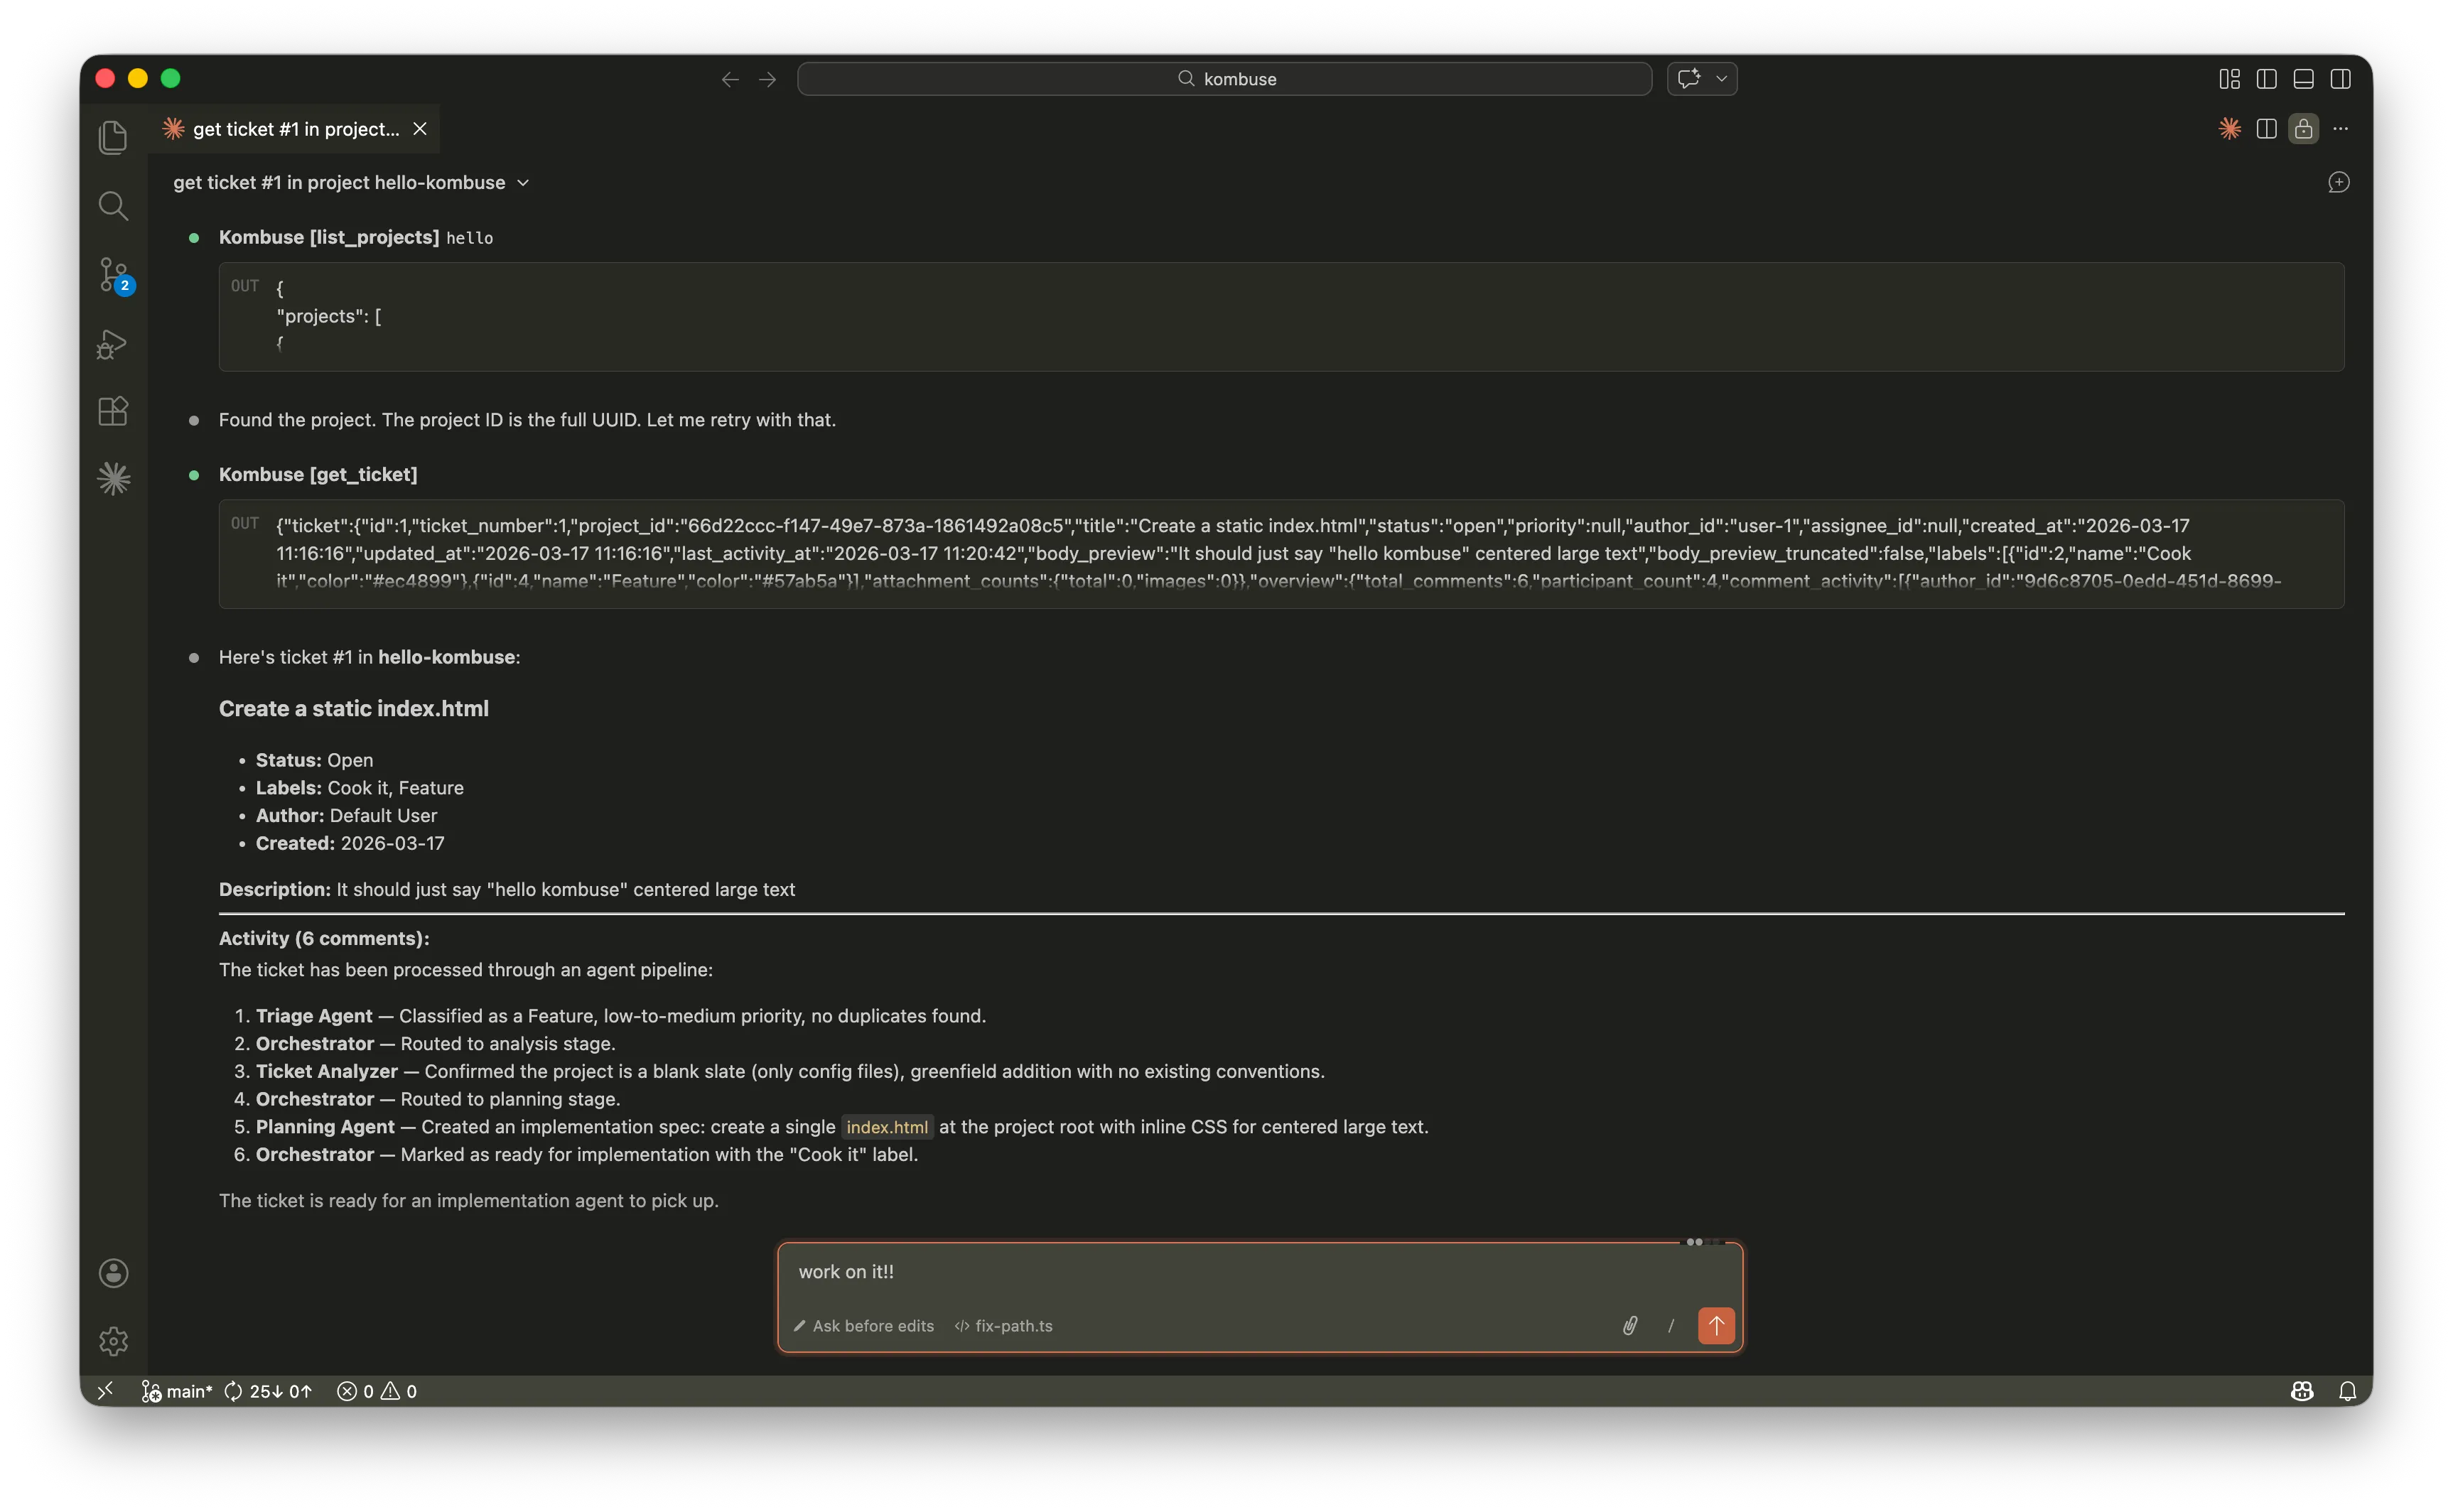
Here is what this looks like in the Claude Code VS Code extension for the prompt “get ticket #1 in project hello-kombuse” — it calls list_projects to find the project, then get_ticket to retrieve the ticket. The result includes the ticket’s status, labels, assignee, description, and a full activity log showing which agents have processed it. In this case, the ticket already includes a full implementation spec from the Planning Agent (see Your First Ticket for how that pipeline works). From here, the agent has full context and can carry out the work directly in VS Code — writing code, running tests, and commenting back on the ticket with the results. This is one of many possible workflows for using Kombuse alongside other tools.
Note: Integrations are actively developed and may change. This is just one of many possible ways to interact with Kombuse from MCP-enabled tools.
Managing Tickets
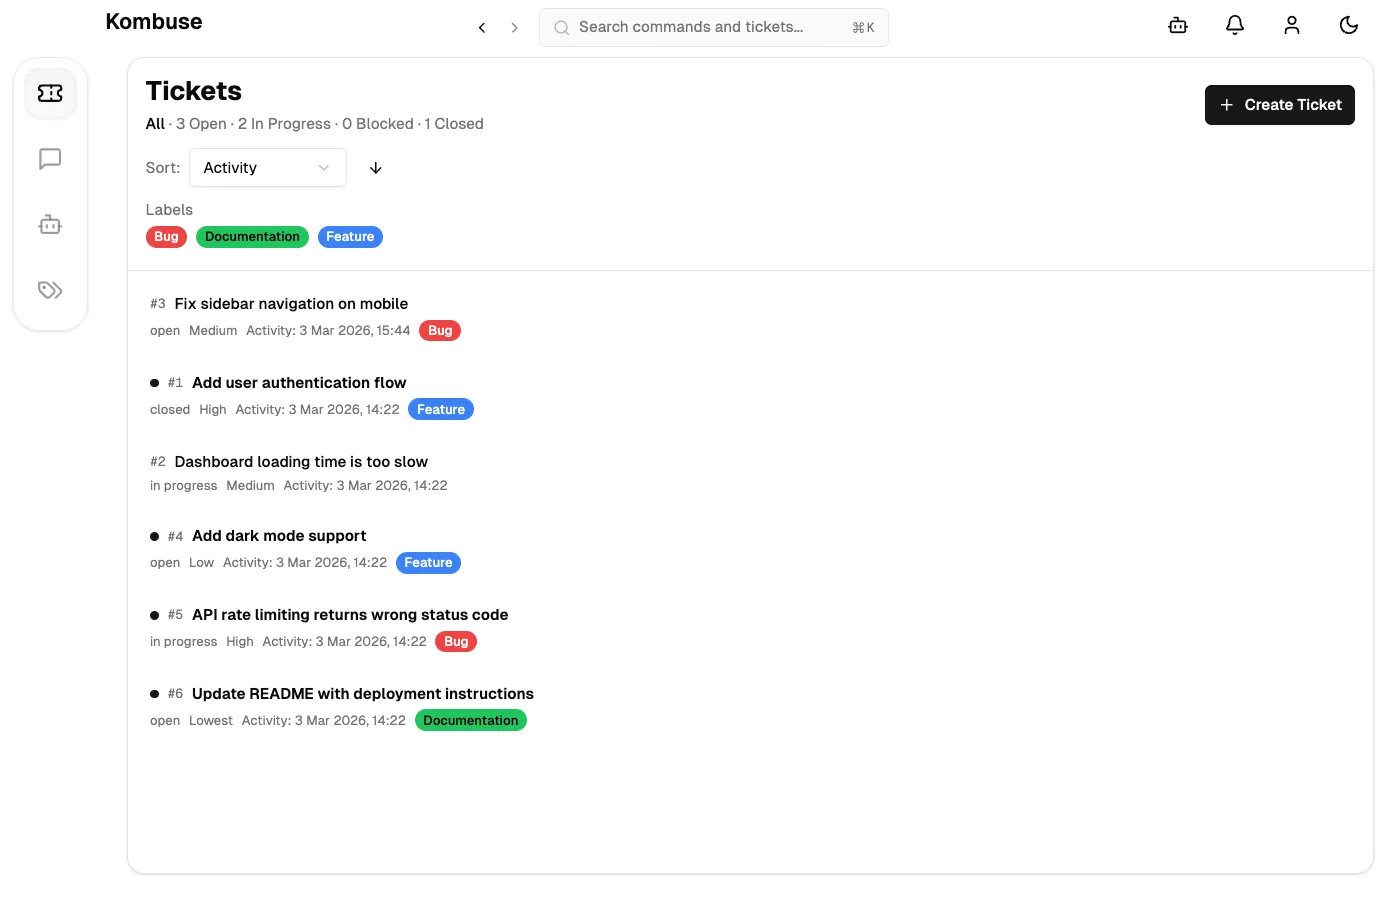
Section titled “Managing Tickets”Once connected, agents can interact with Kombuse tickets directly. Common operations include:
- Creating tickets — asking an agent to create a ticket produces a new entry with a title and description using the
create_tickettool. - Searching — full-text search across ticket titles, bodies, and comments is available via
search_tickets. - Listing and filtering —
list_ticketsaccepts filters for status, assignee, and labels to narrow results. - Updating — status, priority, labels, and assignees can all be changed using
update_ticket.
Tickets created from MCP tools appear in Kombuse alongside tickets created through the UI. All standard ticket features work — statuses, priorities, labels, and assignees.
Working with Comments and Agents
Section titled “Working with Comments and Agents”Agents can read ticket comments using get_ticket and post responses using add_comment. Comments support @agent mentions and #ticket references.
A typical workflow: a user describes an issue in a ticket, then mentions an agent in a comment to investigate. The agent reads the ticket context and all previous comments, analyzes the codebase, and posts its findings. The user reviews and can mention another agent to implement the fix.
When an agent is configured with triggers in Kombuse, mentioning it in a ticket comment automatically starts a new agent session. The agent receives the full ticket context and can read all prior comments before responding. This creates a natural conversation loop where users and agents collaborate directly on tickets.
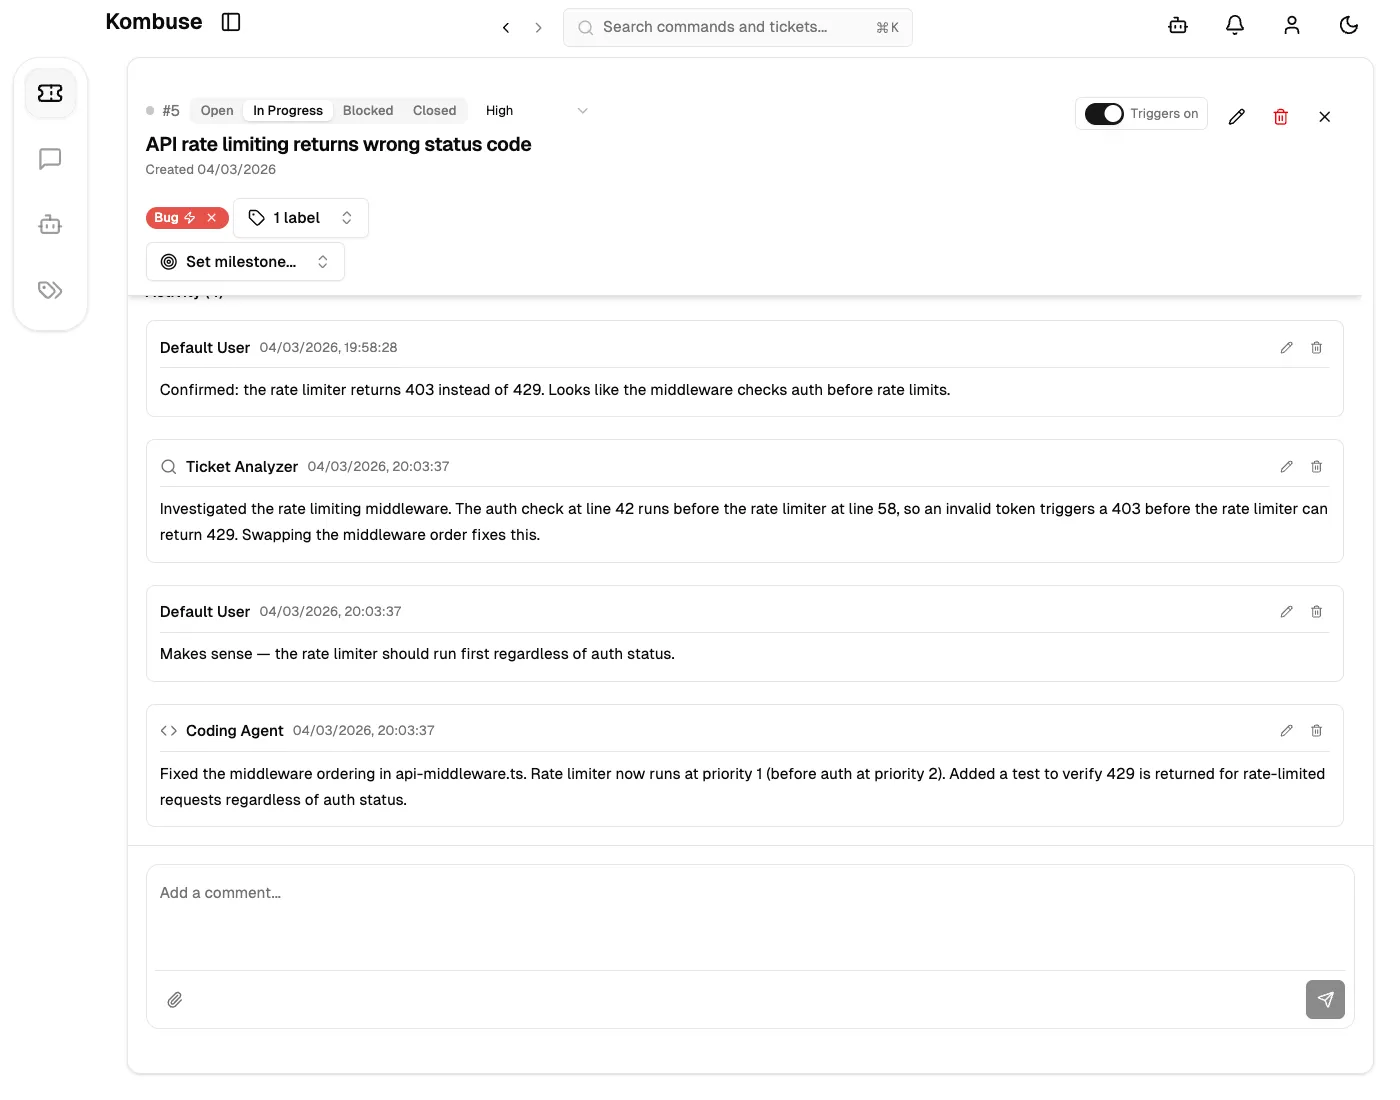
Agents include a kombuse_session_id when posting comments, which lets Kombuse track and display which session produced each response.
Available Tools
Section titled “Available Tools”Kombuse exposes MCP tools across six categories. Desktop tools are only available when running the desktop app.
Tickets and Projects
Section titled “Tickets and Projects”| Tool | Description |
|---|---|
create_ticket | Create a new ticket with title, description, and optional fields |
get_ticket | Read a ticket with comments, labels, and metadata (25 KB response cap) |
list_tickets | List tickets with filtering by status, assignee, labels, and sorting |
search_tickets | Full-text search across ticket titles, bodies, and comments |
update_ticket | Update status, priority, labels, assignee, title, or body |
list_projects | List all projects in the workspace |
list_labels | List all labels available in a project |
Comments
Section titled “Comments”| Tool | Description |
|---|---|
add_comment | Add a comment to a ticket (supports @profile and #ticket mentions) |
get_ticket_comment | Read a single comment by ID |
update_comment | Edit a previously posted comment |
Agents
Section titled “Agents”| Tool | Description |
|---|---|
list_agents | List agents with optional project and enabled/disabled filters |
create_agent | Create a new agent with system prompt, permissions, and config |
update_agent | Update an agent’s prompt, permissions, config, or enabled state |
Database
Section titled “Database”| Tool | Description |
|---|---|
query_db | Execute read-only SQL queries (SELECT only, max 500 rows) |
list_tables | List all tables and views in the database |
describe_table | Show the schema of a specific table with columns and foreign keys |
| Tool | Description |
|---|---|
list_api_endpoints | Discover all available Kombuse REST API endpoints |
call_api | Call a GET endpoint on the Kombuse API |
Desktop (desktop app only)
Section titled “Desktop (desktop app only)”| Tool | Description |
|---|---|
list_windows | List all open Kombuse desktop windows |
open_window | Open a new desktop window, optionally navigating to a path |
navigate_to | Navigate an existing window to a new path |
execute_js | Execute JavaScript in an isolated desktop window |
wait_for | Wait for a CSS selector to appear in a window’s DOM |
take_screenshot | Capture a screenshot of a window as PNG |
save_screenshot | Capture and save a screenshot to disk |
close_window | Close a desktop window |
Anonymous Write Access
Section titled “Anonymous Write Access”By default, external MCP connections are read-only. Read tools such as list_tickets, search_tickets, get_ticket, query_db, list_agents, list_tables, and list_api_endpoints work without any special permissions.
Write operations — create_ticket, add_comment, update_ticket, update_comment, create_agent, update_agent — are blocked unless anonymous write access is enabled.
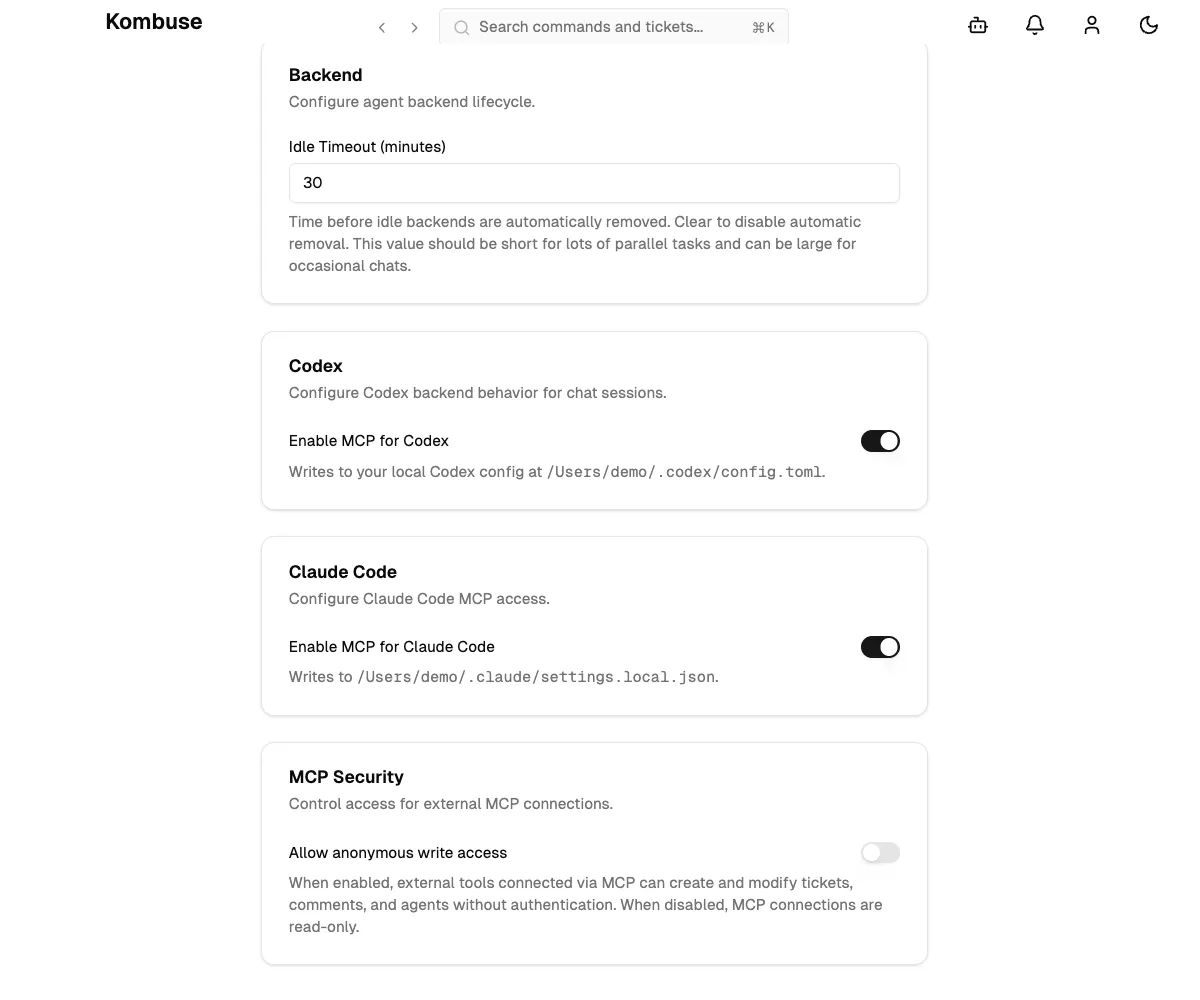
The “Allow anonymous write access” toggle is in Settings → Chat tab → MCP Security. When enabled, external tools connected via MCP can create and modify tickets, comments, and agents without authentication. When disabled, MCP connections are read-only. The setting defaults to disabled.
Enable it when AI agents need to create tickets, post comments, or manage agents through MCP. Disable it to prevent unintended modifications from external tools.
Enabling MCP in Settings
Section titled “Enabling MCP in Settings”The Settings page includes three MCP-related cards in the Chat tab. These automate configuration for Claude Code and Codex specifically.
-
Codex — the “Enable MCP for Codex” toggle writes an MCP server entry to
~/.codex/config.toml. Toggling this setting stops all active Codex backends. -
Claude Code — the “Enable MCP for Claude Code” toggle writes an MCP server entry to
~/.claude/settings.local.json. This applies globally to all Claude Code sessions. Toggling this setting stops all active Claude Code backends. -
MCP Security — the “Allow anonymous write access” toggle controls whether external MCP connections can create and modify data.
For other MCP clients (Claude Desktop, Cursor), manual configuration is required — see Manual Initialization below.
How the Bridge Works
Section titled “How the Bridge Works”Kombuse runs an MCP endpoint at /mcp on its local HTTP server (server name: kombuse, version 0.1.0). A lightweight bridge process (mcp-bridge.mjs) translates between the stdio transport that MCP clients expect and that HTTP endpoint. When the Kombuse desktop app starts, it writes the server port to ~/.kombuse/server-port; the bridge watches this file and forwards JSON-RPC messages to the running server.
Manual Initialization
Section titled “Manual Initialization”Kombuse automatically sets up the MCP connection when a project is created or imported. If the connection is missing or needs to be recreated, open the project in Kombuse and navigate to project settings. The Initialize Project section provides a button to regenerate the configuration files.
Clicking the button creates four items in the project directory:
.mcp.json— the MCP server configuration that tells MCP-enabled tools how to connect to KombuseAGENTS.md— a template for guiding AI agents working in the project.kombuse/— local config and plugin storage directory- A
.gitignoreentry — keeps.kombuse/out of version control
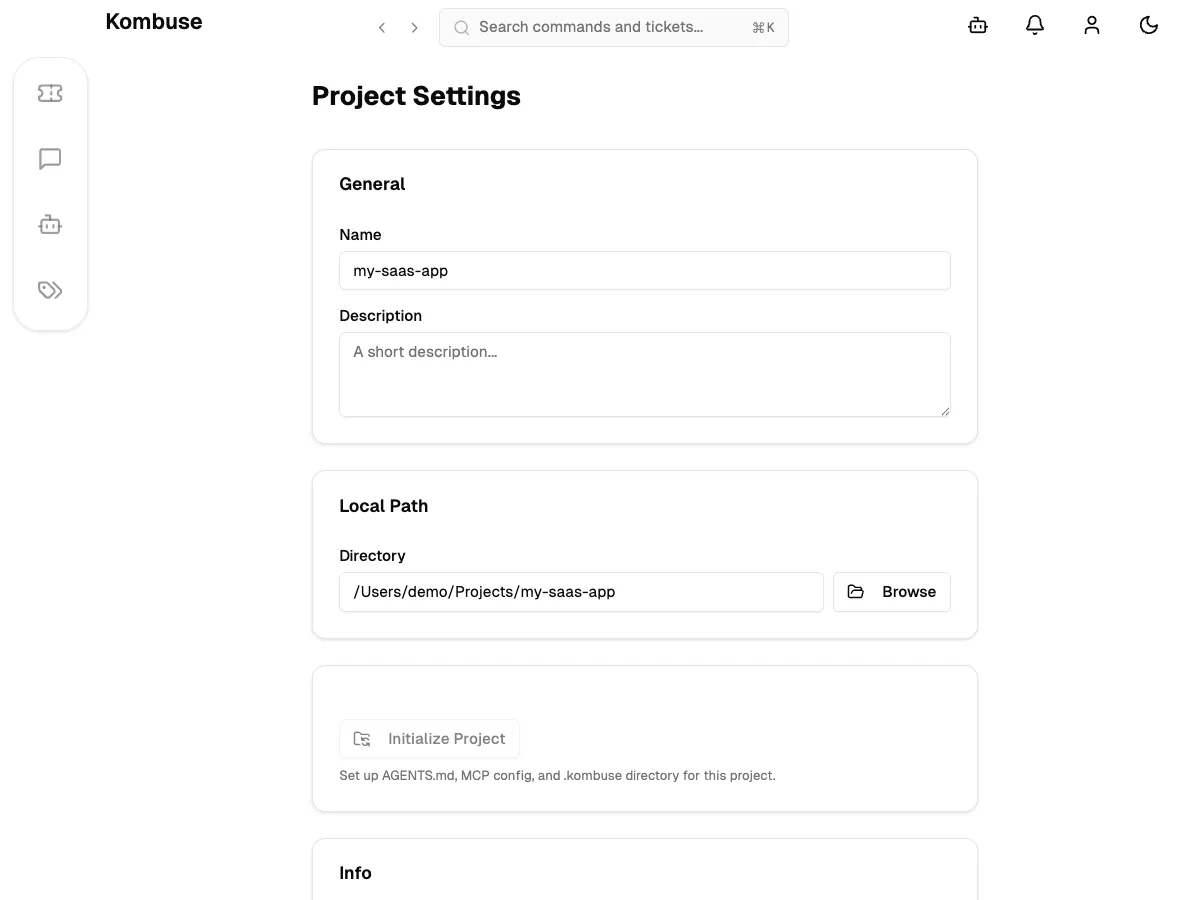
The generated .mcp.json points MCP-enabled tools to the Kombuse MCP bridge:
{ "mcpServers": { "kombuse": { "type": "stdio", "command": "node", "args": ["/Applications/Kombuse.app/Contents/Resources/package/server/mcp-bridge.mjs"] } }}The path is resolved automatically based on where Kombuse is installed. After initialization, any MCP-enabled tool started in the project directory automatically connects to Kombuse.
Claude Desktop — the same mcpServers block is added to claude_desktop_config.json.
Cursor — the server entry is added to .cursor/mcp.json in the project directory, or configured through Cursor’s MCP settings UI.
See also
Section titled “See also”- API Reference — full REST API and WebSocket documentation
- Getting Started — local-first agent management and issue tracking