Projects
Projects are the top-level organizational unit in Kombuse. Each project has its own ticket tracker, agents, and configuration, and can be linked to a local code repository on disk.
The Home Page
Section titled “The Home Page”The home page is the central hub for all projects. The Your Projects section displays project cards in a responsive grid. Each card shows the project name and its local directory path. Clicking a card opens that project’s ticket list.
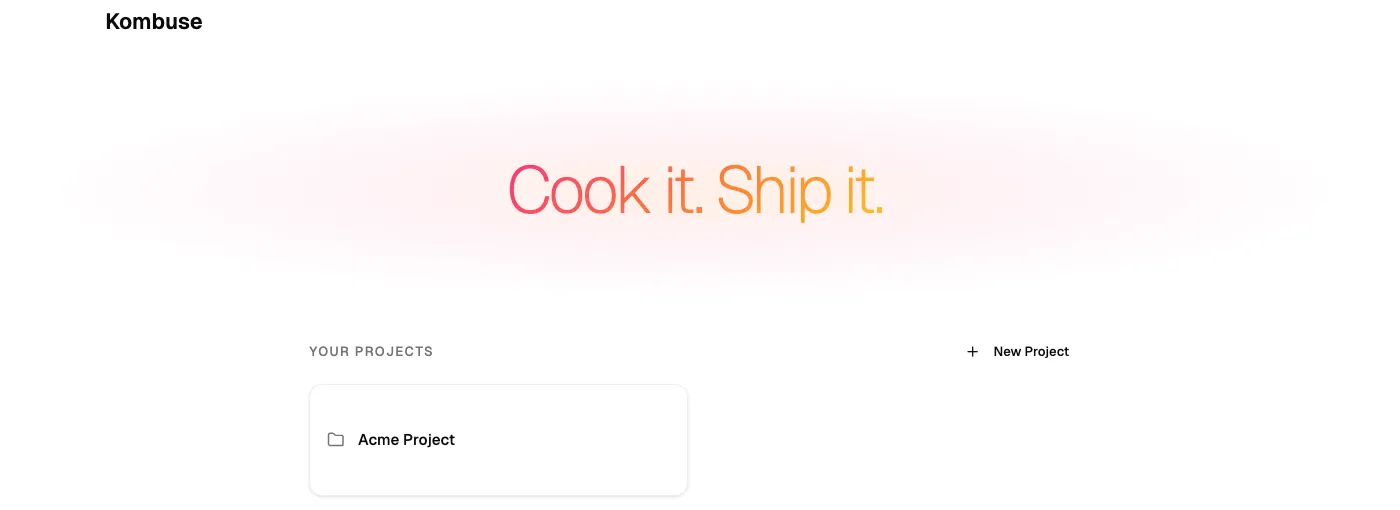
The New Project button in the section header opens the create project dialog.
Creating a New Project
Section titled “Creating a New Project”A new project is created by clicking New Project on the home page. This opens the Create Project dialog.
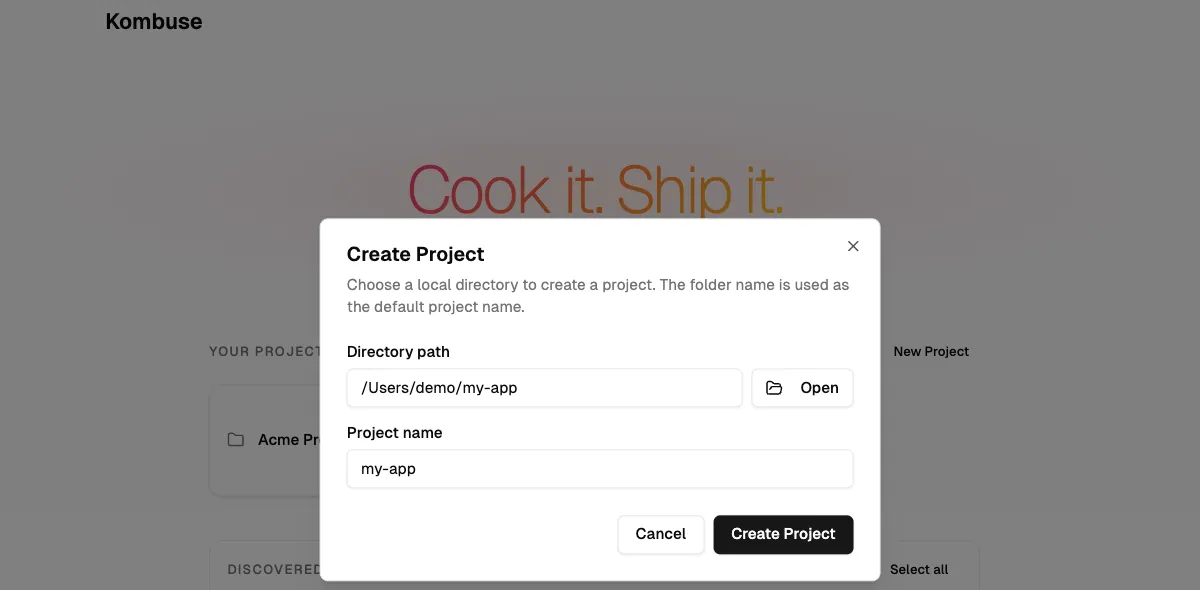
The dialog has two fields:
- Directory path — the local folder for the project. On desktop, an Open button opens a native file picker. In browser mode, the path is typed manually.
- Project name — auto-populated from the folder name when a directory path is entered. The name can be edited independently.
Clicking Create Project saves the entry. Clicking Cancel closes the dialog without making changes.
Importing from Claude Code
Section titled “Importing from Claude Code”Kombuse automatically scans for Claude Code projects on the machine. Projects that have been used with Claude Code appear in the Discovered from Claude Code section on the home page. Each entry shows the project name, directory path, session count, message count, and current git branch (if available).
Projects are selected using the checkboxes, then imported by clicking Import. A Select all button selects all discovered entries at once. The Import button shows the count of selected projects — for example, Import (3). Once imported, projects move from the discovered list to the Your Projects grid above.
If no Claude Code sessions or projects are found, the home page shows an empty state: “No projects discovered. Use Claude Code in a project directory to get started, or create a project manually.”

Project Settings
Section titled “Project Settings”Project settings are accessed by opening the command palette with ⌘K and selecting Go to Project Settings.
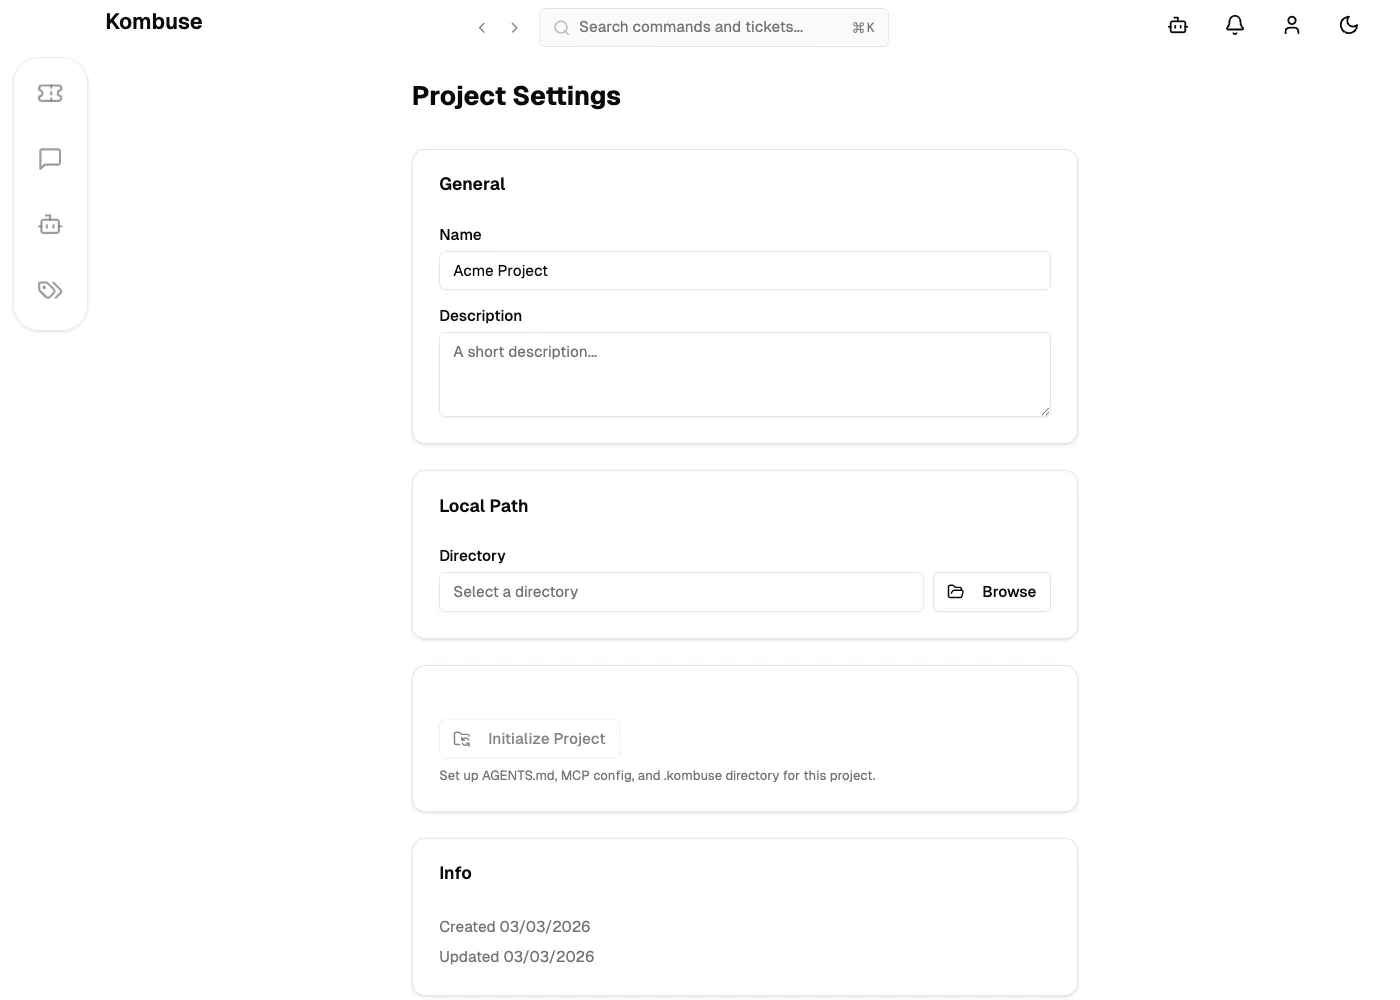
The settings page has four cards:
- General — edit the project Name and Description.
- Local Path — set the project Directory to link it to a local code repository. On desktop, the Browse button opens a native file picker.
- Initialize Project — write configuration files to the project directory (see the next section).
- Info — displays when the project was created and last updated.
Clicking Save Changes at the bottom applies any modifications to Name, Description, or Directory.
Initializing a Project
Section titled “Initializing a Project”The Initialize Project button writes configuration files to the linked project directory. A local path must be set before initialization is available — the button is disabled until a directory is configured. The button description reads: “Set up AGENTS.md, MCP config, and .kombuse directory for this project.”

Initialization creates four items:
| File | Purpose |
|---|---|
| AGENTS.md | Guidance document for AI coding agents working in the project |
| .mcp.json | MCP bridge configuration so Claude Code can connect to Kombuse |
| .kombuse/ | Directory for Kombuse plugins and local configuration |
| .gitignore | Updated to exclude the .kombuse/ directory from version control |
After clicking Initialize, each file displays a status indicator: a green checkmark for created, a gray icon for skipped (already exists), or red for errors. All operations are idempotent — safe to run multiple times without side effects.
Deleting a Project
Section titled “Deleting a Project”Projects can be deleted through the REST API. There is no delete button in the Kombuse UI.
To delete a project, send a DELETE request to /api/projects/:id, where :id is the project’s UUID. Project deletion is permanent and cannot be undone.
Deletion removes the project entry from Kombuse — it does not delete any files or directories on disk.
See also
Section titled “See also”- Tickets — create, organize, and track work with tickets
- Settings & Configuration — customize appearance, defaults, and advanced settings