Agents
Agents are AI-powered assistants that respond to ticket events and chat messages. The pre-configured agents that come with the default plugin can be used as-is, or custom agents can be created to tailor the workflow.
The Agents Page
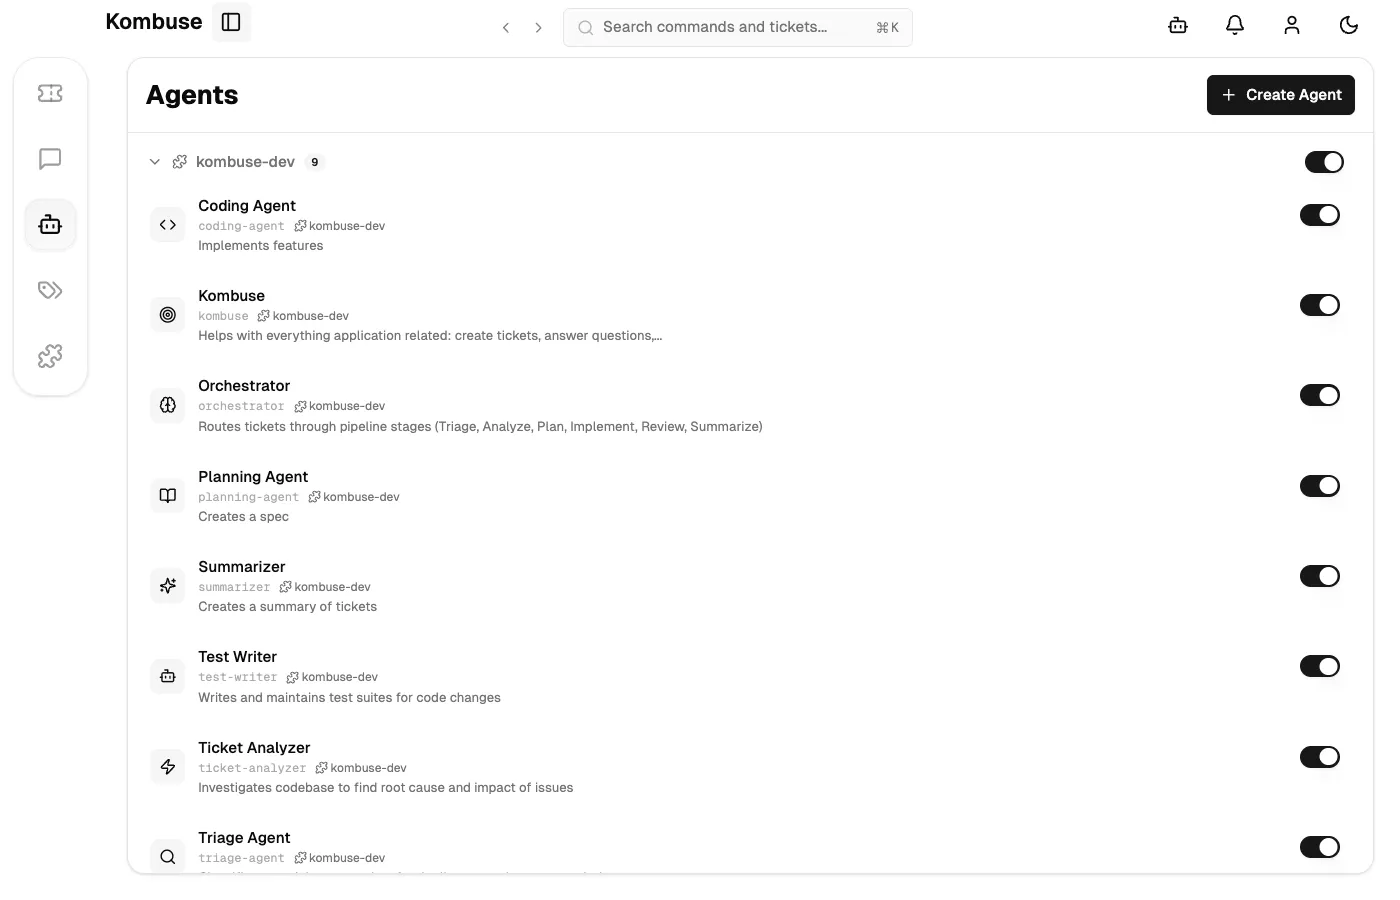
Section titled “The Agents Page”The Agents page is accessible from the project sidebar and shows all agents available in the project. Agents are grouped by the plugin they belong to. Each agent shows its name, avatar, and an enable/disable toggle. Enabled agents can respond to triggers and appear in the chat agent picker.
Kombuse ships with a default plugin that includes pre-configured agents for triage, planning, coding, and code review. If no agents appear yet, the Install button in the onboarding prompt installs the default plugin. Custom agents can also be created from scratch using the Create Agent button in the top-right corner.
Creating an Agent
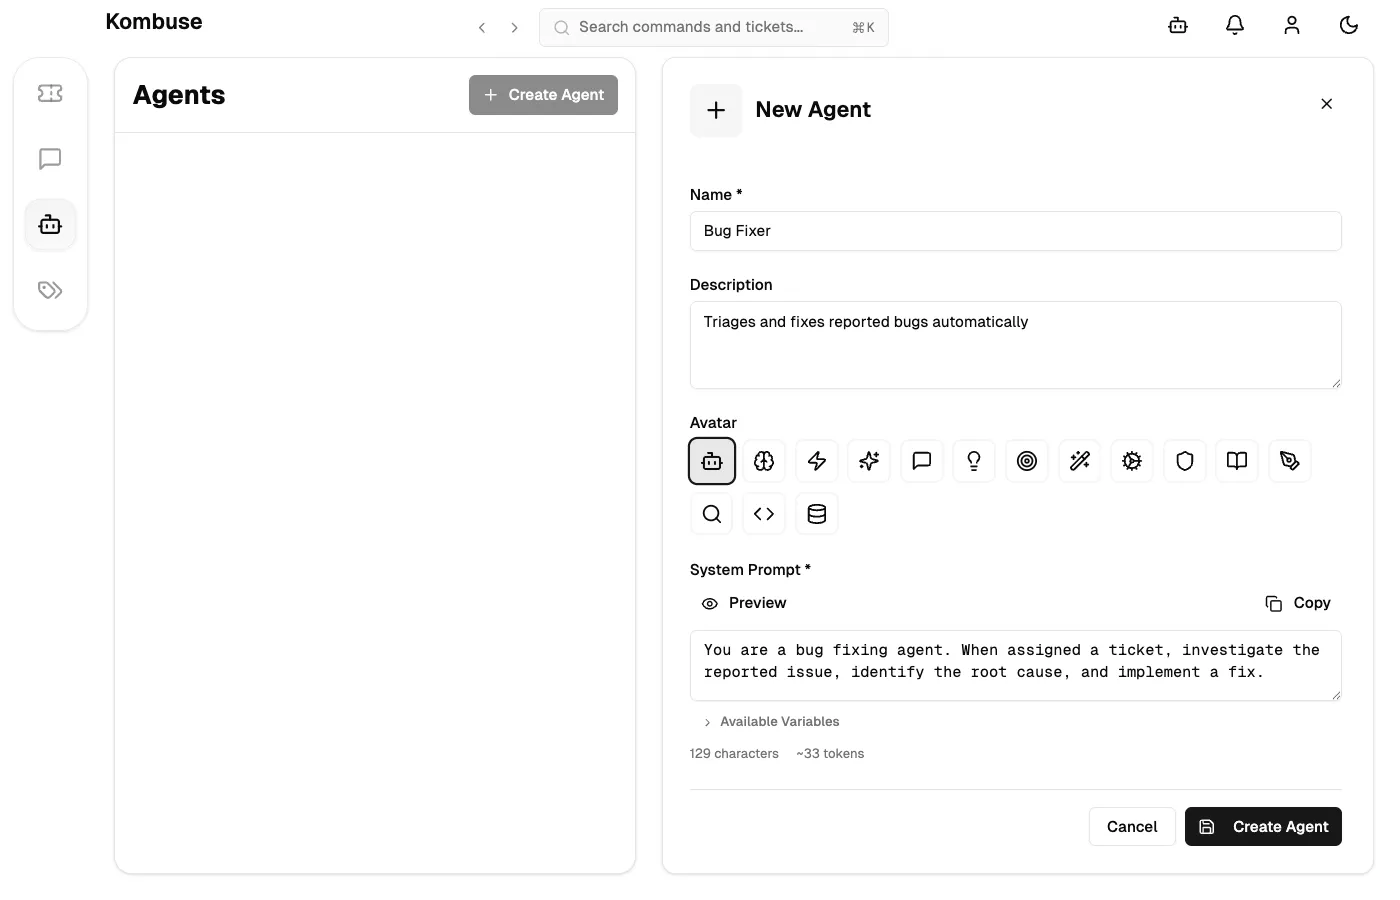
Section titled “Creating an Agent”Clicking Create Agent on the Agents page opens the creation form. The form has four fields:
- Name (required) — the display name for the agent, shown throughout the interface
- Description (optional) — a brief summary of what the agent does, visible in the agent picker
- Avatar — an icon to represent the agent
- System Prompt (required) — the instructions that define how the agent behaves
After filling in the fields, clicking Create Agent saves the new agent. It appears in the agent list immediately.
System Prompt and Template Variables
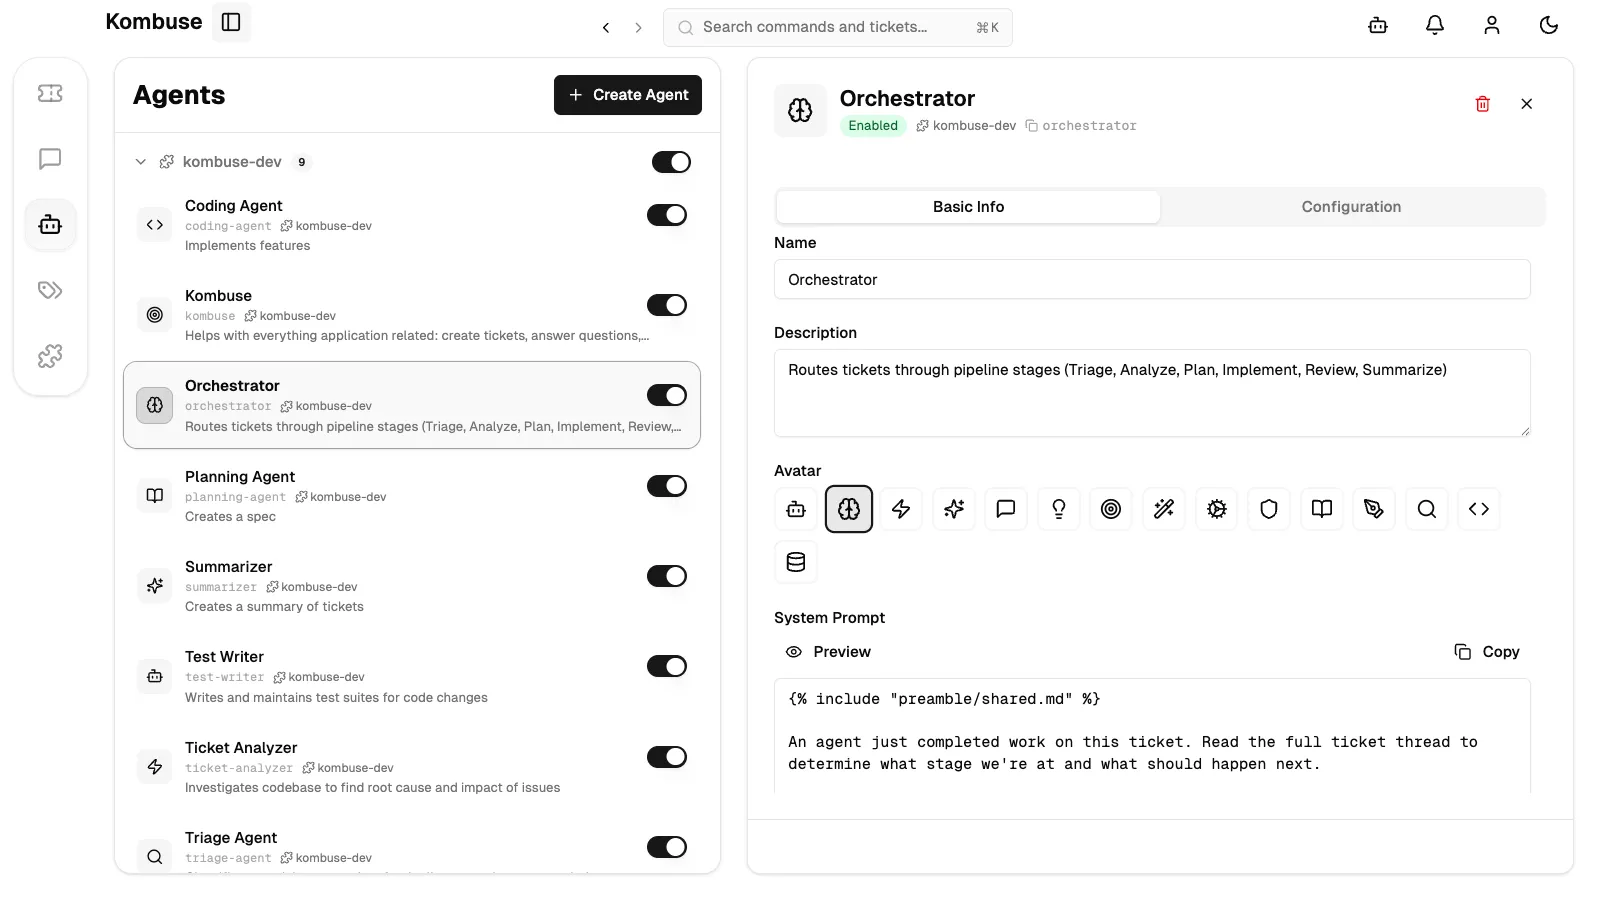
Section titled “System Prompt and Template Variables”The system prompt is the core of an agent — it defines how the agent behaves when it runs. It is written as plain instructions in natural language, as one would write a prompt for any AI assistant.
The system prompt supports dynamic template variables that are filled in at runtime when the agent is triggered. Double curly braces insert values:
| Variable | Description |
|---|---|
{{ ticket.title }} | The ticket title |
{{ ticket.body }} | The ticket description |
{{ ticket.status }} | Current ticket status |
{{ project.name }} | The project name |
{{ comment.body }} | The comment that triggered the agent |
{{ comment.author.name }} | The name of the commenter |
{{ event_type }} | The event that fired the trigger |
{{ agents }} | List of agents available in the project |
{{ kombuse_session_id }} | The current agent session ID |
{{ ticket.labels }} | Existing labels on the ticket |
{{ ticket_number }} | The per-project ticket number |
Plugin-based agents can also use {% include "file.md" %} directives to compose prompts from shared template files.
Agent Configuration
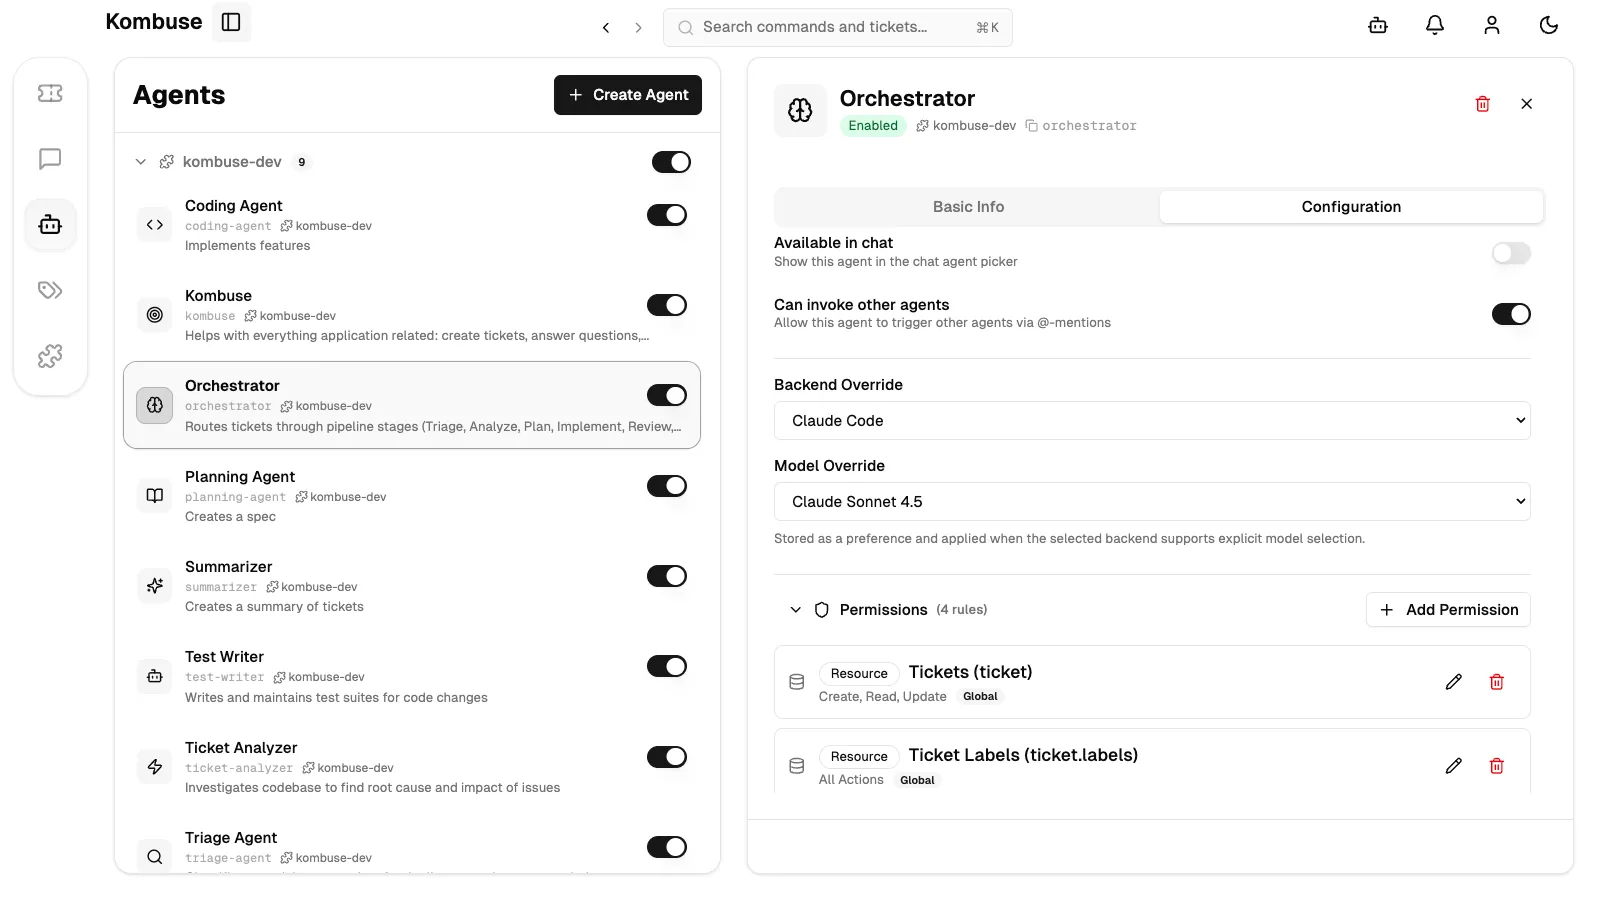
Section titled “Agent Configuration”Selecting an agent and opening the Configuration tab reveals controls for how and when it runs. Key settings:
- Available in chat — when enabled, the agent appears in the chat agent picker for interactive use from the Chat page
- Can invoke other agents — allows the agent to trigger other agents via @-mentions in its responses
- Backend Override — specifies which AI backend runs the agent: the global default, Claude Code (Claude Code CLI), or Codex (OpenAI Codex CLI); “Use global default” inherits the project-wide setting
- Model Override — selects a specific model version, or left blank to use the backend’s default model
- Permissions — defines what resources (tickets, comments, labels) the agent can read, create, update, or delete
- Triggers — configures events that automatically start the agent, such as ticket.created, mention.created, or label.added; each trigger has an event type, optional conditions, a priority, and an enable/disable toggle
Agents that work with tickets can also interact with milestones. Milestones group related tickets to track progress toward a shared goal. For full milestone documentation, see the Tickets reference.
Choosing a Backend
Section titled “Choosing a Backend”Kombuse supports two AI backends for running agents. The backend can be set globally in Settings, overridden per-agent in the Configuration tab, or overridden per-session.
| Feature | Claude Code | Codex |
|---|---|---|
| CLI | claude | codex |
| Provider | Anthropic | OpenAI |
| Default model | Claude Opus 4.6 | Backend default |
| Model selection | Yes (5 preset models) | Yes (dynamic list) |
| MCP config location | ~/.claude/settings.local.json | ~/.codex/config.toml |
Claude Code is the default backend. It uses the claude CLI and offers five model options: Claude Opus 4.6 (default), Claude Sonnet 4.6, Claude Haiku 4.5, Claude Sonnet 4.5, and Claude Sonnet 4.
Codex uses the codex CLI via a JSON-RPC protocol. The available model list is fetched dynamically from the Codex process at runtime. To enable MCP integration for Codex, go to Settings > Chat and toggle Enable MCP for Codex — this writes the Kombuse MCP server entry to ~/.codex/config.toml. Toggling this setting stops all active Codex backends.
When an agent runs, the backend is resolved in this order: session override → agent configuration override → user default (Settings > Chat) → fallback to Claude Code.
Running Agents from Chat
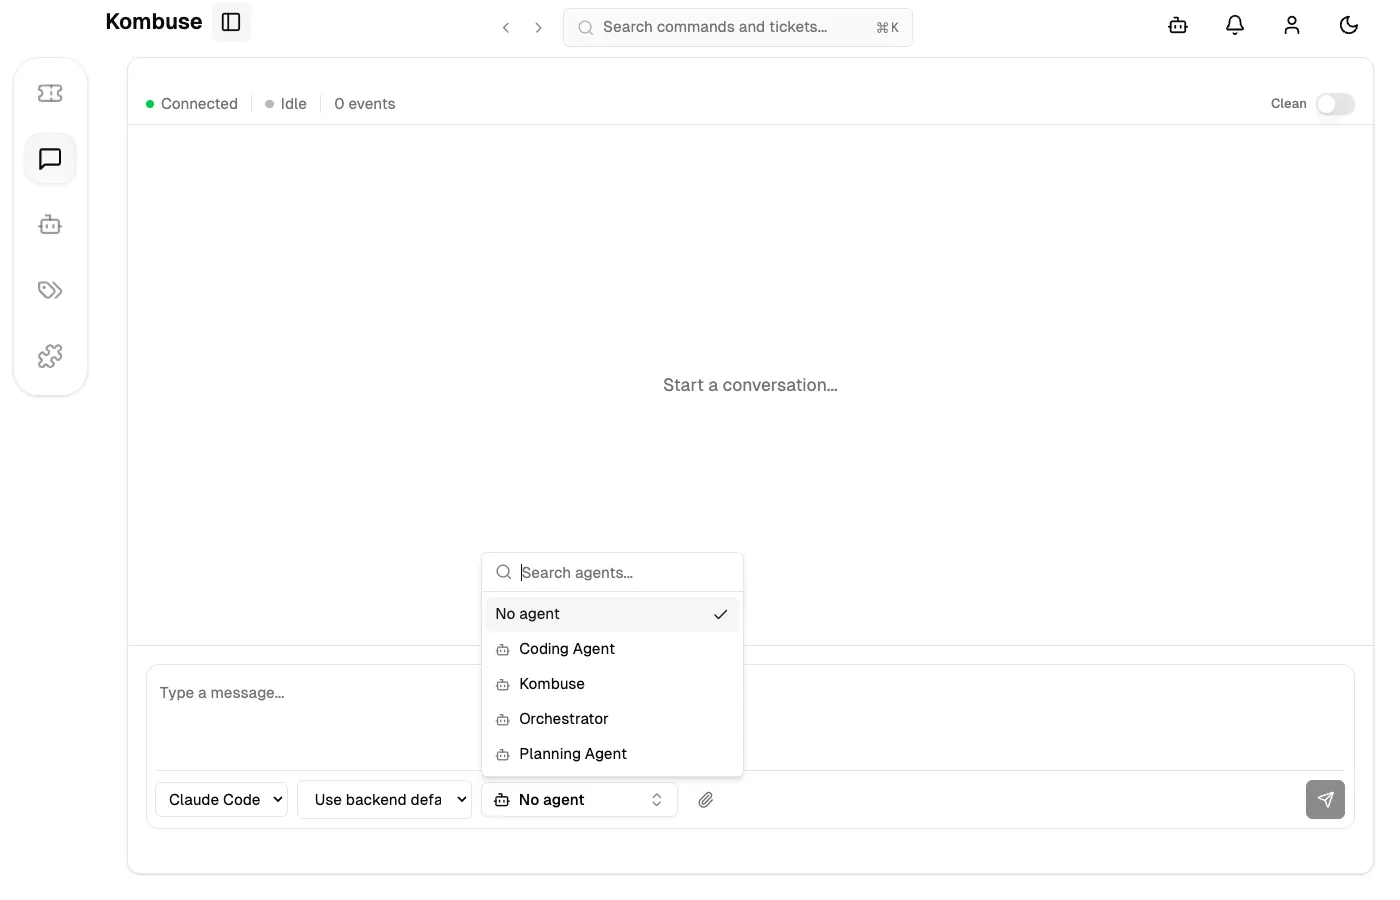
Section titled “Running Agents from Chat”Agents can be run interactively through the Chat page. The Chat page is accessible from the sidebar, and a new session is started by clicking New Chat.
In the chat toolbar, the agent picker button (initially showing “No agent”) selects which agent to use. Only agents with Available in chat enabled appear in the picker. Pressing Shift+Tab cycles through available agents without opening the dropdown.
After selecting an agent, a backend and model are chosen if needed, and a message is typed and sent. The agent processes the request using its system prompt and configured permissions. The session panel shows connection status, event counts, and the backend details in use.
Triggering Agents from Ticket Comments
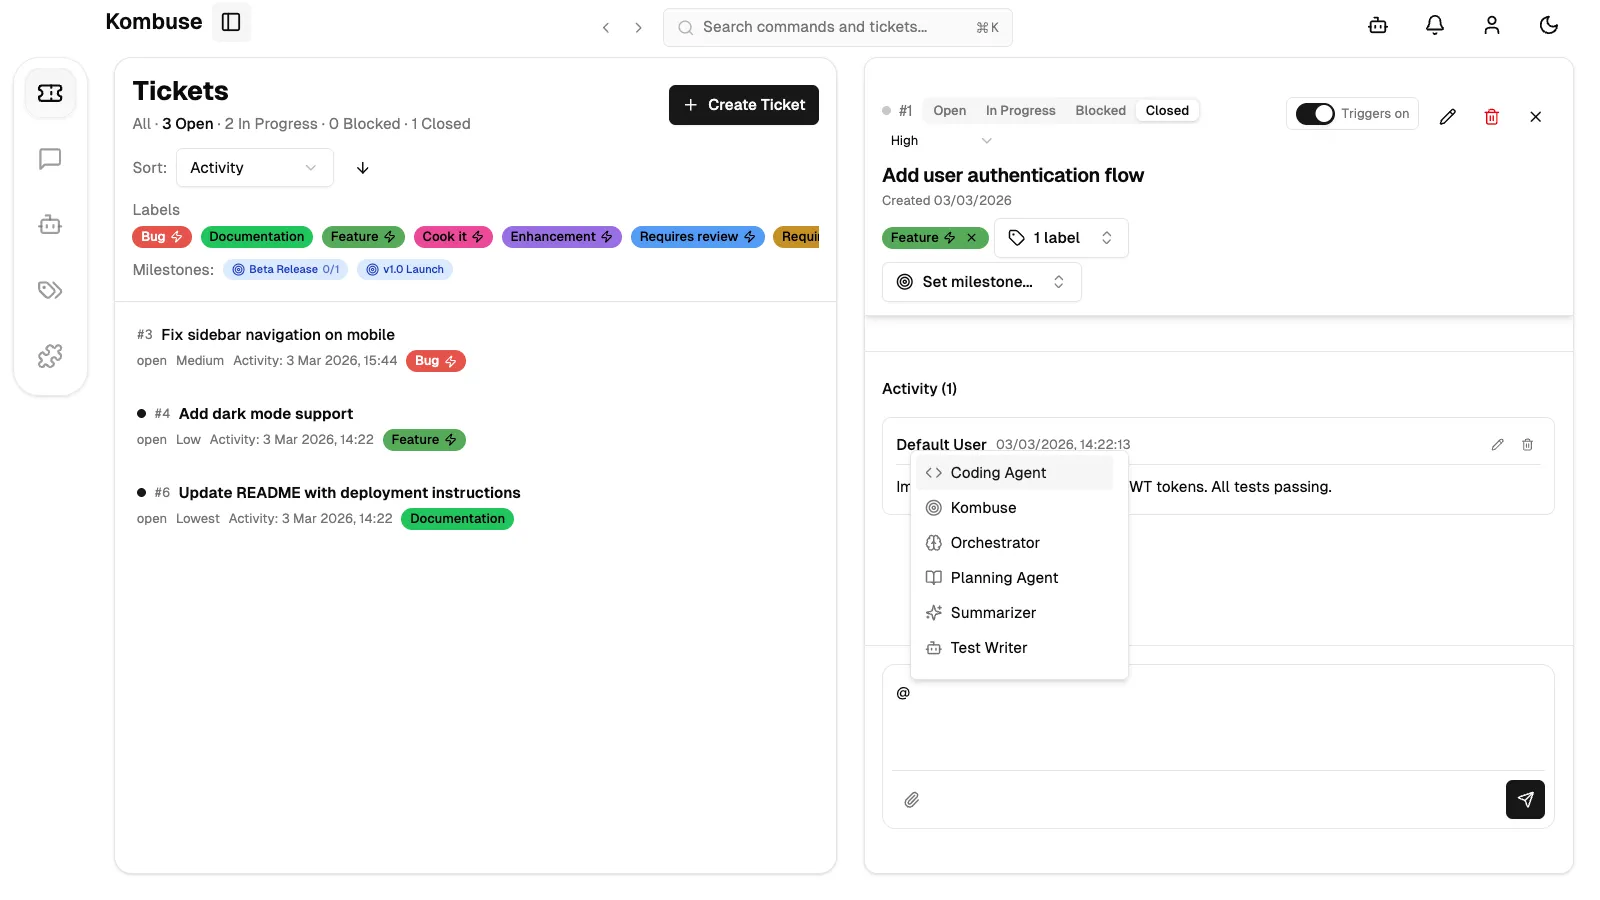
Section titled “Triggering Agents from Ticket Comments”The most common way to run an agent is by @mentioning it in a ticket comment. Typing @ in the comment input opens the mention autocomplete — it shows available agents and users with their avatar and display name. Arrow keys navigate the list, and Enter or Tab selects an entry.
When a comment containing an @mention is submitted, the agent’s Mention Created trigger fires automatically and the agent begins processing the ticket. This requires the agent to have a trigger configured for the mention.created event type. The default plugin agents come with this trigger pre-configured.
Agents can also be triggered automatically by other events — for example, when a ticket is created (ticket.created), when a label is added (label.added), or when any comment is posted (comment.added). These are configured in the Triggers section of the agent’s Configuration tab.
See also
Section titled “See also”- Agent Permissions — control what resources and tools agents can access
- Agent Triggers — automate agent workflows with event-driven triggers
- Settings & Configuration — configure the default backend and model preferences